How to remove the front panel on an LG washing machine
 Is your washing machine not working? You can repair your appliance yourself. Most problems can be fixed by anyone with a good head and the right hands. The key is to correctly identify the problem, which requires looking inside the broken appliance. Today, you'll learn how to properly remove the front panel of an LG front-loading washing machine without damaging the electronics.
Let's get ready to disassemble the car
First, make sure the appliance is unplugged. Also, turn off the water supply and disconnect the inlet and outlet hoses. Move the washing machine to a convenient location for repairs and begin the necessary work.
When disassembling a technical device, you'll need a minimal set of tools. Prepare pliers, a Phillips-head screwdriver, and a star-head screwdriver. The star-head screwdriver is useful when working with certain LG models that use special mounting bolts. The disassembly process is carried out in stages:
- unscrew the top cover;
- remove the lower decorative part of the trim;
- remove the control panel;
- separate the hatch locking device;
- put the front panel itself aside.
It is important to follow the order of the steps to avoid damaging the case and increasing the risk of breakdowns of the device. Before performing the first steps, make sure that safety regulations are observed, then follow the recommendations in this manual.
Remove the top cover
The top of the case serves a protective function, protecting the interior of the machine from moisture, dust, and mechanical damage. The cover is secured to the rear panel with two Phillips-head screws. Unscrew them with a screwdriver and set them aside. Be careful not to lose any small parts, so you don't have to search for replacements that fit the size.
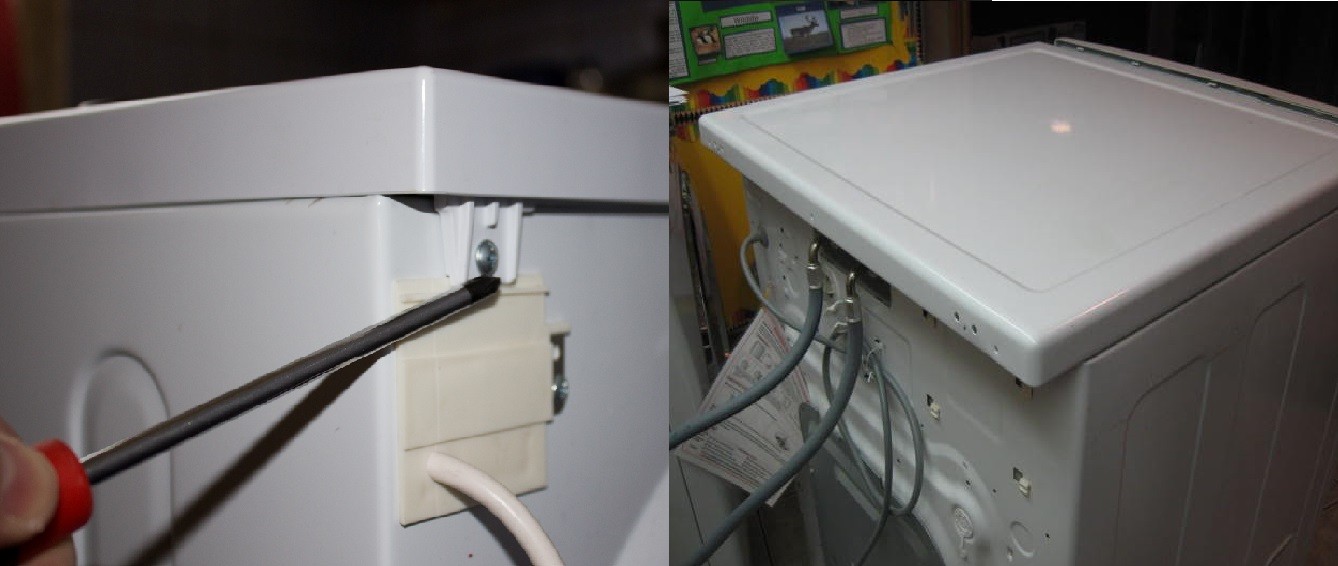
To complete the next step, you need to go to the back of the product, grab the lid with your hands, and pull it towards you in a horizontal plane. Do not attempt to lift the part upward until you have moved the plate a few centimeters. Its vertical movement is impossible due to the design of the mounting.
Removing the narrow panel
It's necessary to unscrew the lower front strip, as it conceals the fastening of the large front panel. A hatch is also located here, providing access to the pump and filterOnce you remove it, you'll see screws that you'll need to unscrew.
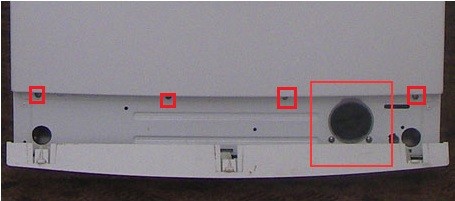
After removing the bolts, gently pry the cover from underneath with a flat-head screwdriver. The fasteners will slide out of the grooves, and the plate can be removed and set aside.
Removing the control panel
The most difficult part will be removing the control panel. This process requires extreme precision and accuracy, as damage to this part can cause irreparable damage to the electronic system. Follow these steps.
- Unscrew the screws.
- Using a flat-head screwdriver, pry up the plastic clips located along the top edges, gently pull them up, and release them.
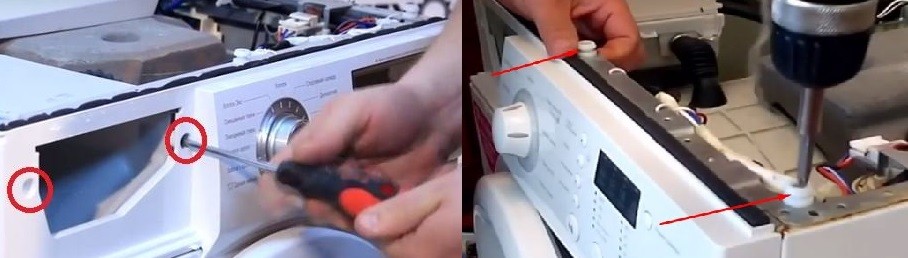
- Slide the panel towards you to release the lower fasteners, then lift it up and remove it.
As the fasteners release from their slots, you'll hear clicks, lighter when working with the lower latches and louder at the top. Also, be sure to monitor the wiring to avoid damage.
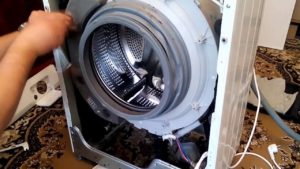
We remove the UBL and the front wall
Before the final stage of the work, the hatch locking device must be removed so that it does not interfere with the wall removal. To do this, perform the following steps in sequence.
- Loosen the clamp that holds the front wall in place using pliers, a screwdriver, or round-nose pliers.
- Remove the cuff to gain access to the inside of the machine and the lock.
- Loosen the two screws located near the connection between the lock hook and the UBL.
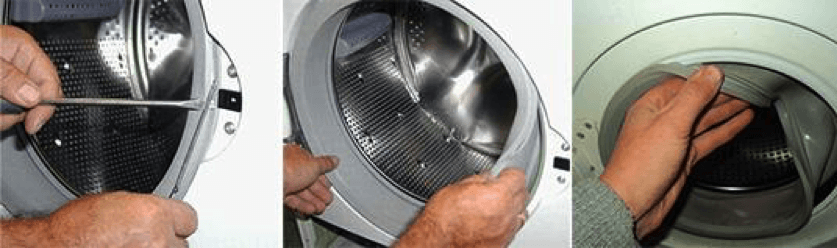
- Remove the part through the hole.
- Disconnect the wires, remove the lock.
The final step involves removing the front panel itself. To do this, unscrew the screws holding it in place, located on the front upper edge of the cabinet and under the lower decorative strip. Now you can remove the panel and begin repairing the washing machine itself.
Interesting:


3 reader comments
Add a comment
Headings
Washing machine repair


For buyers


For users


Dishwasher


On some LG devices, to remove the front top panel, you first need to do everything described above. Then unclip the two clips on the inside bottom (pry them up, otherwise you risk breaking them). The distance from the right edge is +/- 10 cm and 20 cm. Be careful! Thanks for the website, it was very helpful.
How do I disconnect the connectors to remove the panel? It's wired.
Can you tell me how to properly connect the connectors to the control panel on an LG WD 80280n washing machine?