How to remove a bearing from an Ariston washing machine drum?
 If you notice your washing machine making loud knocking and creaking sounds, it's a good idea to check the bearing assembly. If the machine isn't repaired promptly, the noise will intensify, and eventually, the washing machine will fail. Waiting for the noise to stop on its own is pointless. It's important to take action to fix the problem. Let's look at how to remove the bearing from the drum of an Ariston washing machine and whether this job can be done at home.
How to remove the tank?
Removing bearings is a very labor-intensive process. To access the component, you'll have to almost completely disassemble the washing machine. You can handle the task yourself, without the help of a professional. The key is to strictly follow the recommendations and instructions.
The first stage of the work is to remove the tank. The procedure is as follows:
- de-energize the washing machine;
- disconnect the equipment from the house's utility lines;
- move the machine to access the back of the case;
- unscrew the bolts securing the back wall and move it to the side;
- remove the drive belt;
Take a photo of the wiring diagram for the sensors and the wiring to the washing machine's tank and heating element. This will help you avoid mistakes when reassembling the equipment.
- Disconnect the sensors from the tank. To do this, pry up the rubber bands with a flat-head screwdriver and remove each set of wires;
- remove the ground connection from the shaft by first loosening the nut at its base;
- disconnect the wiring supplying the heating element;
- Remove the heating element from the housing. To do this, loosen and push inward the bolt that secures it;
- Unscrew the two screws at the top and lift the front panel up, while being at the back;
- Using a 13 mm socket, remove the metal plate that holds the tank in place;
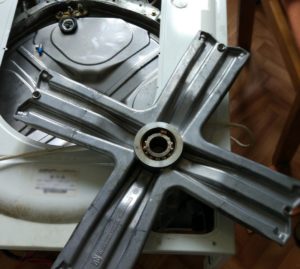
- secure the flywheel with a screwdriver, unscrew the central nut and remove it;
- unscrew all the bolts located at the middle joint of the tank;
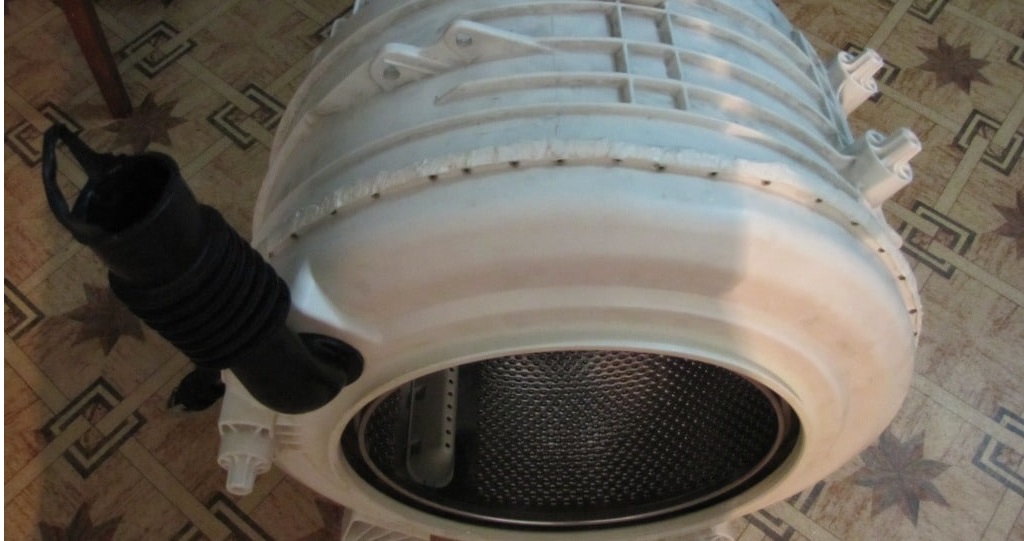
- Grab the tank and pull it out.
This method is convenient because there is no need remove counterweights, engine, dampers, powder receiver and other washing machine components. It is the drum with one half of the tank that is removed - this significantly simplifies the repair. After this, you can begin dismantling the bearings and seals, followed by replacement.
Getting rid of old bearings
Once you have the removed tank in front of you, you should assess the condition of the shaft. A lot of scale builds up on the casing, causing rust. Treat the surface with WD-40, a universal aerosol cleaner. While the solution is working to dissolve the scale, you need to prepare a special structure. Place a brick base under the tank, and place a cushion between them. This is necessary to simplify subsequent work.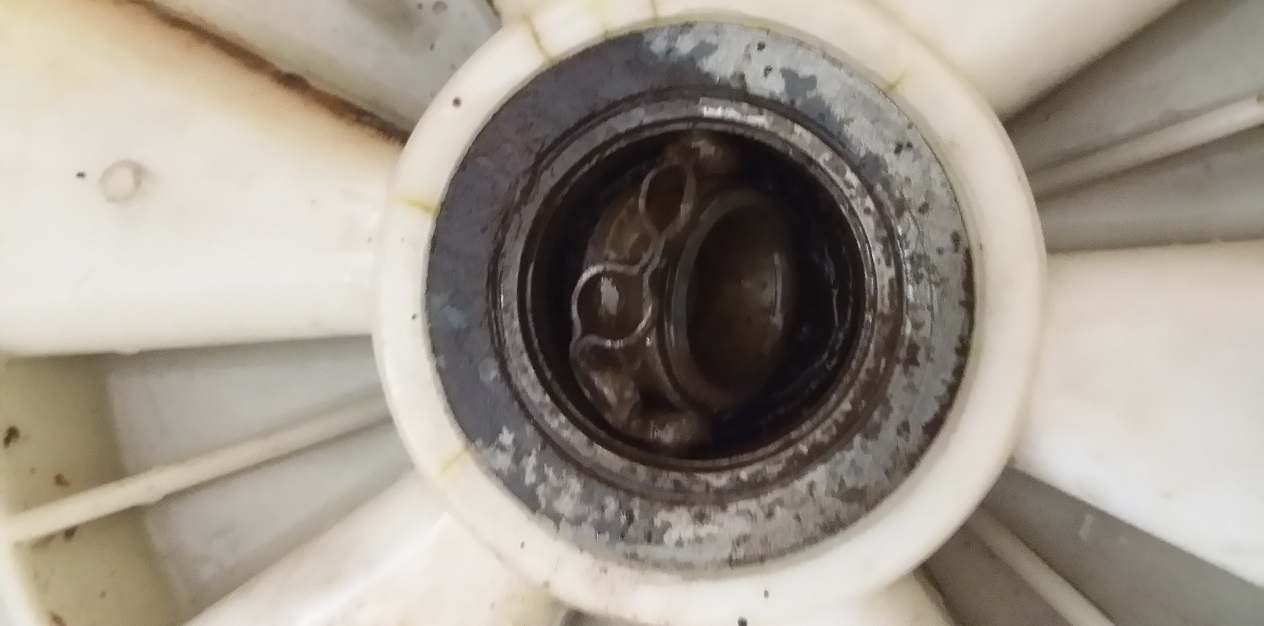
Further algorithm of actions:
- Tap the shaft. You'll need a rubber mallet and a hammer for this. You need to force the drum to fall inward;
- Knock out the first, outer bearing. If it's heavily stuck to the surface, you can use a special chisel and hammer to knock it out;
- remove the oil seal;
- Proceed with removing the inner bearing. If it doesn't come off, make careful cuts with a grinder on both sides and unscrew the ring with a wrench;
- remove the second seal.
The disassembly process is complete. Next, you need to prepare the mounting area—clean it of dirt, deposits, and metal shavings. Wipe the entire surface of the drum and tank with a cleaner and a cloth. Then, wipe everything dry.
We will install a new bearing
The final step is installing the new unit and reassembling the washing machine. When purchasing replacement bearings and seals, make sure they are compatible with your Hotpoint Ariston washing machine model. The procedure for installing the rings will be as follows:
- take a bearing that is smaller in diameter, place the tank with the hole for the drum facing up, and install the part in the seat;
- Ensure the ring is completely seated by tapping it with the blunt end of a chisel;
- lubricate the seal with a special compound and place it on the bearing;
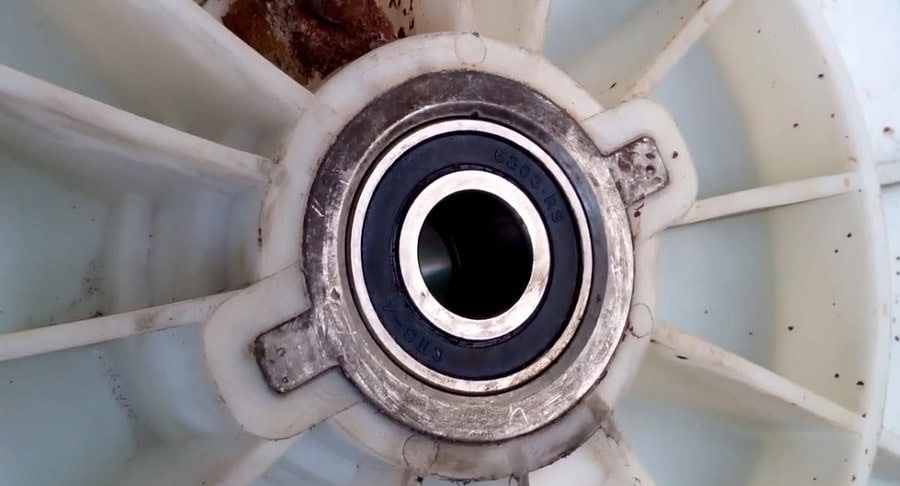
- turn the tank over;
- install the second bearing in a similar manner: place it in the hole and compact it with a chisel;
- generously coat the shaft with grease and secure the drum in the tank.
It is advisable to “go over” the bearing assembly with a moisture-resistant silicone sealant.
Next, reassemble the washing machine in reverse order. Replace the drum, and bolt the halves together around the joint. After connecting the drum halves, it's important to check that the assembly rotates smoothly. If there's no noise or creaking, the replacement is successful.
Next, the pulley is secured, the tension plate is replaced, the heating element is reinstalled, and the removed wires and sensors are reconnected. Finally, the motor is attached, the drive belt is tightened, and both covers are screwed on. It's essential to test the machine's operation by running it empty.
Interesting:


Readers' comments
Headings
Washing machine repair


For buyers


For users


Dishwasher


Add a comment