How to remove the lid of a Whirlpool washing machine?
 If your washing machine has a minor problem, it's not always necessary to call a technician right away. You can try to fix the problem yourself, but this will require some disassembly. Below, we'll explain in detail how to remove the top cover from a Whirlpool machine.
Removal technique
First, prepare the washing machine. Unplug the power cord, turn off the water supply, and remove both hoses. For ease of access, move the machine to the center of the room. Let's begin disassembling:
- go around the equipment from the rear;
- Find and unscrew the screws holding the top cover (they are located in the upper left and right corners, respectively, directly under the ledge);
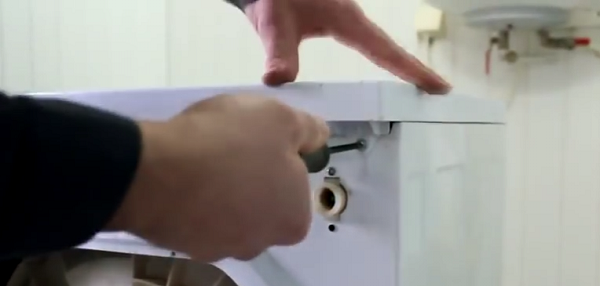
- pull the panel towards you;
- then lift the lid and remove it.
Important! If you feel a part won't come off, do not try to tug it or open it with sharp objects—this will damage the unit.
If you can't lift the lid, it's likely jammed. Try rocking it back and forth. You can gently tap the side with a mallet and try again. Don't apply excessive force; be patient. This method removes the top panel on most Whirlpool washing machines.
What will be the result of removing the cover?
So, we've figured out how to remove the top of the Whirlpool. Let's look at when this might be useful. What machine components can be repaired or replaced if this part of the body is lifted?
First, you gain access to the inlet valve. It's responsible for filling the tank with water. A common cause of failure is a lack of water flowing into the machine. Importantly, the valve can't be disassembled; it can only be replaced.
This element is located at the top, on the left side of the Whirlpool washing machine's housing, near the rear cover. To check it, remove it, inspect the strainer for blockages, and test the element with a multimeter. Check to see if the plastic inserts are still in place in the fittings. If they have fallen out, the valve definitely needs to be replaced.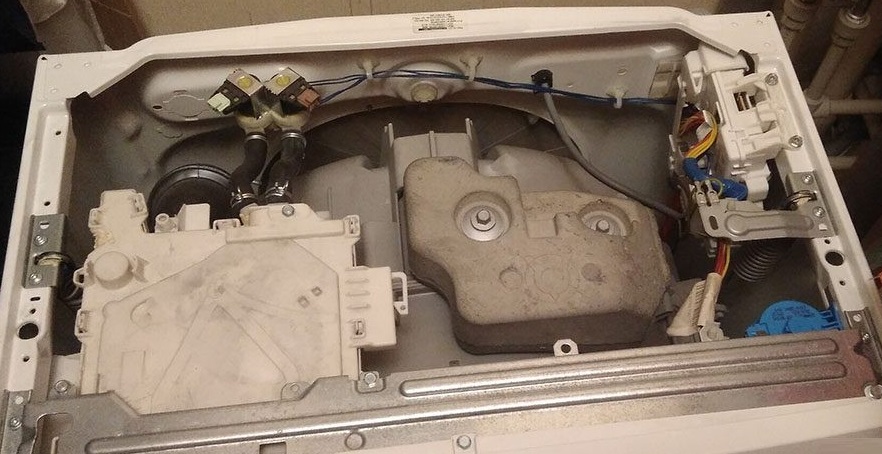
If you notice that the detergent isn't being removed properly after washing, check the detergent drawer. To understand how it works, you need to understand the water inlet diagram. The inlet valve connects to the detergent drawer through the water inlet pipe. Water passes through the valve and pipe, washing the dispenser and dissolving the detergent. Soapy water from the dispenser flows through the second pipe into the drum.
Is the detergent not being completely flushed out of the container? Check the hoses for blockages. Clean them if necessary. If you notice any damage to the detergent drawer, remove the part and replace it.
The third important component of the unit, the pressure switch, is also located here. It's also called a water level sensor, as it monitors the tank's level and transmits a corresponding signal to the control module. A faulty pressure switch is easy to detect—the unit stops draining water or drains it late. To replace the sensor, simply unscrew the fasteners, disconnect the wires, and install a new part.
After removing the cover, you gain access to the upper counterweight. While failure of this component is very rare, it is still possible. This malfunction can lead to serious mechanical damage to the washing machine.
Opening the top allows you to access the Whirlpool's electrical components. The tank and drum can be removed if necessary. However, removing the top panel alone is clearly not enough. You'll also need to remove the front of the housing and the access hatch at the rear.
Removing the lid of a Whirlpool washing machine can be a useful skill in a variety of situations. It's the starting point for troubleshooting any problem, no matter how complex. For the DIY enthusiast, this guide will be a valuable resource.
Interesting:


Readers' comments
Headings
Washing machine repair


For buyers


For users


Dishwasher


Add a comment