How to assemble a car seat after washing?
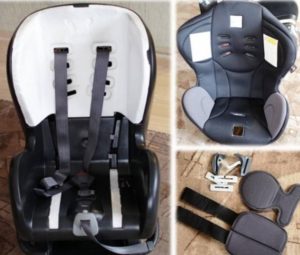 Child car seats get dirty faster than adult car seats and require periodic cleaning. For washing, the seat is disassembled, the cover is removed, and then the entire structure must be reassembled. This last step is challenging: you must strictly follow the instructions, otherwise the safety of your young passenger will be compromised. We offer information on how to reassemble a car seat after washing and the challenges you may encounter. Step-by-step instructions and tips will help with assembly.
Let's assemble step by step
Assembling a child car seat is not an easy task. Before you begin, it's essential to read the instructions included with each seat. They provide step-by-step instructions for your specific model.
If the manual is lost, then we use the standard instructions:
- thread the straps through the holes on the bottom of the seat (on the cover and on the sides of the chair);
- Spread the cover over the surface of the car seat so that there are no creases, folds or lumps;
- fasten the cover to the frame using the available fasteners (fasteners vary depending on the model and can be in the form of buttons, clips, and Velcro);
- insert pads into the upper straps;
- pull the cape over the back and secure it;
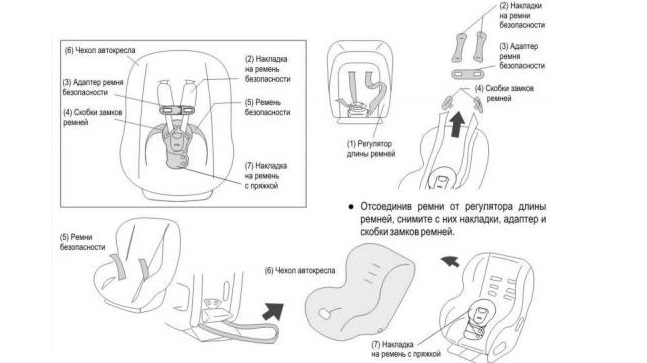
- Pass all straps through the provided metal buckle.
When assembling a child car seat, please strictly follow the instructions provided!
Some models come with a removable headrest. This is placed under the seat cover and secured in place. If you can't complete the assembly using the standard instructions, you should look for the original manual in electronic format on the manufacturer's official website.
Why doesn't it work?
Things don't always go according to plan: often, the chair fails to assemble. The main reason for this is a misstep. It's highly likely that the confusion occurred during the disassembly stage. Most likely, the person didn't follow the prescribed sequence.
You can avoid mistakes by recording all your actions on video or photos. This will make it easier to stick to the plan and not forget certain elements.
To avoid confusion, strictly adhere to the instructions. Ideally, follow "your" manual; in a pinch, follow "someone else's." There's no significant difference between the algorithms; the key is to adapt to the differences using logic and common sense.
If you're having trouble assembling the seat, it's worth seeking help. First, we recommend turning to more experienced friends who have worked with child seats before. The store where you purchased the seat can also provide assistance. Another option is to contact customer support on the official website—find the manufacturer and fill out the form.
Watch your belts
Pay special attention to the straps. It's hard to mix them up: the long ones are secured at the back, while the short ones go underneath. However, it's best to double-check the fastenings after installation.
If the harness straps are too tight, the child will be uncomfortable in the seat. To remedy this, loosen the straps using the specially provided adjusters. Remember that the straps should not only pinch, but also not dangle – the optimal distance between them and the child is 2-3 cm. If the straps are too long, you can shorten them to a comfortable length.
Before using the child car seat, it is necessary to adjust the position and length of the seat belts.
Proper strap placement is also important. The straps should extend out from the backrest at shoulder level. If the straps are positioned too low, under the child's shoulder blades, it's time to consider a new car seat. Some full-size models allow for adjustable strap positions.
Sometimes straps can become uncomfortable due to the pads becoming bunched or bent. In this case, remove the pads, straighten them, steam them, and replace them.
Check the lining
The washed cover must be straightened out over the seat, otherwise the child will complain of discomfort. Even one fold or bump will bother your baby, so it is necessary to feel the entire chair and smooth out all areas with bunched up fabric. At the same time, we check the fastening: it’s likely that the rivet or Velcro has come loose and the cape has been pulled off the frame.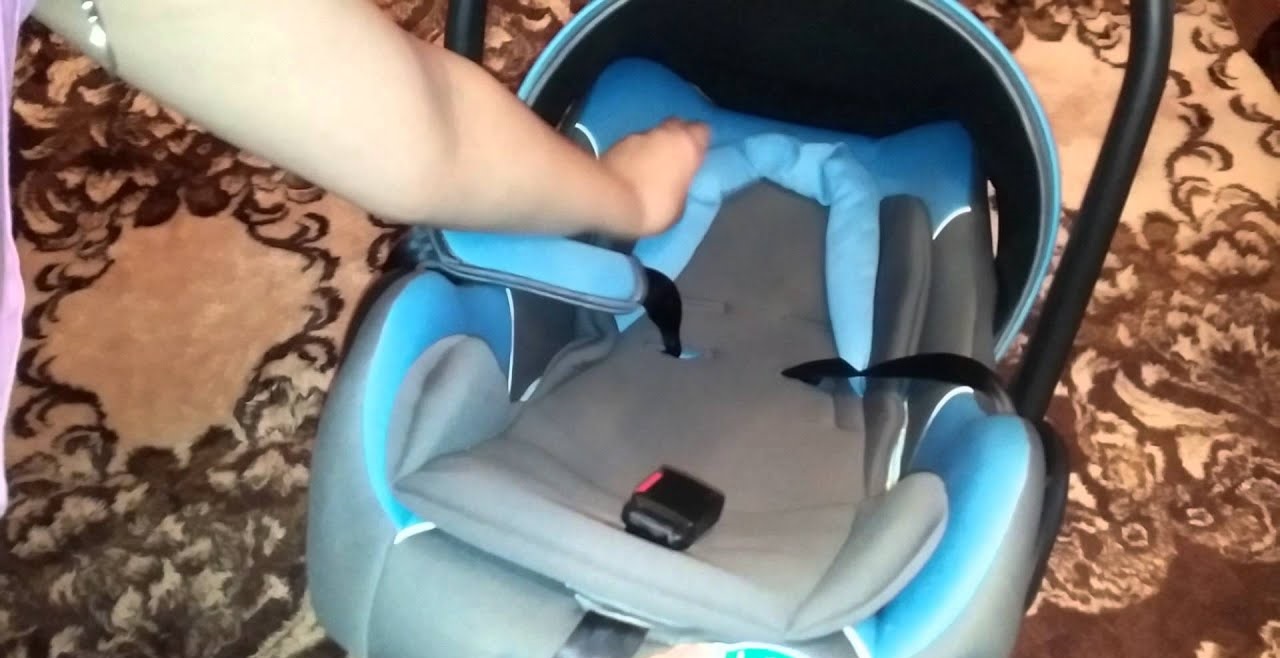
Small items like toys and coins can also get caught under the seat cover, preventing the little passenger from sitting comfortably. It's best to remove the cover, shake it out, and then put it back on.
Inspect the mounts and covers
Difficulty stretching covers also arises when the cover has become deformed after cleaning. Failure to follow the care instructions can cause this loss of shape. Typically, changes in size are caused by heating the water above 40 degrees Celsius, using a spin cycle, or drying on a heater. In any case, the situation must be corrected by rewashing.
There's no need to wash the cover in the washing machine, nor is there any need to add detergent. Simply fill a basin with water, wet the cover, and let the water drain freely. Then, without wringing, place the cover on a flat, dry surface and leave it to dry completely. Pay special attention to the proper installation of the seat itself. It must be secured according to the instructions to ensure the safety of the young passenger. If the fastening has shifted or the seat is no longer stable, the seat needs repair.
The car seat belt must fit snugly along the guides. Each model has its own locking mechanism, but most often the strap runs over the child's shoulder to the hip, without shifting toward the neck. At the "finish," the holder hooks onto the latch and inserts the buckle into the groove. A slight sway in either direction is allowed. The maximum sway is 2 cm. If the seat moves more, tighten the standard seat belts.
Expert advice
A child car seat must be handled with extreme care to avoid damaging its well-thought-out design. But that doesn't mean you should put off washing it for fear of damaging it. Everything will go smoothly and easily if you follow a few guidelines:
Only completely dry covers are put on the chair; otherwise, mold will form under the cover.
- in case of local contamination, the cover can be cleaned without removing it from the chair;
- the lining located under the cape does not like water - it is better to clean it dry;
- You cannot put a “foreign” cover on the seat - only the original cover, which was sewn taking into account the design of the chair;
- It is more convenient to put the cover on the bottom of the chair if you place it horizontally;
- You can't put on covers that haven't dried out completely - the dampness will cause mold and an unpleasant odor.
Don't be afraid to wash your covers. It's easy if you follow the instructions and follow them consistently.
Interesting:


Readers' comments
Headings
Washing machine repair


For buyers


For users


Dishwasher


Add a comment