How to assemble a stroller after washing?
 It's a well-known fact that taking something apart is much easier than putting it back together. The same situation applies to strollers: parents easily remove the covers and upholstery, but then don't know how to put all the parts back together. The manufacturer's instructions can be helpful. If the instructions are lost and you can't find the information online, you'll have to figure out how to assemble the stroller yourself. Let's look at how to assemble the main types of strollers for small children.
Stroller for walks: general recommendations
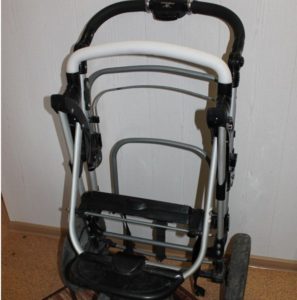
After the upholstery, covers, and mattress have dried, parents begin to reassemble the disassembled parts of the child’s “transport.” It is important that all the parts fit neatly into place; the structure should not wobble or be loose. How do I properly reassemble a stroller after washing? Where should I start?
First, work on the base. The cover is pulled over the backrest and seat. Next, the fabric is secured to the armrests and the hood is secured. Next, you can begin working on the straps—threading them through the special holes and tying them into place. It's important to take your time and assemble the stroller gradually and carefully.
Parents often encounter gaps between the stroller's upholstery after assembly. If this is the case, the covers were not attached correctly. Check that the fabric is tightly taut and that all latches, hooks, and buttons are in place.
Transforming stroller
A convertible stroller is a true all-terrain vehicle, allowing a child to travel safely and comfortably. They are multifunctional, easy to maneuver, and feature a spacious sleeping area. These stroller models have their own unique characteristics, so assembly can be challenging.
Before you begin assembly, be sure to check that all the main structural elements are present.
To check that all parts are present, consult the stroller's instructions. They list all the main components.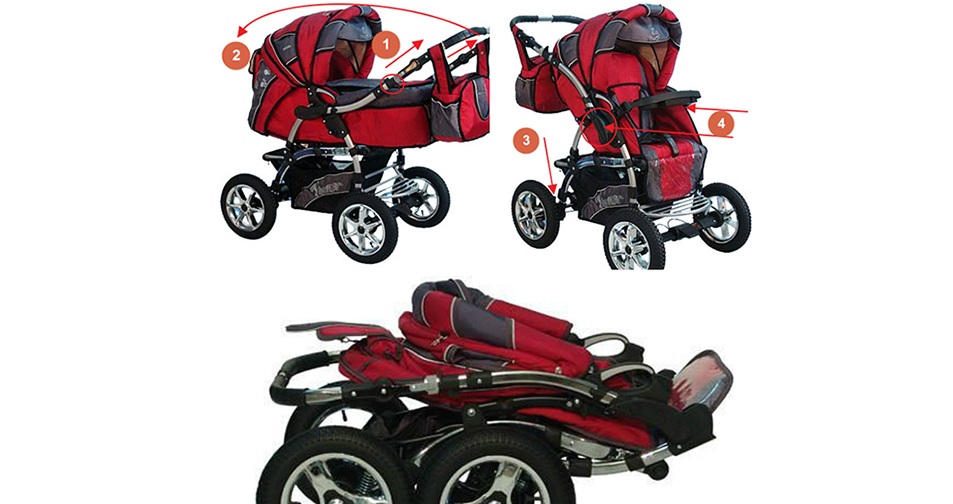
When assembling the transformer, be sure to:
- all mechanisms functioned properly, the textiles and seat belts did not interfere with this;
- There should be no gaps between the upholstery pieces. There should be no holes; their presence indicates that the structure was assembled incorrectly.
Here, as with the stroller, you should first stretch the covers over the base, then move on to the side walls and visor. To avoid confusion, you can film the upholstery removal process. This will ensure a hassle-free reassembly.
Multifunctional strollers
Removing the upholstery from 2-in-1 or 3-in-1 strollers is quite difficult. Putting the fabric back on is even more challenging. However, because multifunctional strollers are so convenient for both mother and baby, demand for them is high, meaning parents often face the problem of reassembling them after washing.
When it comes to 3-in-1 strollers, the easiest way is to remove and wash the car seat cover. A bassinet for toddlers takes longer. Removing and reattaching the seat cover is even more difficult. Sometimes even the instructions can't help you secure the fabric properly. The main problem in these cases is the seat belts.
The more complex the design, the more difficult the assembly will be. Therefore, a video camera or still camera may be your faithful assistant. When removing upholstery elements, it is better not only to remember the sequence of actions yourself, but also to record the process on camera. Even better, find the instructions and figure out how the stroller parts are attached.
It's important to follow the washing instructions for your stroller's upholstery. Make sure it doesn't become deformed, otherwise reassembly will be even more difficult. If possible, it's best to have the stroller dry cleaned.
Interesting:


Readers' comments
Headings
Washing machine repair


For buyers


For users


Dishwasher


Add a comment