How to assemble an Indesit washing machine?
 Sometimes, when repairing a washing machine, it's necessary to completely disassemble it. Replacement of bearings and seals, for example, is a very labor-intensive and time-consuming process, requiring the removal of virtually all components. A technician can complete this task in a few hours, while a user who decides to repair the machine themselves will need all day. After completing the repair, it's important to reassemble the Indesit washing machine properly and with care. To avoid mistakes, carefully read the assembly instructions.
Assembling the tank
So, the first task that arises after replacing the drum bearing is reassembling the drum. Most Indesit washing machines have a non-detachable drum, so during repairs, it is carefully cut into pieces. Securely joining the two halves, ensuring a watertight seal, is the task that arises at this stage of the work. There are two ways to assemble the tank: using waterproof silicone sealant and screws, or by welding the halves together using a welding rod and a heat gun.
The first method, where mechanics recommend sealing the tank with sealant, is considered simpler. Before cutting the machine's cast tank, holes must be drilled to secure the halves together with screws. Therefore, after replacing the bearings, you'll be left with:
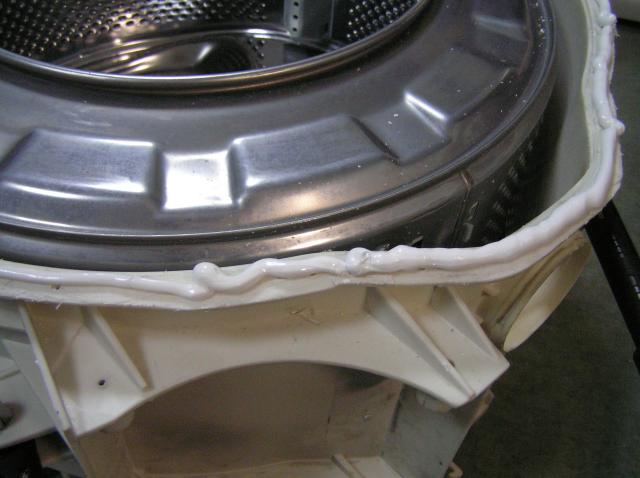
- degrease the seam area on both halves of the tank;
- Apply a waterproof silicone sealant around the joint. It's crucial to cover every millimeter, not missing even the smallest area.
To glue the tank, only a sealant that can withstand temperature changes, high pressure, vibrations, and is waterproof is suitable.
- place the parts of the tank on top of each other, align the holes previously drilled in the halves;
- screw screws or self-tapping screws of a suitable diameter into the prepared holes along the entire perimeter of the connecting seam;
- wait until the sealant is completely dry.
This method of assembling the drum has some drawbacks. Firstly, it's unknown how the sealant will hold up over time during continuous use of the washing machine. Secondly, it's unclear how reliable this connection will be and how long the washing machine will last. Today, some technicians are soldering sawn-open drums. The following is required for this work:
- construction hair dryer;
- Welding rods. Welding wire is easily found at any specialty store;
- a nozzle for a heat gun that narrows its opening;
- Welding nozzle for filler material.
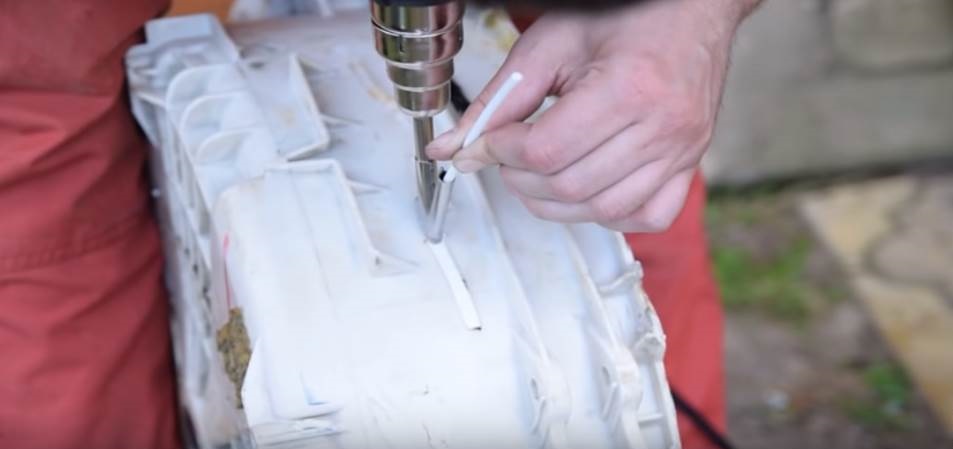
Before you begin connecting, you should check the compatibility of the selected rods with the tub of your washing machine. This can only be determined through trial and error. To do this, try applying the material to the surface of one of the tub halves to determine how it adheres to the element.
Professionals recommend purchasing HDPE plastic welding rods for Indesit machines.
Once the connecting material has been selected, the tank halves need to be tacked together in several places to secure them in place. Next, the element is soldered along the entire seam. It's important to understand that choosing this connection method will result in a cast, non-separable tank, which will have to be sawed off if the bearings fail again.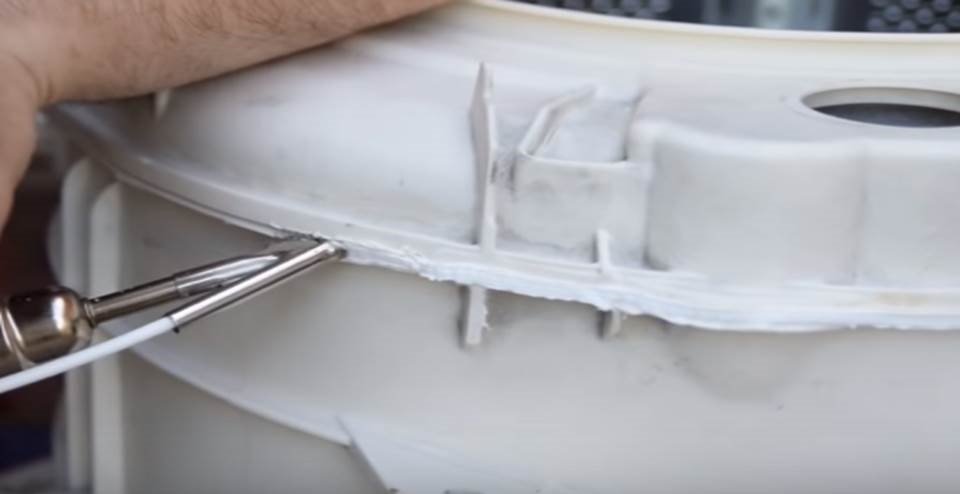
Using a heat gun, the two halves of the tank can be joined in just 15 minutes. This makes assembly easy even for a layperson. The choice of how to attach the cut pieces is entirely up to the washing machine owner.
Installing the tank into the housing, connecting the pipes
Further reassembly of the machine involves replacing the tank in the housing and connecting the drain hose, pump, and powder receptacle hoses. All steps are performed in strictly reverse order:
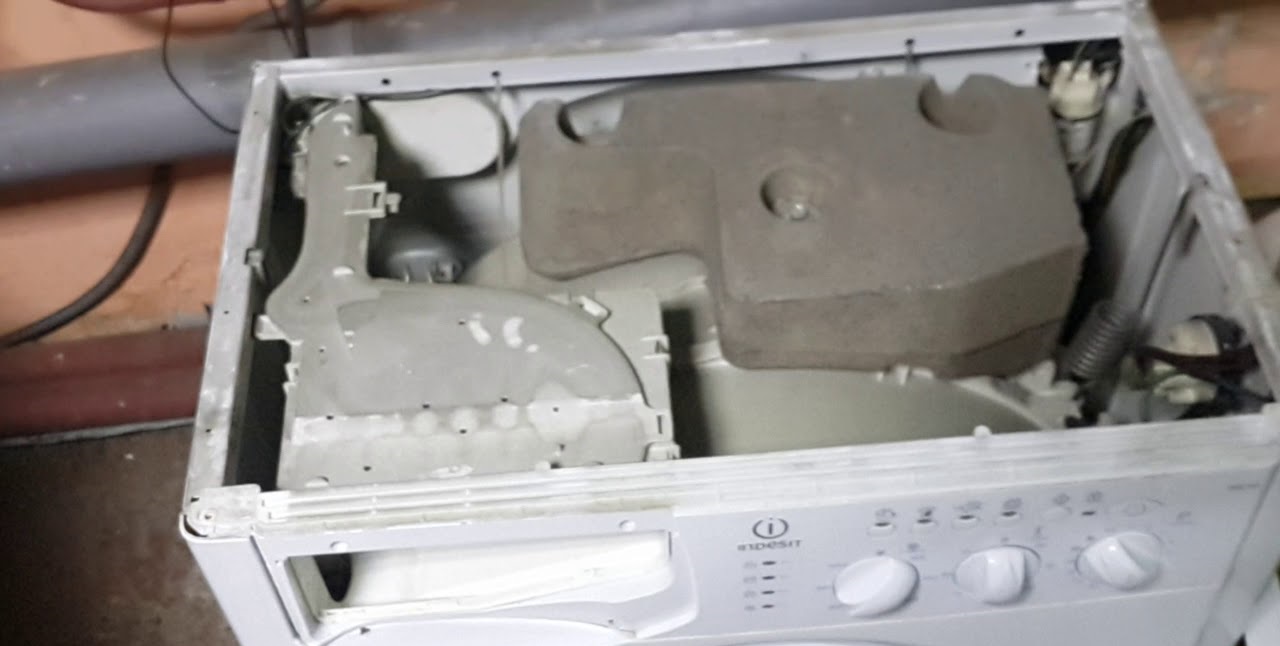
- The tank is inserted into the washing machine. When installing the tank, keep the shock-absorbing system in mind. Be sure to hang the element on springs and connect it to the dampers;
- Place the washing machine on its left side to position the racks and secure the drain pipe;
- secure the racks with the previously unscrewed screws, and the drain pipe with two clamps;
- connect the wires from the pump and the water inlet valve clamps to the tank;
- put the pressure switch back in place and connect its power supply wiring;
- reconnect the powder receiver pipes in place.

Be sure to check the connections of the pipes and hoses for reliability. Don't forget to secure the components with clamps where necessary. Afterward, you can proceed with installing the other main components of your Indesit washing machine.
Installation of other parts
There is very little left to finally assemble the Indesit washing machine. Next, it is important to correctly connect the electric motor, heating element, and control panel removed during disassembly, secure the counterweight, put on the belt, and straighten the sealing cuff. The algorithm of actions will be as follows:
- put the engine back in place, secure it with bolts, then connect the removed wires with connectors;
- Insert the heating element into the groove. Connect the wiring to the contacts of the tubular heater and the temperature sensor. Tighten the central nut, thereby securely fixing the part inside;
- Install the top counterweight—a heavy block designed to ensure the washing machine's stability. It's secured with three screws. Be careful when handling the counterweight, as it's very heavy.
- Replace the control panel and connect the power supply wiring. First, secure the panel with latches, then with bolts.
The panel fastenings are located around the perimeter and near the powder receptacle niche.
- Place the drive belt on the engine pulley and, gently rotating it, pull the rubber band onto the drum wheel. If you encounter any difficulties, ask for an assistant, as the belt on Indesits is quite tight and can be difficult to install alone.
- Move on to the cuff – remove it from the drum and straighten it. Replace the metal clamp. Snap the ring fastener into place;
- screw the trash filter back in, close the lower false panel that covers the element;
- Insert the detergent dispenser.
This will install all the washing machine components. Make sure you haven't forgotten anything: inspect the connection points of all the hoses, tubes, and power wires. Next, install the access panel, secure it with screws, attach the top cover of the washing machine, and connect the drain and inlet hoses. Then move the washing machine to the wall or return it to its cabinet.
Once assembly is complete, connect the washing machine to the sewer and water supply. Test the equipment by running a wash cycle with the drum empty. Stay close to the machine during operation so that you can immediately notice any leaks and turn it off. If everything is done correctly, your washing machine will delight you with its quiet, smooth operation. The bearings will no longer make noise, meaning you can continue using it.
Interesting:


1 reader comment
Add a comment
Headings
Washing machine repair


For buyers


For users


Dishwasher


How to install the motor and belt correctly?