Service life of the Atlant washing machine
 Users often confuse the warranty period with the estimated service life of Atlant washing machines. The warranty period is the period during which the household appliance manufacturer is obligated to provide free repairs if problems with the equipment are not the user's fault. The service life is the estimated time the owner should expect the washing machine to operate, provided all operating instructions are followed. Of course, this period does not guarantee the machine will last exactly as long as the manufacturer specifies, as it is only an estimate. Let's review the basic care guidelines to extend the life of the washing machine.
How reliable are Atlant machines?
First of all, it's worth noting that Atlant brand appliances come with a 3-year warranty. This is an excellent value, considering that most washing machine manufacturers only offer a 1-year warranty. This means that the Belarusian company produces high-quality and reliable devices that will serve perfectly for at least 36 months after purchase.
The service life is even better, as company representatives claim a 10-year service life for their equipment. Service center statistics cite 8 years—that's how long Atlant washing machines typically last without breaking down. This is a very good figure, as even devices from Indesit, Beko, Candy, and other brands often break down for the first time after just 5 years of active use.
Don't neglect the maintenance of your equipment
To ensure a true service life of 10 years or more, it's essential to properly care for your appliance. Basic care recommendations are also the most straightforward to follow: open the door after each use to ventilate the appliance and wipe all surfaces dry to prevent mold and odors. More serious preventative maintenance should be performed at least once a quarter. What should you do?
- First, turn off the power to your “home assistant” and disconnect it from all communications.
- Remove the detergent drawer and rinse it thoroughly in hot, soapy water. If the detergent drawer has become coated with film or mold, clean it with a sponge.
- Disconnect the inlet hose from the washing machine and rinse it with a strong stream of hot water from the tap.
- Remove the filter mesh and rinse it with hot water to remove any dirt.
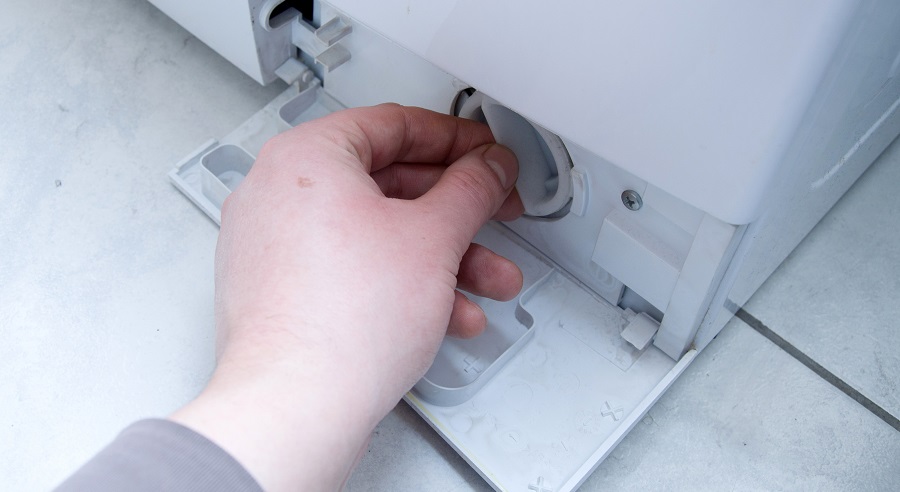
- Clean the machine's drain filter, located in the lower right corner of the machine and hidden by a decorative panel. To do this, lay rags or towels on the floor and place a container of water under the machine. Only then can you open the drain plug, wait until all the water has drained, and then rinse the filter and the walls of the drain to remove any debris, scale, or other contaminants.
- Check the condition of the drum rubber seal; it should be free of cracks, debris, and mold.
- Try turning the drum by hand – it should rotate smoothly, but with a slight tension. Listen to the sounds the container makes – there should be no creaking or metallic scraping.
When your "home assistant" makes strange sounds during diagnostics or operation, it's time to contact a service center specialist.
- Inspect the drain hose for blockages or damage. If the element is intact, flush it under strong running water from the tap.
This list of recommendations is easy to follow at home at least once every few months. No special experience, professional knowledge, or tools are required.
If there are any abnormalities in the operation of the machine
The longer you use your appliance, the more carefully you should treat it and the more closely you should monitor it. If you notice any abnormalities in its behavior, such as strange noise, humming, or increased vibration, you can try checking the device yourself before calling a technician. To do this, you will have to partially disassemble the machine, check the dampers, bearings and counterweights. To do this, follow the instructions.
- Disconnect SM from all communications.
- For convenience, move the equipment to a spacious room to gain free access to all sides of the unit.
- Prepare a few unnecessary rags or towels in advance.
- Unscrew the fixing bolts of the top cover of the machine and remove it.
- Repeat the previous step with the back wall of the case.
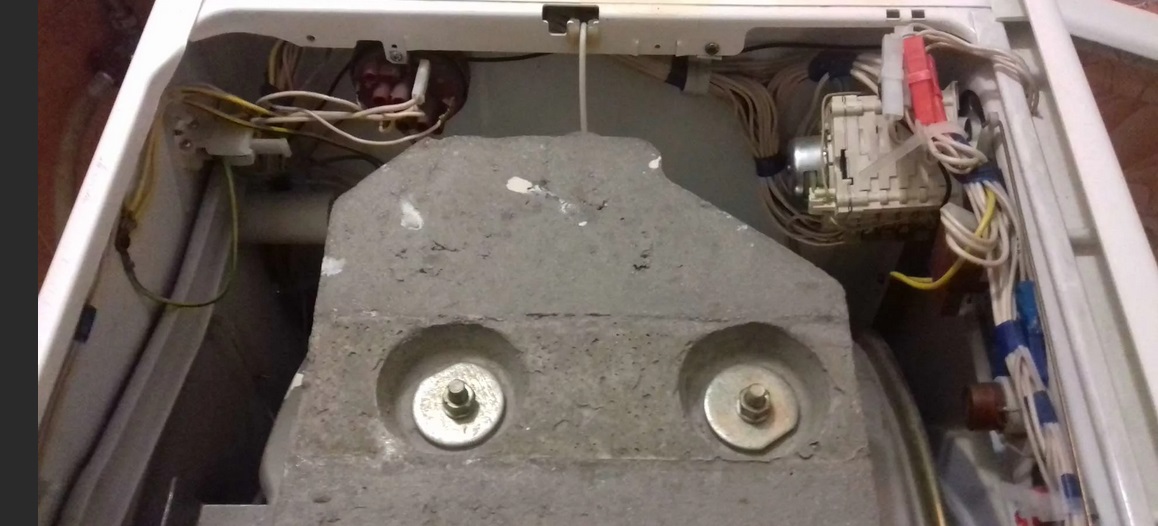
- Locate the counterweights—these concrete blocks should be intact, without cracks or small chips. Try applying gentle pressure to the blocks to ensure they are securely bolted in place. If the counterweights are loose, they will need to be reinforced. If the blocks are damaged, they will need to be replaced.
- Check the drive belt tension—it shouldn't slip. If this happens, you can either replace it with an equivalent, or wash it, dry it, and treat it with pine rosin.
- Check the shock absorbers underneath the car; they should be firm. For added security, treat the springs with graphite grease.
- Access the water heating element and clean it of any deposits. To do this, first disconnect the wires connected to the element, loosen the central retaining nut, and remove the heating element. The deposits can be easily removed with a sponge or brush after soaking the element in a vinegar solution.
Be sure to take a photo of the wiring before disconnecting it so that you have an example of how to properly connect the wires when reassembling.
- Inspect all sensors and wires, which should be free from damage.
- Finally, check all the tubes running from the dispenser to the tank, as well as the fill valve. All of these components should be not only intact but also dry.
As you can see, there's nothing complicated about home diagnostics—just follow our instructions carefully and replace damaged parts with the same or similar ones, which your local hardware store can help you with.
Interesting:


Readers' comments
Headings
Washing machine repair


For buyers


For users


Dishwasher


Add a comment