Dust collects in the dryer
 It's no secret that dryers collect dust. When laundry dries on the balcony or outside, lint and other small particles are released into the air. If the dryer is automatic, all this dust settles in the appliance. We'll explain how and how often you should clean your "home helper."
There must be dust
Some users, when purchasing and trying out a dryer for the first time, are surprised by the presence of dust in the appliance after drying. This is actually expected. Lint and small hairs remain on wet clothes. When clothes are dried naturally, these particles are released into the air, but when dried automatically, the particles remain in the appliance.
Most of the dust collects in the lint filter of the dryer.
Dryer manufacturers have anticipated this issue, so every machine is equipped with a lint filter. This is where dust settles after drying. There are so many small particles that after just three cycles, the filter element becomes almost completely clogged.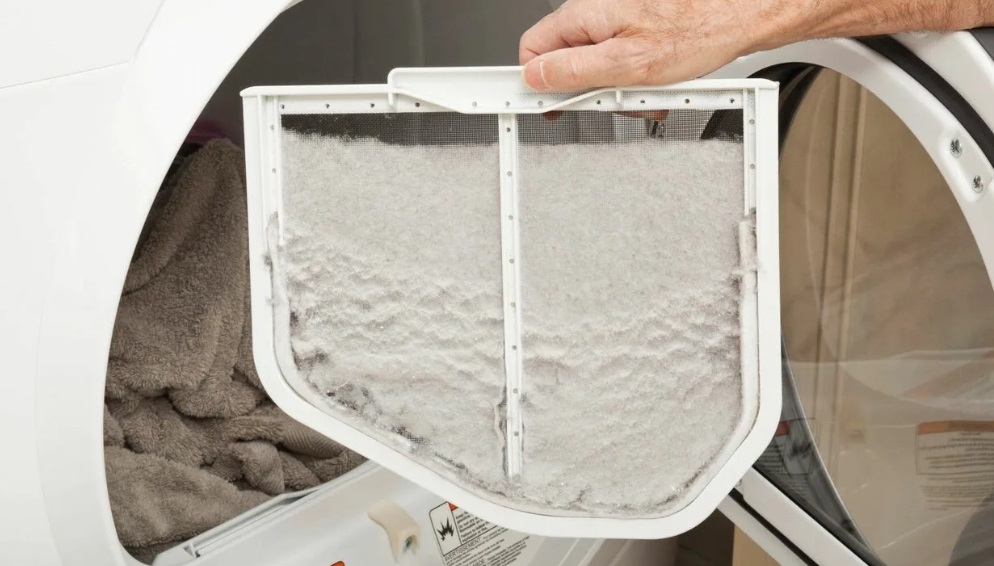
It is important to clean the dryer from dust in a timely manner. Experts recommend emptying the lint filter after each drying of laundry. If this is not possible, then at least every third or fourth cycle.
Cleaning the lint filter is easy. It's located in plain sight and easy to remove. The dust is removed, and the filter can then be reinserted into the dryer body.
A small percentage of dust still bypasses the lint filter and settles in the dryer's heat exchanger. This is also nothing to worry about; the key is to clean the part regularly. We'll tell you how.
Cleaning the heat exchanger
How does debris affect the machine's performance? Firstly, it slows down the drying process. Secondly, it negatively impacts cycle results. If you use your washing machine frequently, it's recommended to clean the heat exchanger once a month.
Before cleaning the heat exchanger, allow the machine to cool. Of course, the power must be off. Next, place a dry cloth under the dryer, near the access hatch. Water may spill out when the door is opened.
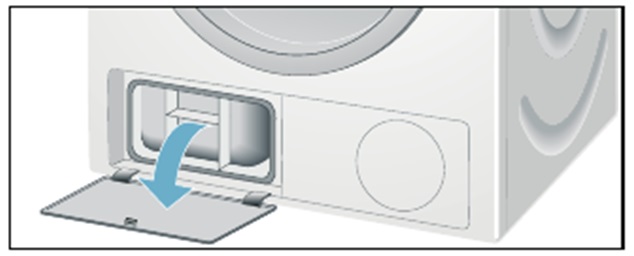
The heat exchanger door is located at the bottom of the dryer, under the loading hatch. Whether it's on the left or right depends on the dryer model. Here's how to proceed:
- open the technical hatch door of the SM;
- turn the locking levers;
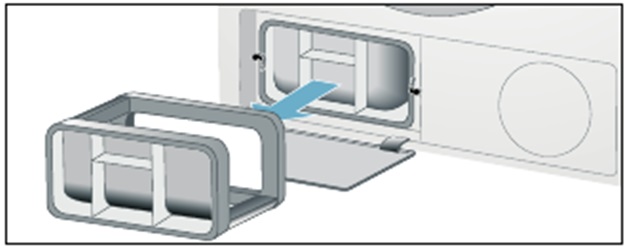
- remove the top part of the heat exchanger;
- remove the heat exchanger from the dryer;
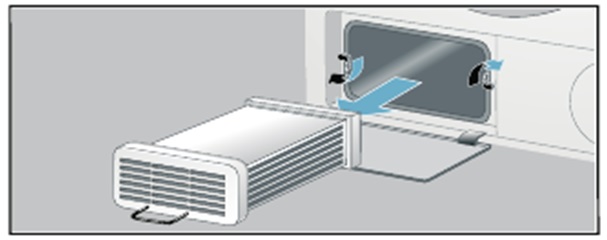
- Rinse the part in water until all dirt is removed.
When cleaning the heat exchanger, do not use sharp objects or hard brushes. They may damage the element. Soft sponges or cloths are acceptable for cleaning.
It's important to remove dust not only from the heat exchanger but also from its sealing gasket. Therefore, wipe the rubber seal with a clean, damp cloth. There's no need to completely dry the element before installing it in the dryer—just let the water drain.
Reassembly of the washing machine is performed in reverse order. First install the heat exchanger, then its top cover. Then return the locking levers to their original position and close the access hatch.
Interesting:


Readers' comments
Headings
Washing machine repair


For buyers


For users


Dishwasher


Add a comment