The washing machine's hopper is leaking.
 A washing machine's watertightness is essential for its safe operation. If a trickle of water runs down the machine's casing, it indicates a leak and requires immediate repair. Otherwise, flooding, short circuits, and even machine failure are possible. Typically, streaks on the front panel indicate a leak in the washing machine's detergent dispenser. This is unpleasant, but easily fixed at home without calling a service center.
Troubleshooting
Before thinking about what to do with the stream, it is necessary to determine the cause of the leak. Only by knowing the location and extent of the breakdown can the leak be completely eliminated and prevented from recurring. As a rule, new machines leak due to a manufacturing defect, while old ones leak due to wear and tear of components.
If the machine was recently purchased, self-repair is prohibited—you should contact a service center and use the warranty. You can fix a leak in an older machine yourself. First, determine where the leak is: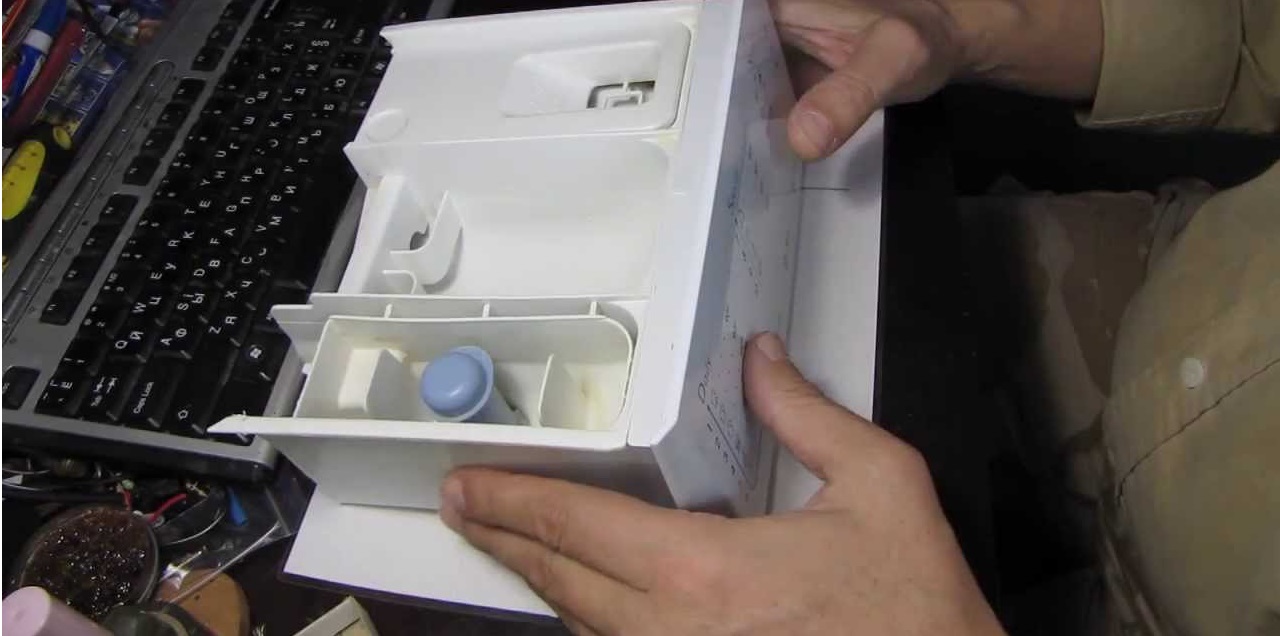
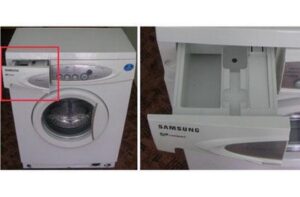
- along the perimeter of the powder receiver, from the top or bottom side of the body;
- at the junction of the tray with the front of the washing machine;
- through the hole at the end (meaning that one of the compartments of the powder receiver is damaged);
- through a loose or torn pipe (usually the clamp becomes loose, the rubber band comes off, and water leaks).
The powder receptacle leaks water due to a manufacturing defect, wear and tear of components, and careless operation.
A leaking detergent dispenser is often caused by user carelessness. Often, when cleaning the detergent dispenser, the owner rushes and tugs at the component. This can result in the dispenser body or adjacent components breaking, hoses coming loose, or cracks appearing. Excessive use of harsh detergents can also cause leaks: abrasive components corrode plastic and rubber, compromising the seal.
What is needed for a successful repair?
Once we've determined the cause of the dispenser's leak, we can begin repairing it. To stop the leak, you'll need a certain set of tools. Here's what you need:
- screwdrivers (Phillips and slotted);
- pliers;
- file;
- hacksaw for metal.
You'll need a reliable silicone sealant. If the bin is heavily clogged, you'll need cleaning agents such as citric acid and laundry soap. Sometimes the powder drawer is so damaged that replacement is the only solution. In this case, a new drawer is purchased, but you should first verify that the old one is completely dead.
Description of repairs
You can't ignore leaks in your washing machine when it's filling with water. If you notice any leaks, you should forcefully stop the cycle, drain the water from the drum, and try to determine the source of the leak. If there are no obvious causes, proceed to diagnostics. This will require checking all possible causes and fixing the problem.
The first step is to open the powder receptacle, press the special lever in the central compartment, and remove the dispenser from its "nest." The second step is to inspect the hopper body, looking for cracks, chips, and other signs of a leak. We also evaluate the contamination of the part: a thick layer of scale and detergent often causes leaks. The explanation is simple: the collected water does not have time to pour into the drum, the compartments overflow, and the liquid spills out.
Are there any visible causes, such as clogs or cracks? Then we begin a more thorough inspection. First, use a Phillips-head screwdriver to loosen the screws securing the powder receptacle, then remove the top cover of the machine. Next, locate and inspect the four pipes leading to the hopper:
- the first and second are connected to the back of the dispenser and are needed to fill with water;
- the third one is allocated for air conditioning and is fixed to the right wall;
- the fourth is the thick corrugation on the left, adjacent to the counterweights.
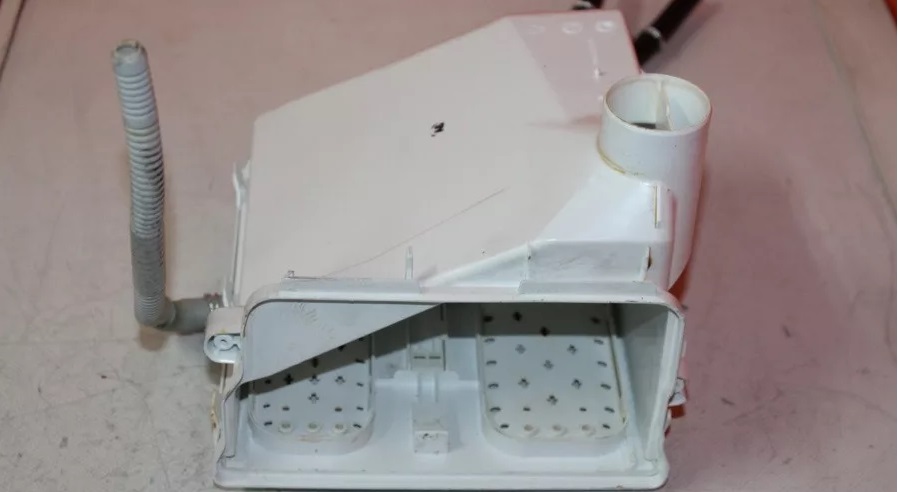
The identified pipes are disconnected from the bin and removed along with the tray itself. Once all components are removed, the actual repair begins. The first step is cleaning the components of scale and blockages.
The powder compartment must be cleaned regularly from scale and powder!
Neglecting a thorough cleaning of the powder dispenser is not recommended. A thick layer of plaque isn't always the problem. Often small limescale deposits and some hardened detergent residue clog the water supply nozzles. As a result, liquid flows into the tray not in a steady vertical stream, but chaotically, splashing onto the front wall of the bin and ending up on the end of the washing machine. It's best to eliminate the blockage immediately by soaking the part in a warm lemon solution at a rate of 50 grams of acid per liter.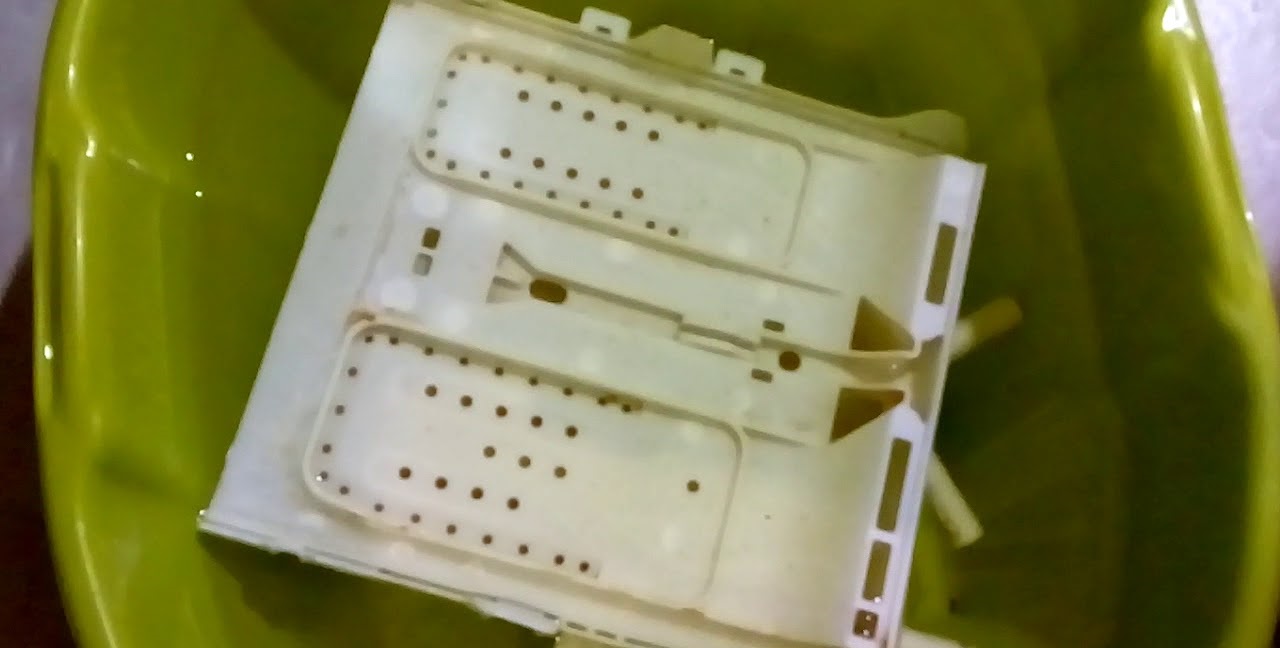
Next, we evaluate the condition of the fourth pipe:
- we inspect the corrugation (due to its close proximity to the counterweight, it quickly wears out and loses its tightness);
- If you notice damage to the rubber, buy a new hose (patches are unreliable, it’s better not to risk it and buy a similar hose);
- “we’re working on our mistakes” (to prevent the situation from happening again, we seal the edge of the counterweight with polyethylene);
- fill the joint area with sealant;
- We apply sealant to all the joints of the dispenser (we press the latches with a flat-head screwdriver and fill the seams with glue).
The remaining hoses in the detergent drawer must also be checked for integrity. If cracks are detected, replace the hoses without attempting to patch the holes with electrical tape. Replacement is also recommended if the drawer itself is damaged. Done? Then reassemble the machine in reverse order and run a test wash. If the leak persists, contact a service center.
Interesting:


Readers' comments
Headings
Washing machine repair


For buyers


For users


Dishwasher


Add a comment