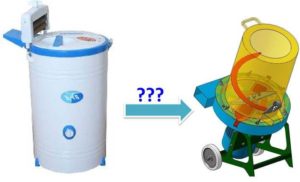
How to make a DIY grass cutter from a washing machine
 Real gardeners and horticulturists know a thing or two about tools like a grass cutter and a branch shredder. These aren't the only tools they have in their home.
Buying all the necessary gadgets isn't always possible, so people come up with all sorts of DIY ideas. Today, we'll show you how to make a grass cutter from an old washing machine.
Preparing parts and tools
To determine what you'll need to make a DIY grass shredder, you need to have a good understanding of its design. In reality, there's nothing complicated about it. A branch shredder or straw cutter is somewhat reminiscent of a food processor. Its main components include:
- a shaft with knives rotating on it;
- electric motor;
- container for grinding;
- receiving tank;
- electric cable;
- frame.
Based on the design of the three-in-one device: branch shredder, straw cutter, grass cutter, we will prepare the necessary materials. Try to use materials and tools at hand. So, you need to prepare:
- a metal tank from a Soviet washing machine, for example, from an Oka machine; the body of a Typhoon vacuum cleaner can be used as a container;
- a 180-watt washing machine motor, or even more;
- an old hacksaw for making knives, you can use a ready-made circular knife;
- electric cord with plug;
- start button;
- silo bucket;
- metal corner for the frame;
- bushings, nuts, washers, bolts for connecting parts;
- Tools: pliers, hammer, screwdriver, grinder, drill.
When choosing a motor, pay attention to its power. A low-power motor can only be used for cutting grass or straw, but it won't work as a DIY chipper for large branches.
To make a DIY shredder capable of processing branches thicker than 5 mm, DIYers recommend choosing a gasoline engine rather than a washing machine motor. This engine is much more powerful.
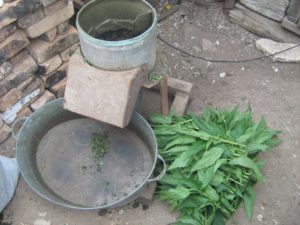
Assembling the case
To make a DIY grass cutter, we'll start with the top container, where the grass is dropped and where it will be shredded. To do this, the washing machine housing needs to be cut to the correct height, making it easier to use. At the bottom side of the body we make a rectangular hole measuring approximately 20x7 cm so that the knives are located slightly above the hole, or at the same level as it.
A metal plate casing should be made around the hole. This will prevent grass from flying everywhere. You can secure the casing with bolts. Next, weld a stand out of a metal angle. Its height will depend on what you'll be placing under the silo. If you're using a basin, a low stand will suffice, but if you're using a bucket, it should be taller.
As for the motor, two holes approximately 7 mm in diameter must first be drilled into its shaft. Then, a bushing with holes and a threaded end is placed onto the shaft and bolted in place.
You'll need to order the bushing in advance from a lathe specialist if you can't turn it yourself on a lathe. It must be at least 50 mm long.
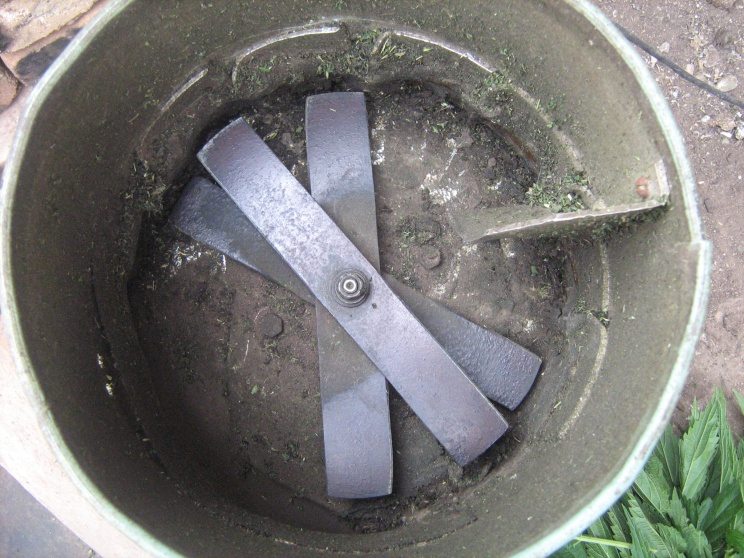
Now you need to secure the motor to the bottom of the tank with studs. Then, place the specially cut and sharpened blades on the shaft and carefully tighten them with nuts, such as 32 mm plumber's nuts. The knives should not touch the walls of the container. Next, the container and motor are firmly welded to the stand. The structure must be secure. The stand for the wood chipper can be lined with sheet metal, but first connect the starting mechanism and electrical cable to the motor.
Connecting the engine
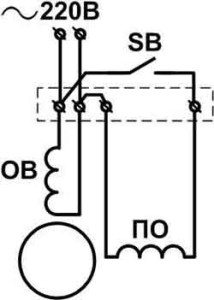 Connecting the motor to the electrical cable begins with locating the starting and running windings of the motor itself. This is done using a tester. The resistance of the running winding is lower than the resistance of the starting winding. Once the contacts are located, the connection can be made. Here's how:
- we connect one end of the starting winding to the wire from the start button;
- we connect the other end to the cable and the working winding;
- We connect the second end of the working winding to the cable and wire from the start button.
The diagram shows this connection.
When using a homemade wood chipper, remember the following rules:
- do not add too much straw or grass;
- Do not put wet branches and straw into the shredder, the mechanism may jam;
- Observe safety precautions when working with electrical appliances to avoid harming your health!
So, a simple shredder or straw cutter made from scrap parts is ready. This homemade grass cutter will be just as effective as one you can buy at the store. For those who want to make a grass cutter from a washing machine, we've included a video. And if you're interested, What else can you make from car parts?, read the articles on our website.
Interesting:


Readers' comments
Headings
Washing machine repair


For buyers


For users


Dishwasher


Add a comment