The drum in the dryer is spinning slowly.
 Many dryer owners are surprised by the fact that their dryer's drum rotates with great difficulty. While this component operates smoothly and easily in a washing machine, it can be quite difficult in a dryer. So why does the dryer drum spin so stiffly when you try to turn it by hand? This typically occurs for several reasons: some can be fixed at home, while others require professional intervention. To solve this problem, it's necessary to identify its source through a thorough diagnosis.
Why is it difficult to turn the drum by hand?
If you're having to force the drum of your "home helper" to spin, don't panic right away. Dryer and washing machine drums operate differently. For example, a washing machine may not have a drive belt at all, or if it does, it's connected directly to the motor shaft. Therefore, in a washing machine, the element connects the drum to the motor shaft directly, without any "intermediaries."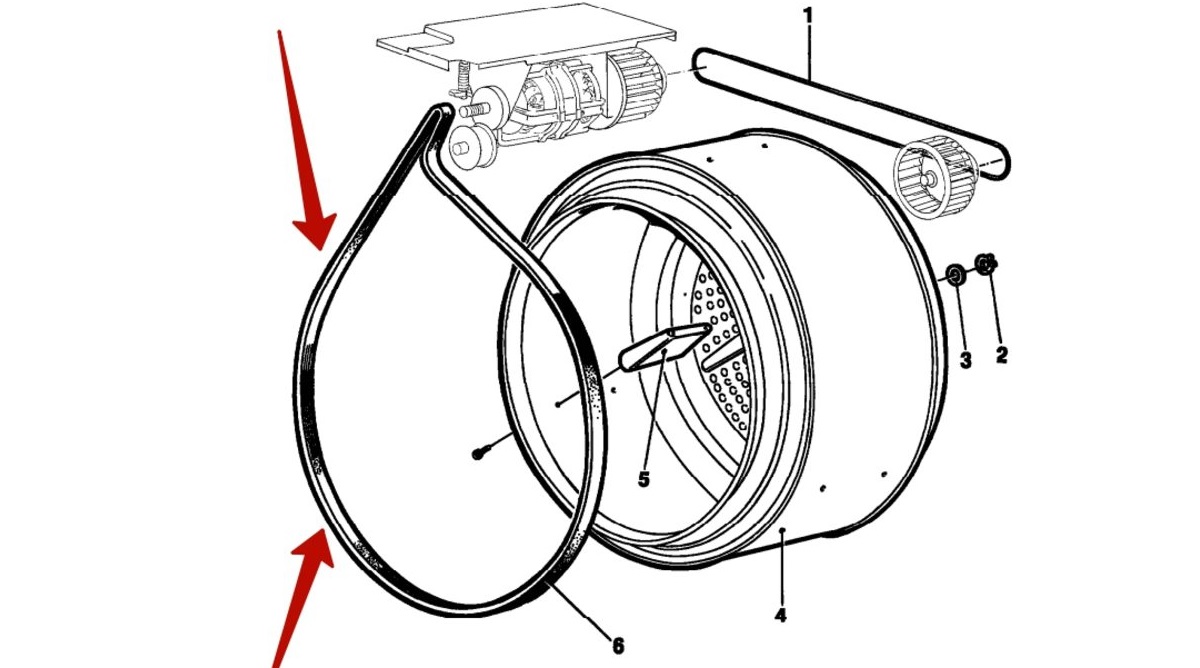
In a dryer, the drive belt connects the drum to the motor via a tensioner pulley. This component maintains tension and prevents the drum from being rotated manually. However, it does not affect the transmission of power from the motor to the drum during operation.
If the drum does not spin at all
Sometimes the appliance stops working and the drum stops rotating completely. This is the first sign of a malfunction in the dryer. One of the main causes of this problem is a worn or broken drive belt. It transmits power from the motor to the drum and, over time, can become loose or damaged, causing the drum to operate with difficulty or even stop completely.
In such situations, the belt should be replaced. You can do this yourself; there's no need to call a technician. First, remove the damaged part. Then follow these steps:
- Move the dryer away from the wall to ensure easy access;
- remove the lint filter from it (this must be done if it is located on top of the housing);
- remove the side panels of the machine body, having first removed all fasteners;
- remove the top panel as well (to do this, you can slide a flat-head screwdriver or knife under it, and then carefully unfasten all the cover clips);
- remove the back panel of the case.
After removing these parts, you'll gain access to the drive belt. Sometimes the rubber belt is already torn and located at the base of the machine. In this case, it should be removed from the appliance and discarded.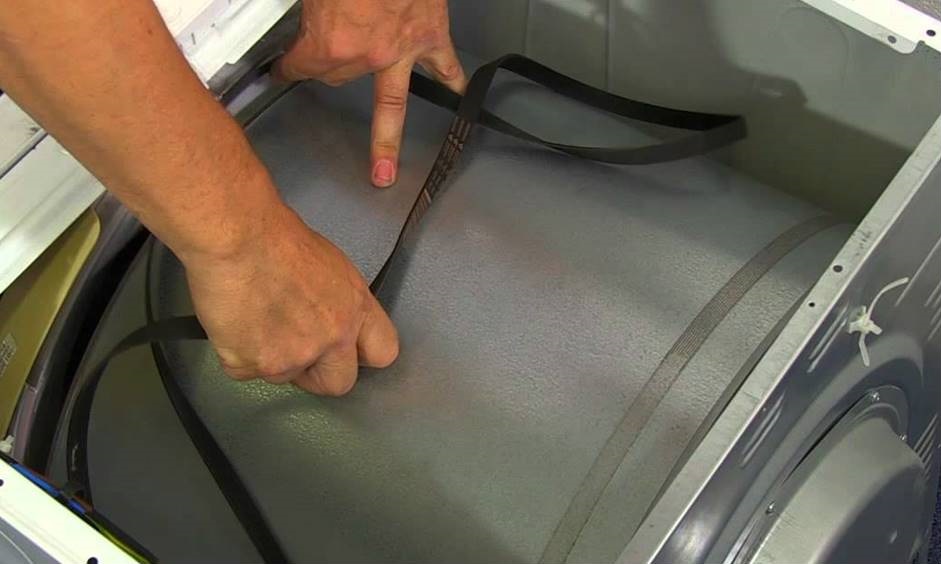
If the drive belt is attached to the drum, remove it manually. This completes the removal process, allowing you to install a new belt. To ensure you select the correct parts for your dryer, we recommend ordering them before beginning the repair. When selecting parts, be sure to use the model and serial number of your dryer.
If you are concerned about making a mistake, it is better to remove the old belt, check its markings and then buy a new one!
Purchasing spare parts for a dryer is usually straightforward. However, a car belt can always be used as an alternative. The key is to make sure it's the same diameter. If the part is longer, the belt can be carefully trimmed to prevent the elastic from slipping.
Now you'll need to install the new belt. To do this, wrap it around the drum, making sure it fits snugly into the groove. Next, you'll need to:
- pass the drive belt around the engine pulley;
- wrap the element through the tension pulley (it is located above the engine “wheel”), due to which the belt will “fit” tightly;
- rotate the drum by hand to check its tension;
- put the top panel of the case back in place and connect all previously removed wires to it;
- secure the clamps;
- put the side walls of the case back in place, securing them.
Now you can carefully move the dryer back into place and plug it in. To check the dryer's functionality, run a test cycle without any laundry. The drum should rotate smoothly and without excessive noise.
If everything went smoothly, you can consider this task successful. To prolong the life of the drive belt, it's important to always follow the dryer's operating instructions. Avoid overloading the device, regularly clean filters and other components of the device.
In addition to problems with the drive belt, poor drum rotation can also be caused by various foreign objects getting stuck in the mechanism. Small pieces of clothing and coins interfere with the drum's movement. Furthermore, they can cause strange noises in the machine.
Another common malfunction is worn or broken bearings. If these parts are damaged, they will cause friction and impede the drum's operation. Electrical problems or improper installation can also contribute to problems with the dryer's drum.
Why are there problems with the belt?
To extend the life of a new drive belt, it's important to understand why it failed. Therefore, before replacing the old component, it's recommended to diagnose the device. The belt could have been damaged due to:
- problems with drum rollers;
- clogged ventilation wheel;
- accumulation of dust and dirt in the lint filters;
- damage to the felt seal;
- overloading of the drum;
- initially incorrect installation of the belt, when the required elastic tension was not ensured;
- natural wear and tear.
Let's discuss each of the possible options in more detail. Special rollers in dryers significantly facilitate the rotation of the drum. They distribute the load evenly, preventing overloading the motor and drive belt.
However, over time, the rollers wear out, developing flat spots that cause temporary disruption to the drum rotation. This malfunction places additional strain on the dryer drive and significantly contributes to its stretching and damage. To prevent this problem from recurring, it's necessary to replace not only the belt but also the drum rollers.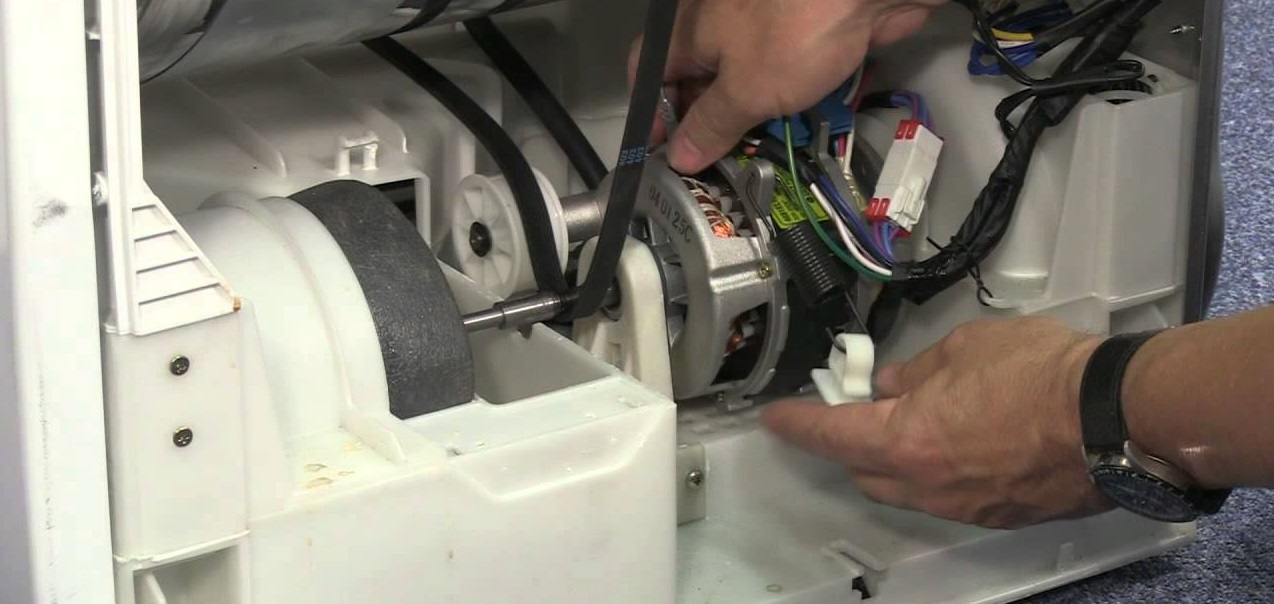
The fan wheel drive belt is a component independent of the fan itself. However, if it becomes clogged, uniform heat distribution within the dryer may be disrupted. If heat is emitted from the rear and heats up various components inside the dryer, including the drive belt, it can overheat, expand, and slip. This will create additional resistance, accelerating wear.
Another potential cause could be a clogged lint filter. All dust, threads, hairs, and small fibers from clothing are collected in a special container that needs to be cleaned regularly. It's recommended to clean this filter every 3-5 cycles.
If you neglect cleaning, all the accumulated debris will interfere with the dryer's operation and end up in other parts of the unit, creating unnecessary friction points and thereby increasing the load on the drive belt!
Don't forget to also check the felt seal located inside the dryer door. Its purpose is to reduce friction caused by the rotation of the dryer drum. If the felt seal is damaged, the drum will rub against the front panel, increasing friction and putting additional strain on the motor and drive belt. Therefore, it's important to regularly check the seal and replace it if necessary.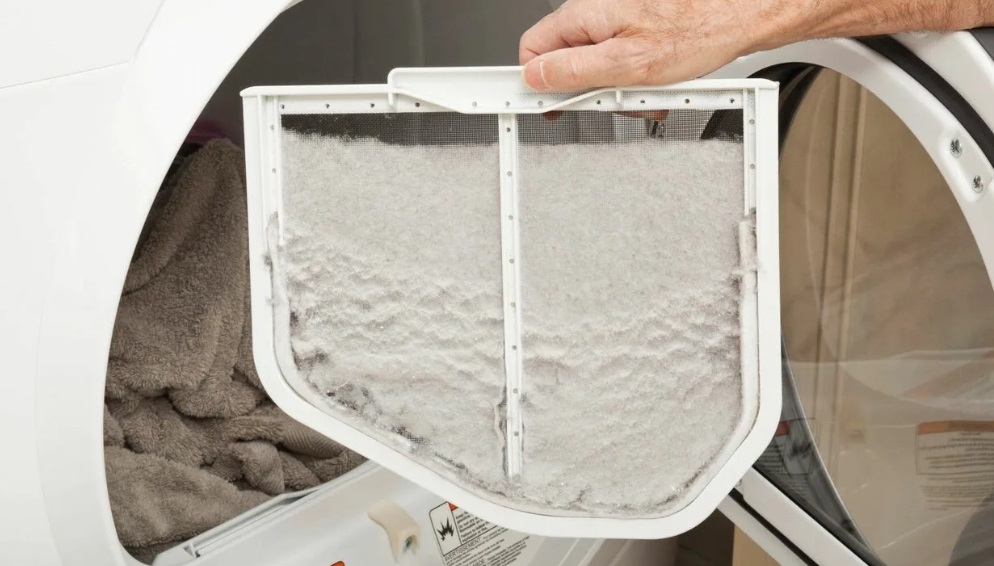
Manufacturers set a specific weight limit for a dryer drum for a reason. Overloading is the most common cause of drive belt breakage or stretching. For example, a machine designed for 5 kg of cotton could be overloaded by a user, who might constantly load 7 kg of laundry.
This results in the overall load being placed on all parts of the machine at once. This increases the risk of damage to shock absorbers, bearings, drum pulleys, drive belts, and other components. Therefore, it is crucial to adhere to the manufacturer's recommended load weight limit.
If the belt on the drum is either too tight or too loose, lacking sufficient tension, it can also stretch and break. This will cause the drum to rotate incorrectly, accelerating the wear of the rubber. Ultimately, belt wear can also be caused by natural processes. The rubber part has a limited lifespan and is approximately 5-7 years. The belt causes the drum to move due to friction and, as it gradually comes into contact with the pulley, it becomes less elastic, which leads to slipping or breaking.
Anyone can replace a dryer's drive belt; it doesn't require any special skills. All you need is a screwdriver, and the job itself takes 20 to 30 minutes. However, remember: before installing a new belt, it's crucial to eliminate the cause of the problem. If any foreign objects get caught in the drum mechanism, remove them immediately. If you experience electrical problems, it's best to contact a professional for a quality repair.
Interesting:


Readers' comments
Headings
Washing machine repair


For buyers


For users


Dishwasher


Add a comment