How to reduce washing machine vibration during spin cycle
 Any modern washing machine vibrates heavily during the spin cycle, especially during the spin cycle. During this cycle, the drum can spin at speeds of 800, 1000, 1200, or even higher, so vibration is nothing unusual. However, in certain situations, your "home helper" may vibrate excessively, or even move around the room due to sudden movements. In such cases, it's crucial to quickly reduce the vibration of the washing machine during the spin cycle to avoid damaging your appliances and flooring. We'll show you how to do this correctly at home.
Is the vibration really excessive?
The drum of the machine is a moving element that rotates at high speed, causing vibration. Typically, vibration becomes noticeable during spin cycles and high-speed washing cycles. Vibration is a natural process, so if small items placed on top of the washing machine start to wobble or bounce a little during washing, just ignore it.
To reduce vibration, manufacturers place counterweights on top or around the drum, as well as shock absorbers that absorb the negative impact.
How can you tell if vibration is excessive? Standards for household appliances can be found in the Russian Federation's Sanitary Rules and Regulations (SanPiN), but it's not that simple. The problem is that vibration measurements require specialized instruments, which you may not have at home. Furthermore, even relatively safe vibration levels can be harmful to the user and their home.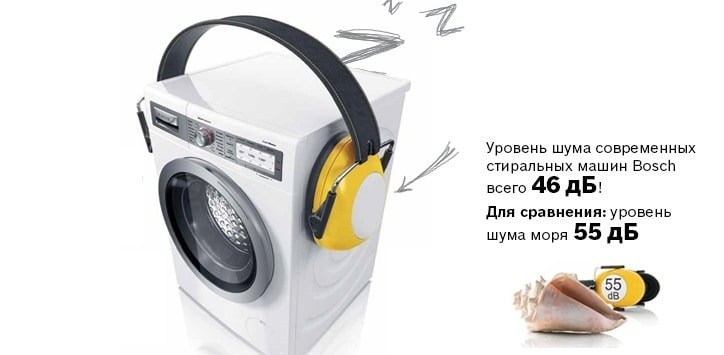
That's why it's easier to simply inspect the machine. If it bounces, moves a few centimeters, or is very loud, it's best to take action. Pay special attention to the maximum permissible noise level during washing and spinning. The manufacturer usually specifies this value in the user manual, so you can use your smartphone and a dedicated app to check the data and compare it with the standards.
If the results aren't satisfactory, it's best to try to reduce them by conducting a thorough diagnosis and then troubleshooting. You can perform the check yourself without calling a service center specialist, but if you're unsure, it's best to call a technician. If you want to save money and do the job yourself, be sure to have screwdrivers, wrenches, and a spirit level handy. Finally, find the official instructions for tips on partially disassembling the washing machine.
Errors were made during installation of the equipment
One of the most common causes of increased vibration is improper installation of the “home assistant”. The fact is that counterweights and shock absorbers can only work effectively when household appliances are level. If even a slight misalignment occurs during installation, this will result in imbalance and excessive vibration. 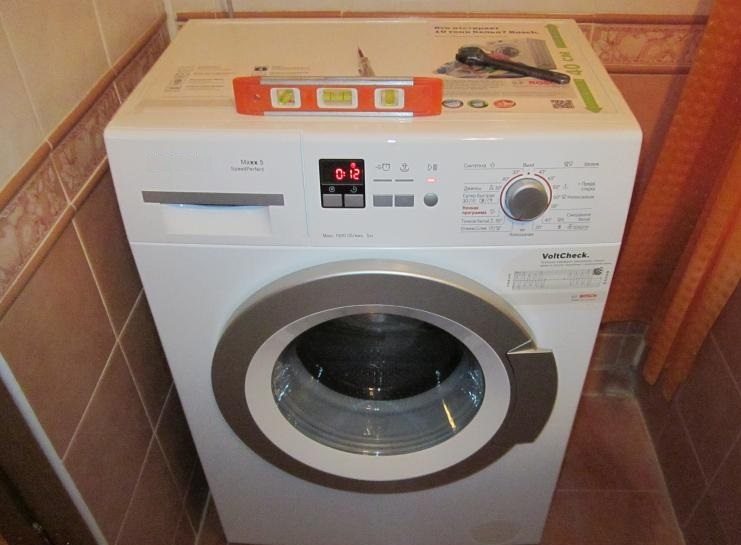
If this is exactly what happened, then it’s very easy to fix the problem – just take a building level and adjust the washing machine’s feet according to it.
For increased accuracy, experts recommend temporarily removing the top panel of the washing machine to adjust the level using the metal frame, rather than the plastic cover, which can introduce errors.
Anti-vibration pads are also popular. These mats and other rubber elements are helpful, but not always. They're best used when the user has slippery floors and needs to reduce equipment movement during vibration. However, these pads can't reduce the vibration itself, as it's the drum itself that's the source of the vibration.
The screws securing the drum have not been removed.
Most often, delivery of a brand-new "home assistant" ends with lifting it to the desired floor, and users install it themselves. This is why new owners sometimes forget about the transport bolts—special fasteners necessary for the safe transport of equipment. 
If it weren't for these bolts connecting the drum to the body, the machine could be seriously damaged during transportation, which is why the manufacturer includes such elements.
Running the washing machine with the shipping bolts in place will void the warranty, so be sure to always keep the shipping bolts in place.
These parts must be removed before using the machine for the first time, otherwise you risk quickly damaging the washing machine. The washing machine can operate with these bolts in place, but the drum vibration will not be reduced by the shock absorbers, resulting in increased vibration.
They stuffed a lot of things into the machine.
Next, you need to make sure that the housewife has not mistakenly exceeded the maximum permissible load of dirty laundry. In the most common SM models this figure is 5 kilograms. If the level is exceeded, the bearing and seal of the hatch door may soon fail. Finally, this directly affects vibration during the operating cycle, which the bearings and shock absorbers simply cannot handle.
If the problem is indeed an overloaded drum, simply stop the wash and remove the excess laundry. It's also worth checking that small items aren't tangled in larger items, such as a duvet cover or blanket, as this can cause the clothes to become tangled and create an imbalance. Some machines can detect this automatically using special sensors, but if yours doesn't have this feature, you'll have to monitor the imbalance yourself.
A concrete block collapsed
Next, you need to check for a rare, but still possible, cause of the malfunction: destruction of the concrete counterweights. To check them, you'll need to remove the top or front wall of the housing, depending on the location of the blocks. In the machine, they are usually secured with retaining bolts.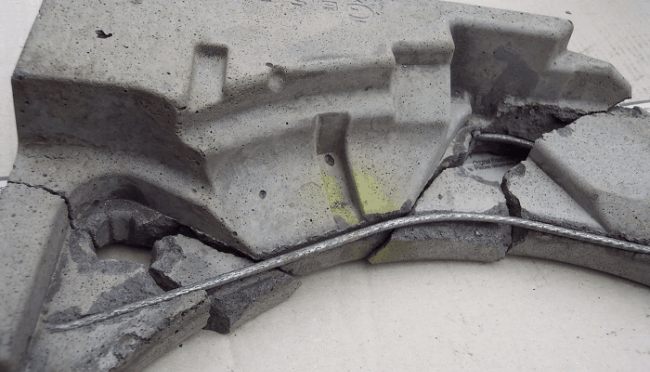
Carefully inspect the concrete element. If cracks appear, or if it's not secured due to broken mounting bolts, the element must be replaced. This is because even small cracks in a concrete block can cause imbalance and increased vibration. Don't attempt to repair damaged fasteners, as over time, increased vibration will cause them to deteriorate further. Therefore, they must be replaced with a similar component as soon as possible.
The dampers are broken
It's quite possible that vibration can be reduced by replacing the shock absorbers. This component often fails before many others, as its service life is typically only 5-7 years. Shock absorbers are most often located at the bottom of the car, where they work with the suspension springs to reduce vibration. 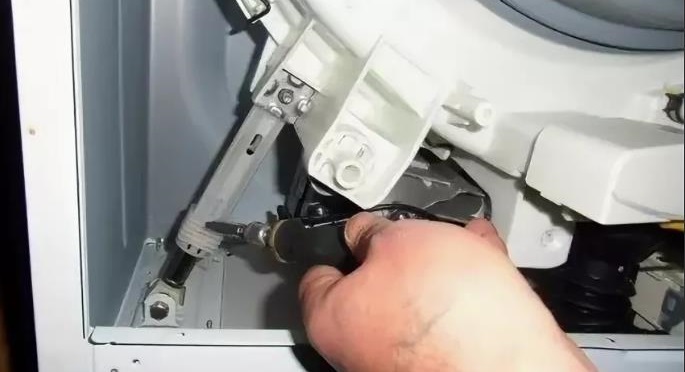
During operation, the element's O-rings wear out significantly, and the lubricant dries out completely. This causes the moving part to move less efficiently and cannot cope with the drum's vibrations.
Dampers should always be replaced in pairs, even if only one part is damaged.
When searching for a replacement, ensure the dimensions match the original dampers, and the rigidity is identical to the original dimensions of the part being replaced. To replace, you'll need to secure the tank with shipping bolts, turn the appliance over, and replace the dampers from the bottom. This requires partial disassembly of the appliance, so if you've never done this before, it's best to call a repair technician.
The bearing unit is destroyed
If, even after all these manipulations, the vibration cannot be reduced, then you will have to diagnose the bearing assembly. When it breaks, several signs of destruction appear at once. What should you pay attention to?
- Significant increase in vibration.
- Formation of a crunching sound with a metallic clang.
- Poor quality of laundry spinning.
- Deformation of the cuff edge.
If everything points to bearing damage, you should disassemble the washing machine to gain free access to the component. This usually requires disassembling almost the entire washing machine, so it's best to call a service technician.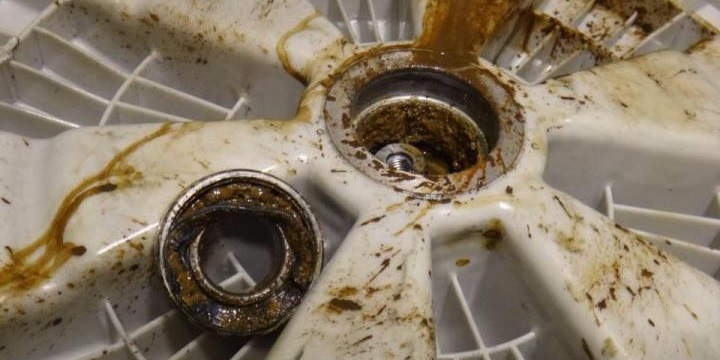
In any case, reducing vibration is often very simple: simply correct installation errors, remove shipping bolts, eliminate overloading of the drum with dirty laundry, or replace the shock absorbers and counterweights. This is easy and inexpensive, so don't delay repairs to avoid making the problem worse.
Interesting:


Readers' comments
Headings
Washing machine repair


For buyers


For users


Dishwasher


Add a comment