How to install a Beko dishwasher
 On average, a dishwasher lasts about 10 years, provided its owners have used it properly, following all safety precautions and operating instructions. After this "shelf life" has expired, it's advisable to replace the machine with a new one, both to prepare for the possibility of a breakdown and to embrace modern technology. Today, we'll take a detailed look at how to properly dispose of your old "home helper," check the new one for defects, and then install your Beko dishwasher.
Getting rid of an old broken dishwasher
First, you'll need to gather a small set of tools that will be useful for unpacking, connecting to the water supply and sewer lines, and installing the dishwasher. You'll need a utility knife or regular scissors to open the box, a wrench or pliers, a negative-head screwdriver, FUM tape, and a spirit level to ensure the dishwasher is level. Once you've gathered all of these tools, review the following safety precautions to help you connect the dishwasher safely.
- Be sure to turn off all utilities in the house before you begin dismantling old appliances or installing new ones.
- Make sure that the equipment is disconnected from the power supply.
- Place the dishwasher only on a surface that is as level as possible and that can also support the weight of the machine.
Never place your dishwasher on a rug, carpet, or any other carpeted surface, as this will restrict airflow to the electrical components underneath the machine, causing them to overheat and eventually fail.
- When you receive your device from a store or delivery service, be sure to check that it is undamaged and that all necessary components described in the user manual are included.
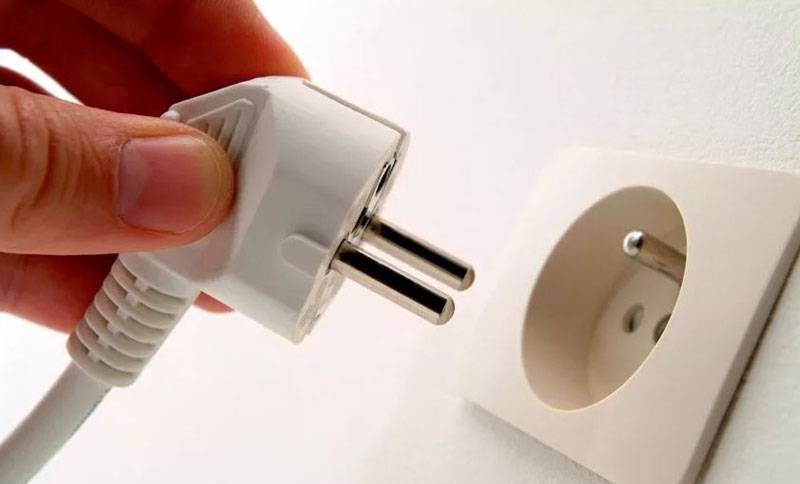
- Check the electrical outlet in your home where you plan to plug the dishwasher. It must be grounded, protected by a fuse, and meet the specifications specified in the instructions.
- After placing equipment in the house, check that it does not stand on its own wires or hoses.
- Never touch the plug with wet hands. Also, do not attempt to remove it from the socket by holding the cord instead of pulling on the plug body.
- If you have a built-in dishwasher, be sure to remove the mounting bolts before removing the appliance from the kitchen cabinet.
- Remember that dishwashers are very heavy, so either call movers or ask a family member to help you lift them. It's much easier to remove the appliance from its niche by tilting it backwards and placing an old rug under the front feet so you can pull it out with the appliance.
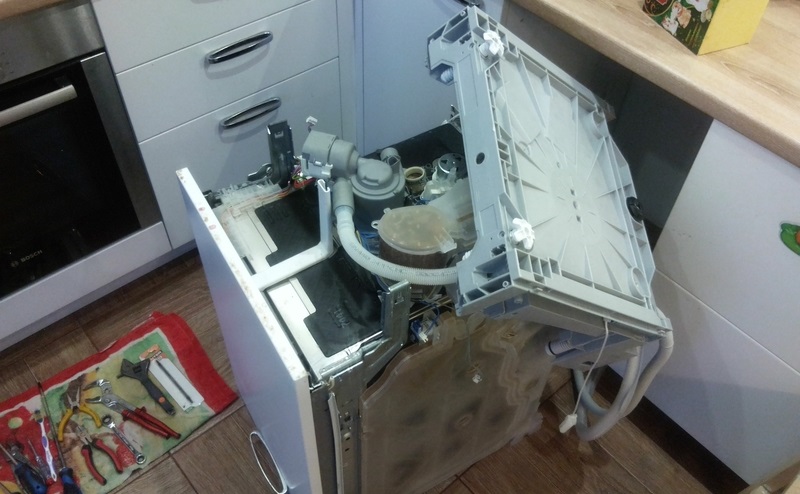
Once the dishwasher has been removed from its original location, you will have access to the back panel of the appliance. The final step is to disconnect the power supply and the inlet and drain hoses. For this, you will need a wrench or pliers, as well as a small basin into which to lower the hoses to drain any remaining water. This officially completes the dismantling of the equipment.
Preparing PMM Beko for installation
First, you need to clear some space so you can easily unpack your new purchase and set it up in its new location. Once you've cleared the space, you can begin unpacking, using a utility knife or scissors. Open the box carefully to avoid accidentally scratching the dishwasher's body with sharp objects. Remove all cardboard, foam, and packaging from underneath the machine. It's also a good idea to remove any unnecessary advertising labels and stickers from the machine's body and display, as they could interfere with operation.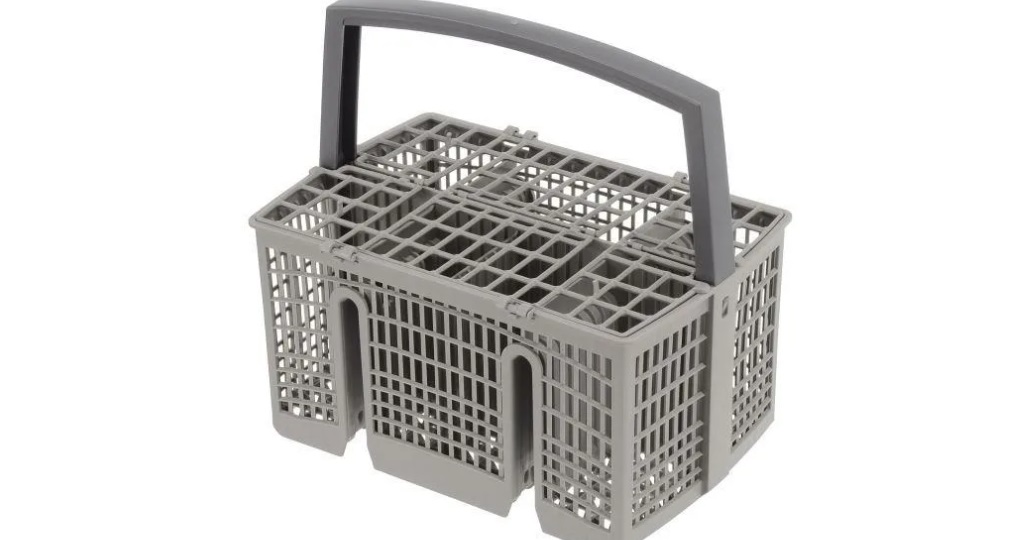
Once all packaging debris has been removed, check the contents of your Beko dishwasher. This includes the official instructions, a cutlery basket, a funnel for easily loading special salt, and a test strip for checking the hardness of your tap water. Depending on the model, the packaging may also include soundproofing tape, a starter kit of household cleaning products, and much more.
Finally, pay attention to the back of the machine, where the power cord and two hoses should be secured with plastic clips. The dark hose is for supplying water, and the light one is for draining. Once the test is complete, all that remains is to move the machine to the installation location so you can connect it yourself and start washing dishes.
We install dishwashers ourselves.
Installing a new dishwasher is very convenient if you already have a dishwasher. This eliminates the need to prepare space for a freestanding unit or drill holes in cabinet walls for hoses and cables for built-in appliances.
The same applies to a prepared water supply system. If you don't have one, you'll need to purchase a double valve for connecting to both the water supply and sewer lines. This valve has two holes for connecting two hoses to a single water pipe. You can find more details on this process in the Beko appliance user manual.
We begin the installation by connecting the drain and inlet hoses. To do this, release the water supply hose from the clamp in which it is secured by the manufacturer and connect it either to the water supply or to the aforementioned convenient double valve. Then, all that remains is to secure the connection by turning the plastic bolt manually and sealing it with FUM tape.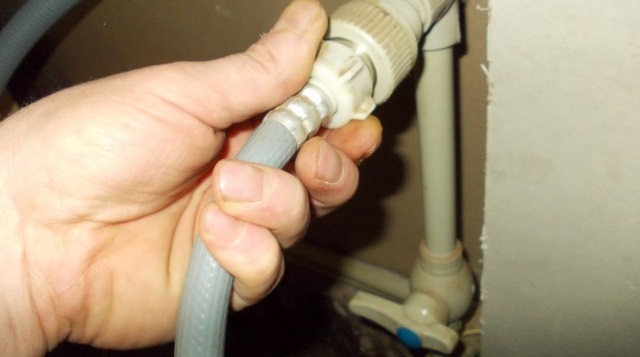
There is no need to release the drain hose from the plastic holder, as it must be permanently fixed to the dishwasher body so that the waste liquid does not return back to the washing chamber, but goes directly to the sewer. Connect the drain hose to a separate outlet, either to the sink drain pipe or to a wall drain hole if one was previously installed for the previous dishwasher. In the latter case, extend the end of the drain hose approximately 12 centimeters into the wall hole.
If you connect the drain hose to a sink drain or another separate outlet, make sure it is 40-100 centimeters above the floor to avoid problems with draining waste liquid.
If there's no separate drain hole, you'll need to connect the drain hose to the drain on the sink pipe. Typically, the U-shaped bend of the pipe has a separate hole for attaching the drain hose. If you used this drainage method with your previous dishwasher, the pipe should already have a hose connector.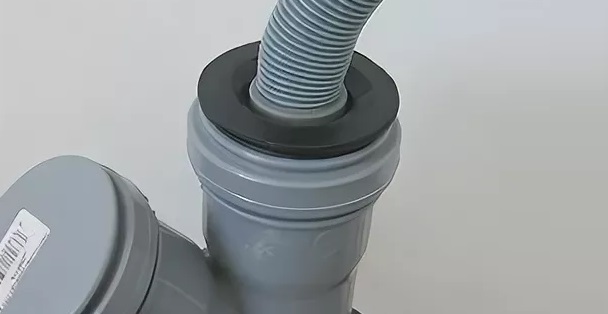
If this is your first installation of the dishwasher, you'll likely need to install the drain hose connector yourself. To do this, remove the auxiliary drain plug and connect the connector in its place, making sure to remove all stoppers and plastic protectors.
Once you've prepared the water lines for drainage, all that's left to do is connect the drain hose. Secure it securely with a metal clamp, and then proceed to connecting the appliance to the power supply. As we've mentioned previously, only a dedicated power outlet is suitable for this purpose, preferably with moisture protection and a circuit breaker for increased safety.
When connecting the dishwasher to the electrical system, do not use extension cords or multi-plug sockets, which can cause a fire, nor refurbished power cords, which are best replaced immediately with new ones.
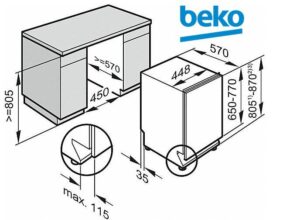
After connecting to the water and power supply, all that's left to do is install your new "home helper" in the pre-prepared location. Double-check that you haven't accidentally placed it on a cord or hose. Finally, level the appliance using a spirit level to prevent any risk of imbalance or excessive vibration during operation. The appliance's adjustable feet, which are best accessed with a wrench, will help you achieve a perfectly level installation.
At this point, the installation is complete – you can proceed first to a test empty wash, and if everything goes well, then to a full working cycle.
Interesting:


Readers' comments
Headings
Washing machine repair


For buyers


For users


Dishwasher


Add a comment