How to install an Asko washing machine?
 It's not enough to simply choose a washing machine, buy it, and wait for delivery; it's also important to properly prepare it for long-term use. That's why installing an Asko washing machine requires careful preparation, starting with preparing the plumbing and finishing with a dry cycle. Any homemaker can handle the installation process, as there's nothing complicated about it. Simply read the manufacturer's instructions carefully and follow each step of our guide.
Preliminary actions
Connecting your new "home assistant" takes a long time, but that's no reason to call a service center, as every step of the installation can be easily completed yourself. It's important to follow the steps in strict order.
- Please read the official user manual first.
- Remove the factory packaging and protective stickers.
- Let the appliance sit for a few hours until it reaches room temperature.
- Select the optimal location for mounting the CM.
- Remove all shipping bolts.
- Connect the machine to the sewer, water supply and electrical network.
You need to study each section of the instructions, paying special attention to the connection information. The manufacturer's manual details installation details, such as location selection, utility connection methods, various details, etc. It's especially convenient that the manual always includes detailed illustrations that will help a beginner understand the Asko washing machine's operation.
After reading this, carefully remove the device from its original packaging. Pay attention to all accessories and remove any protective stickers, tape, foam, or other materials that protected the equipment during transportation. You should also empty the drum, which typically contains the components.
Then, leave the unit for a few hours to "acclimate" to room temperature. This step is especially important in winter, as it affects the safety of household appliances. Two to three hours is enough for the rubber parts to regain their elasticity and resilience.
The fourth step is choosing a location for the washing machine. It's best to choose a location before purchasing the machine, so that it fits into the overall style of your home and the interior of your specific room. This is also crucial because of the dimensions, which must be taken into account, especially when purchasing a built-in washing machine. Additionally, it's important to ensure that all utilities are close by, as using an extension cord, overstretching the power cord, or extending the drain hose can be dangerous. Finally, the location should be chosen based on the flooring, which should be durable and level. For example, tile or concrete can be used.
If you have no other place for the machine, you will have to install it on laminate or wood flooring. Be sure to reinforce the floors and protect them from leaks.
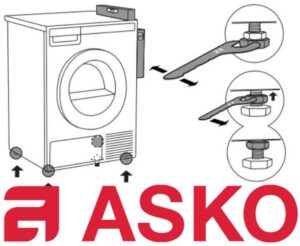
Finally, it's time to remove the rear shipping bolts from the machine. These bolts are installed for safe transport. These bolts hold the machine's drum in place, preventing damage to the internal components during transit. 
However, starting the working cycle in this state is strictly prohibited, since there is a risk of damage to the internal elements of the machine. If this happens, you will have to pay for the repairs yourself, since such a start of the SM voids the warranty. That's why it's important to remember about the locks and, before the first start-up, remove them with a key, and then close the holes with the plastic plugs that come with any washing machine.
How are we going to park the car?
There are several different ways to install an Asko washing machine yourself, each suitable for any space. Each has its own unique features that need to be considered.
- Freestanding installation. The laundry equipment can be freestanding from other appliances. This is the simplest type of installation, as you only need to adjust the machine's height using a spirit level to ensure it's level, and also to match the countertop height if you're installing it in the kitchen.
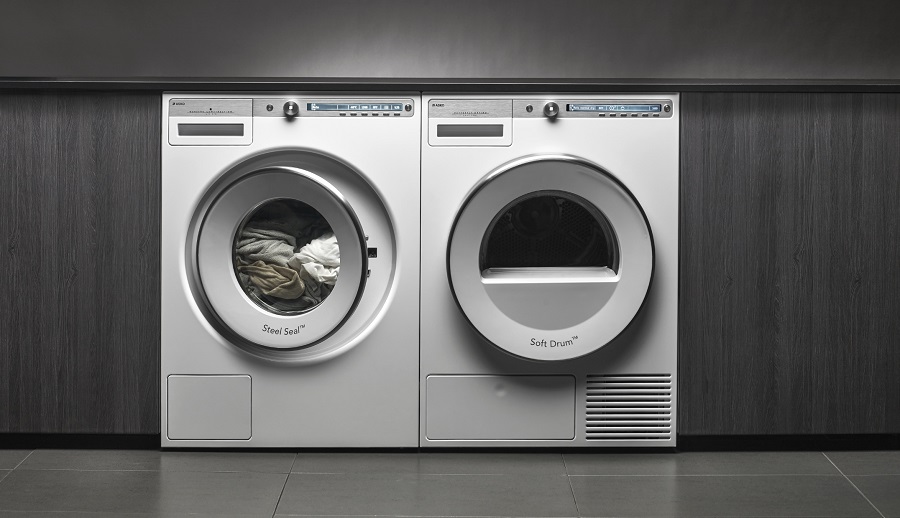
- Stacking. If a user has a dryer, they can place it on top of a washing machine if the dimensions of the two units are compatible. In this case, the dryer is mounted on top using suction cups or a special mounting element from Asko, if both "home helpers" are manufactured by this company.
- Side by side. A method for placing a washer and dryer next to each other.
- Under the countertop. If the room's countertop is 90-95 centimeters high, the appliance can be placed underneath it.
In this installation option, it is necessary to ensure that there is approximately 5 centimeters of free space around the unit.
- In a cabinet. Finally, to maintain a unified style throughout the interior, you can hide your appliances in a cabinet. For this option, ensure there are at least 2.5 centimeters of air gaps between the edges of the washing machine and the cabinet walls. The cabinet doors should also have ventilation holes and should not interfere with the opening of the appliance door.
With so many installation options, anyone can find a place for their new "home assistant," even if space is limited.
Set the required language and other parameters
Modern Asko appliances feature innovative programs and features, so they can and should be customized in advance. This primarily applies to the menu language.
- Activate the washing machine and enter the main menu.
- Go to the "Language" section.
- Select the language you need.
- Click the OK button.
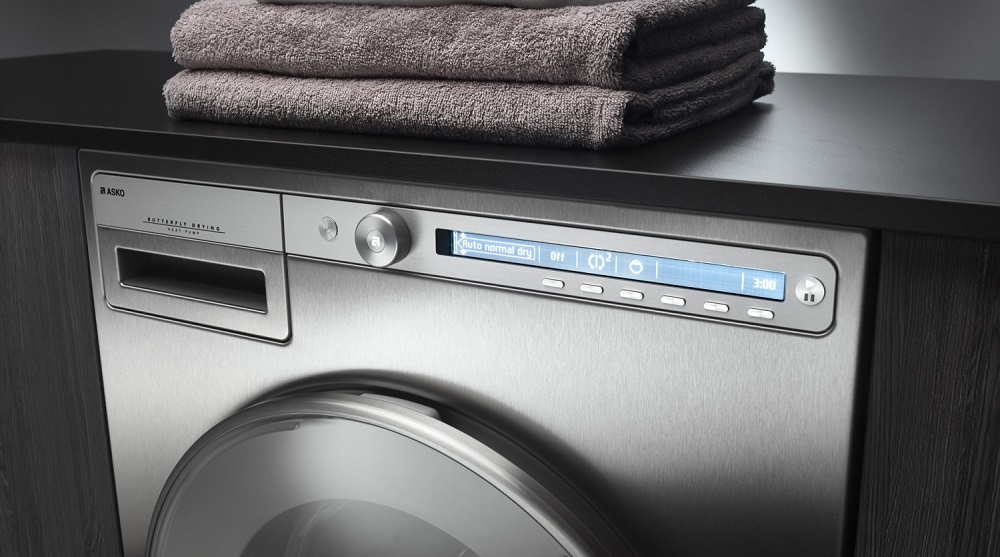
You should also adjust the consumption of household chemicals during cycles. To do this, you need to know the exact water hardness in your region. This information can be found on the official website of your local utility company, or by performing simple tests yourself using test strips or other devices. Next, examine the packaging of your detergent, which will indicate the consumption based on water hardness. Then, all you need to do is set the detergent consumption in the corresponding section of the main menu.
We place the SM body evenly and adjust the height
The next step in preparing the equipment is to place the washing machine on a flat, hard surface. Never install the appliance without a spirit level, as even the slightest misalignment will cause excessive vibration and imbalance, which could damage sensitive household appliances.
Levelly installed equipment not only vibrates less during washing and spinning, but also makes less noise.
To adjust the level, you'll need not only a standard building level, but also a 32mm and a 17mm wrench. The former is needed to adjust the washing machine's feet, while the latter will help you tighten the lock nuts until they stop toward the bottom of the washing machine.
Provide the machine with power supply
Now let's move on to connecting the utilities, which should be prepared in advance. It's best to place the "home assistant" near a suitable outlet. It should be no further than 1.5 meters from the appliance, as this is the standard length of the power cord. Furthermore, this should be a separate, moisture-resistant outlet with the appropriate voltage. Using an extension cord is strictly prohibited, as it can damage energy-consuming appliances.
It's also important to remember that the outlet must be grounded, as this will protect the machine's owner from electric shock and possible fire. Otherwise, there's a very high risk of fire, which is absolutely essential.
Connecting the equipment to the water
Now we move on to the water supply, with the help of which the machine will wash dirty things. Most often, the washing machine's inlet hose is connected to a cold water pipe, since the machine itself heats tap water perfectly well using a heating element. While some Asko models can be connected to a hot water supply, it's best not to do so. Avoid exposing the equipment to boiling water on a regular basis, as it's unsafe, and it's not always necessary for the operating cycle.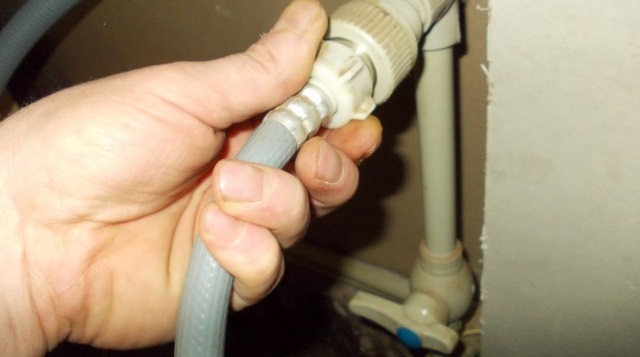
Connecting to the water supply will take just a few minutes, especially if this is not the first automatic washing machine in the house. In this case, simply connect the appliance's inlet hose to the existing outlet, open the shut-off valve, and ensure there are no leaks at the connection. If the outlet hasn't yet been installed, you should either prepare it yourself by installing a tee valve in the pipe or call a professional. In any case, keep the following rules in mind when working with the plumbing:
- water pressure should not be less than 0.1 MPa;
- If you have new pipes in your home, flush the water beforehand to prevent contamination of the filters, which could block the water supply;
- Use only the special inlet hoses that come with the equipment;
- Install an adapter for connections with size mismatches.
The most difficult part of working with plumbing is setting up a point for the washing machine, so if you already have one ready, then all further preparations will take less than 5 minutes.
We install a hose that discharges dirty water
The final section of our guide is dedicated to wastewater drainage. The quickest and easiest method is to lower the end of the drain hose directly into the bathtub or toilet. While this is convenient, it's completely unhygienic and simply unsightly. This will require constantly removing the hose before each flush and then putting it away again. Furthermore, dirty water, hair, fur, and other debris will remain on your pristine white fixtures.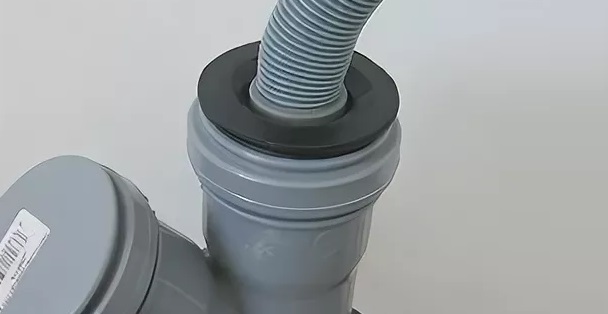
That's why it's best to install a drain using a sewer pipe or a trap. To do this, carefully secure the joint with a clamp to prevent leaks. It's also important to ensure the hose is bent and at the correct height, following standard connection guidelines.
Most often, the hose is placed 50-60 centimeters above the floor and then bent with a small hook. This creates a water seal, preventing unpleasant odors and contaminants from entering the Asko washing machine's drum.
Do not connect the drain hose to a drain that is higher than 90 centimeters from the floor or has a diameter of less than 1.8 centimeters.
Once the plumbing connection is complete, all you need to do is turn on your "home assistant" and run a test cycle. This will allow you to verify proper installation and remove any dirt and grease that may have accumulated during assembly and storage.
Interesting:


Readers' comments
Headings
Washing machine repair


For buyers


For users


Dishwasher


Add a comment