Connecting a Dexp washing machine
 Selecting, purchasing, and transporting a washing machine is only the first step. Much more important is properly preparing your new "home assistant" for use. This includes not only connecting it to all utilities but also a test run to remove any residual dirt that may have accumulated during storage. We'll explain in detail how to install a Dexp washing machine to ensure it serves you well for decades.
Be sure to prepare for work
Connecting household appliances can raise many questions for the inexperienced user, but in reality, there's nothing complicated about the process. That's why you can handle the installation yourself without calling a professional. The most important thing is to follow the instructions carefully to avoid accidental damage. The process consists of six steps.
- Studying the user manual.
- Unpacking the machine, removing factory stickers.
- Waiting for the appliance to reach room temperature (for winter).
- Selecting and preparing a location for automatic washing machine.
- Removing the transport bolts.
- Connection to water supply, sewerage and electricity.
First, carefully read the official instructions, specifically the installation instructions. These guides cover all the details, including site requirements, utility connection methods, tips, and much more. They also include detailed images to help you better understand the washing machine's design and settings.
The second step is to carefully remove the Dexp washing machine from its original packaging. It's important to remove all plastic, foam, protective stickers, tape, and other items needed for safe transportation. Don't forget to remove all foreign objects from the drum—the manual, warranty card, shipping bolt covers, and other components are often found there.
Never operate your "home assistant" with the transport bolts in place, otherwise you will damage the machine and lose your warranty.
The next step takes time as the unit needs to reach room temperature, so it's best to leave it alone for a few hours. If delivery was made during the cold season, you will have to wait a couple more hours for all rubber components to fully regain their elasticity and resilience.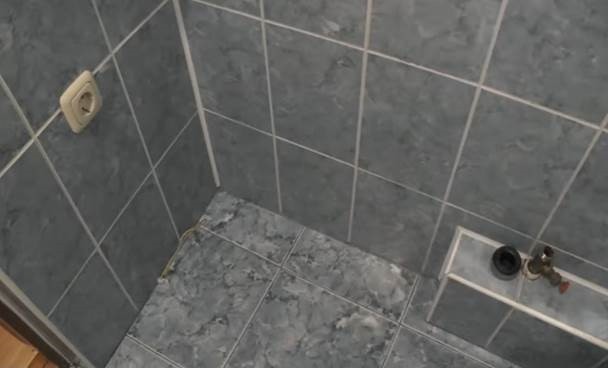
The fourth step is choosing a spot in the house where the washing machine will be located. It's best to find this location before purchasing the appliance, as this will allow you to choose the right size, color, and design to ensure it fits seamlessly into the room's interior. This is even more important when purchasing a built-in washing machine. Additionally, consider the following:
- All communications must be close by, so experts do not recommend stretching the wire too much, using a surge protector, or extending the drain hose, as this is dangerous;
- The flooring under the washing machine must be durable and level. Tile and concrete are ideal for this purpose. However, linoleum, laminate, and other similar flooring should be avoided, as they will need to be reinforced and protected from moisture.
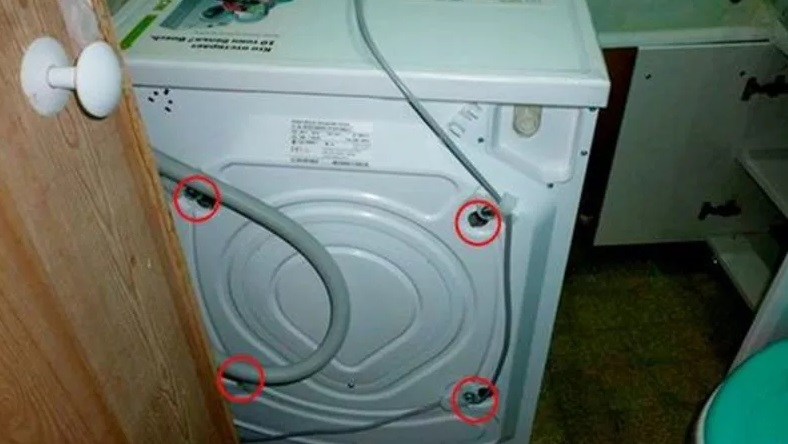
Finally, be sure to remove the transport bolts installed at the rear of the machine. They help secure the drum in place, ensuring safe transportation. These bolts must be removed after delivery, as operating the washing machine with these bolts will result in damage to the drum-tank assembly. If this occurs, the user will have to pay for expensive repairs out of pocket, as the warranty will be voided.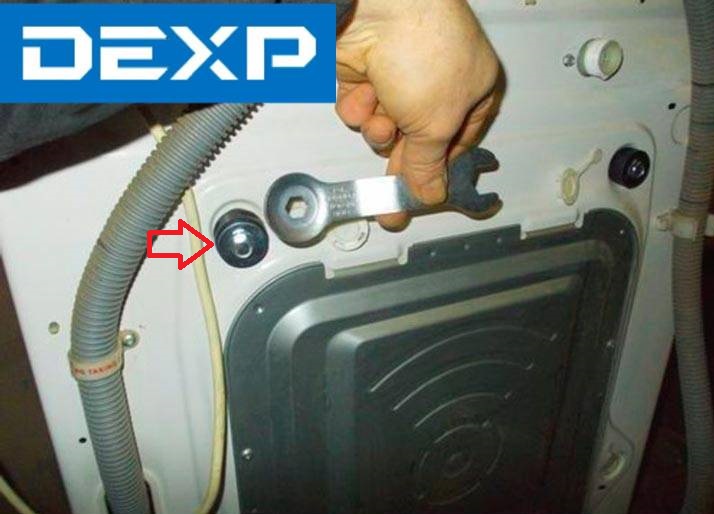
Removing these fasteners is extremely simple, so there's no need to be intimidated by this process. All you need is a suitable wrench or pliers. Loosen the bolts to remove them from their sockets, then cover the resulting holes with the special plastic plugs supplied with the washing machine. The remaining sixth step of preparation is covered in more detail in separate sections of this article.
The machine needs the correct socket.
You need to think about connecting to the power grid in advance, as the outlet needs to be nearby. Ideally, the outlet should be less than 1.5 meters away, as this is the type of power cord that modern washing machines typically come with. 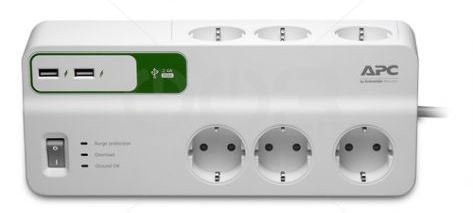
As for the outlet itself, it must not only have the appropriate voltage but also be moisture-resistant. Never connect the washing machine through an extension cord, as this is extremely dangerous.
Dexp brand products come with a 1.5 meter long cord.
That's why you need a separate outlet, especially one with grounding—this will protect your family members. Otherwise, users risk constant electric shocks, plus the risk of fire is extremely high.
We provide the machine with water
We are moving on to preparations related to providing water supply for the SM. Typically, the filling hose is connected to a cold water pipe, as the machine itself effectively heats the liquid for the operating cycle. There are devices that connect directly to hot water, but this is impractical, given that constant contact with boiling water is harmful to household appliances. What can happen to an appliance connected to hot water?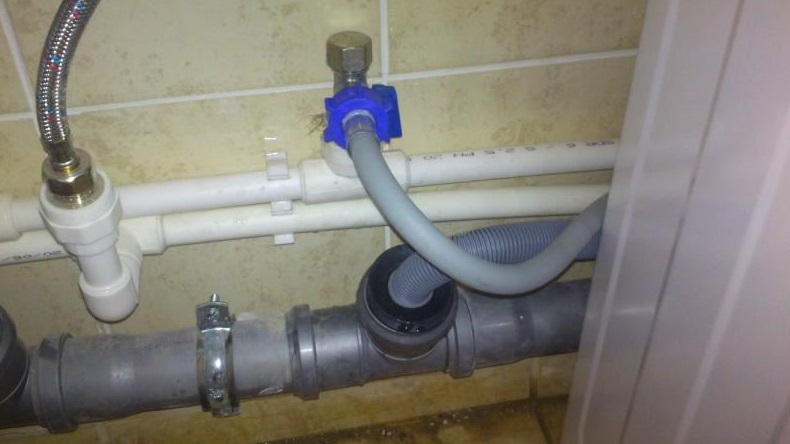
- The filters will become clogged. This is because hot tap water is much dirtier than cold water, so more sediment will accumulate on the filters and other internal components of the system.
- Clothes won't wash well. Since hot water is very hard, washing and rinsing performance will be seriously affected.

If you still want to connect your "home assistant" to hot water, first carefully read the official instructions. They will provide information on whether this connection is permissible. If this is not possible, it's best not to look for ways around this rule and simply connect the device to cold water to avoid needlessly shortening its lifespan.
Only open the water supply tap for the operating cycle, as it is much safer to keep it closed when not in use.
Setting up a water supply for a washing machine is easy if there's already a water inlet for other appliances in the house. In this case, simply connect the inlet hose to the existing connection, open the faucet, and ensure there are no leaks. However, if this is the family's first washing machine and no other water inlet has been prepared, you'll have to install the inlet yourself or call a plumber. All that's required is installing a special tee in the water supply pipe and then checking the pressure—it should match the parameters specified in the instructions.
Where to dispose of waste water?
Finally, the last stage is organizing the drainage of waste liquid. The easiest way is to lower the end of the drain hose into the bathtub or toilet, because then you don’t have to do anything extra. However, this isn't aesthetically pleasing from a space-organization standpoint, and it's simply unhygienic. This solution will allow hair, fur, threads, dirt, and other debris to accumulate on the fixtures, forcing the housekeeper to spend more time cleaning. Furthermore, the drain hose will have to be removed and put away regularly before and after each wash.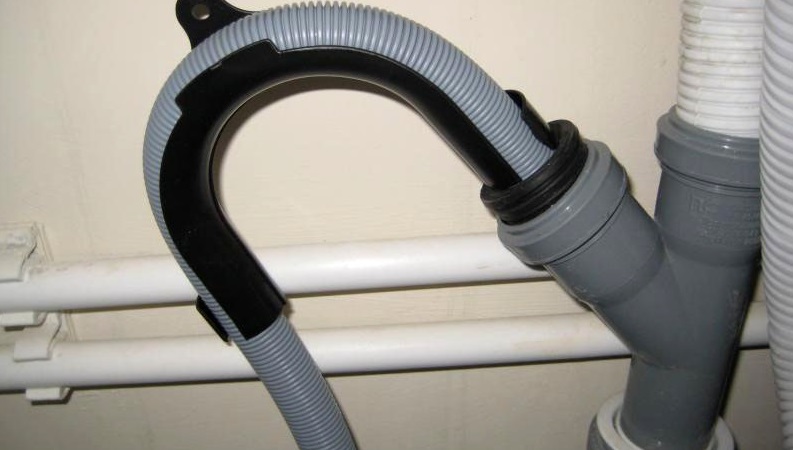
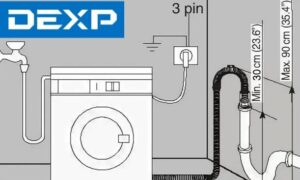
It's much easier to connect the washing machine directly to the sewer system through a pipe or trap. Simply secure the connection with a clamp to prevent leaks. Also, remember to check the hose height and bend, as specified in the Dexp user manual.
The drain hose often needs to be secured at a height of 50-60 centimeters above the floor, with a mandatory bend to create a water seal that traps dirt and odors. After connecting the machine to all utilities, all you need to do is level it with a spirit level using the adjustable feet, and then test its functionality with a test run without clothing.
Interesting:


Readers' comments
Headings
Washing machine repair


For buyers


For users


Dishwasher


Add a comment