How to install a Haier washing machine?
 Purchasing and transporting the appliance home is just the first step. The second stage involves installing the Haier washing machine, connecting it to the utilities, and starting the washing cycle. Calling a technician for installation is not necessary; you can handle the machine yourself. To ensure smooth installation and avoid future problems, it's essential to strictly follow certain guidelines. Let's take a closer look at the instructions.
Where do we begin?
Installing a Haier washing machine is a troublesome but not difficult task. Any user can understand the installation process if they wish. The key is to follow a specific sequence. You must complete six steps:
- study the factory instructions;
- unpack the machine, remove the protective stickers;
- let the machine "sit";
- choose a place;
- remove the transport bolts;

- connect to the water supply and sewerage system, as well as to electricity.
First, open the user manual and read the sections dedicated to installing the machine. The instructions cover all installation details: site requirements, utility connection options, tips, and step-by-step instructions. Illustrations are always included to help you understand the purpose of hoses and other components. The second step is to remove the machine from the box, removing all the hardware. This includes protective stickers, staples, tape, and the foam frame. Be sure to clean out any excess debris from the drum—it's often used for storing Haier components.
Before starting the Haier washing machine, please remove the transport bolts!
Now you need to stop and let the washing machine rest for 2-3 hours at room temperature. This is especially true if it was transported during the cold season. During this time, the machine will adjust to the new environment, and the rubber elements will regain their elasticity and resilience. The next step is choosing a location. Ideally, you should decide on the placement of the machine before purchasing it, so that the dimensions and color of the case are chosen correctly. This is especially true if you are purchasing a built-in model. It's also worth considering the following: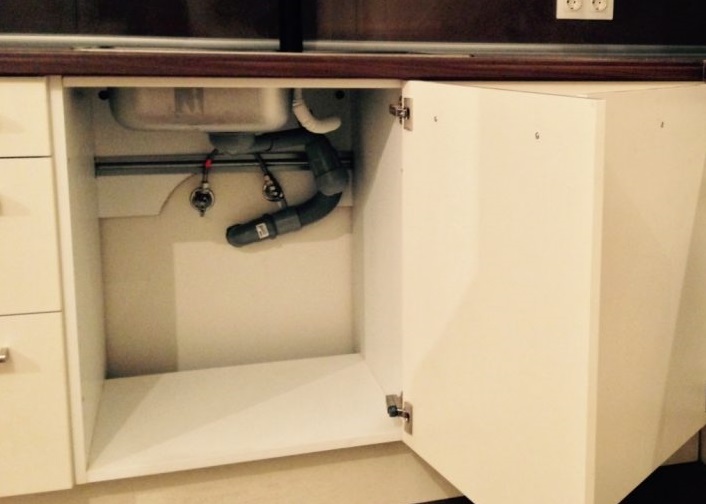
- utility lines must be close by (you cannot pull the power cord too tightly, use an extension cord, or “extend” the drain hose—this is unsafe);
- The surface under the machine must be strong and level (tile or concrete is ideal, while laminate or wood must be additionally reinforced and protected from possible leaks).
It's important to remove the transport bolts from the machine. They are screwed into the rear for safe transportation, helping to secure the drum in place. However, running the machine in this position is prohibited—attempts to spin the motor while the drum is stationary will cause the drum to overheat and damage the drum. Worse, such a malfunction isn't covered by warranty, and will only be repaired at the expense of the careless user. The bolts can be removed manually: simply grasp the caps with pliers and unscrew the fasteners from their sockets. The exposed holes are sealed with special plugs, which are included with the Haier.
Reliable connection to the power grid
The power connection should be planned in advance. It's best to install your new Haier appliance near a suitable outlet. The ideal distance is no more than 1.5 meters, which corresponds to the standard length of the power cord. This should be a dedicated outlet with the appropriate voltage and moisture protection. It is strictly forbidden to use an extension cord to connect to the network - these "intermediaries" are unsafe for the washing machine.
Haier washing machines have a 1.5 m long power cord.
It's important to install grounding in the electrical outlet. This precaution will protect residents from electric shocks and the premises from fire. Otherwise, the washing machine will generate electrical shocks during operation, causing inconvenience to the user and, in the event of an accident, creating a fire hazard.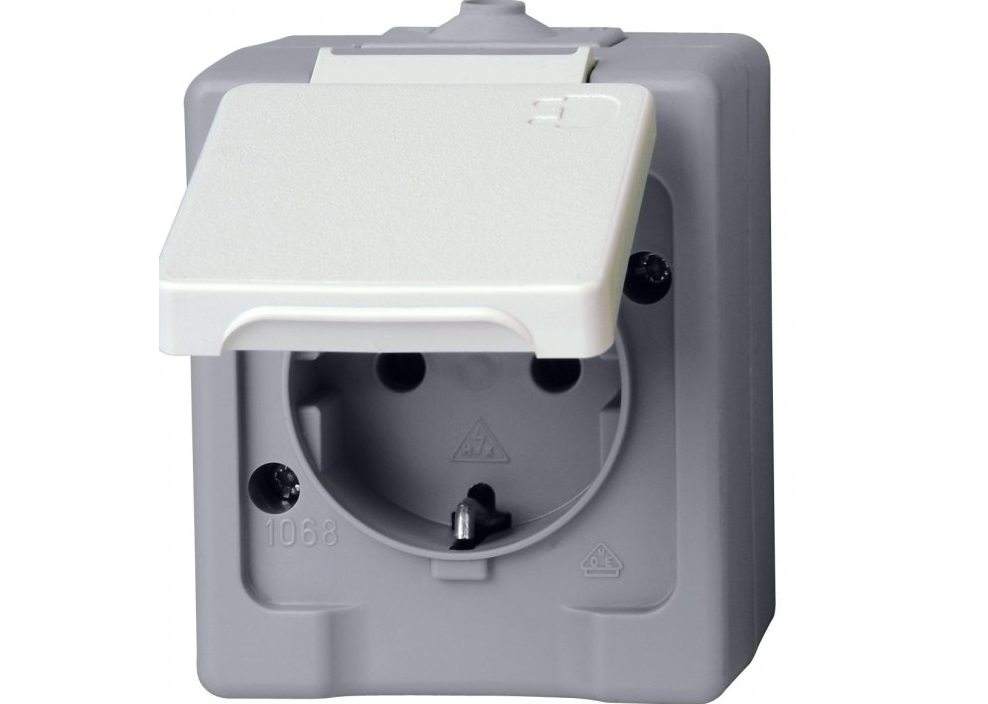
Organizing the water supply for the washing machine
The next step is connecting to the water supply. Typically, the machine's inlet hose is connected to a cold water pipe. Some Haier models also allow for a hot water connection, but this would be a poor choice. Washing machines use a heating element for heating, and constant contact with boiling water will damage the appliance. Connecting to a hot water supply poses the following risks:
- clogged filters (hot water is dirtier, more deposits will settle on the filter attachments and internal elements of the washing machine);
- poor washing (hot water is harder than cold water, so the fabric will wash and rinse worse).
You can check the instructions to see if a hot water connection is permitted. If the manufacturer doesn't allow it, looking for an alternative is risky—it's better to install a cold water supply. Otherwise, the washing machine's lifespan will be significantly reduced.
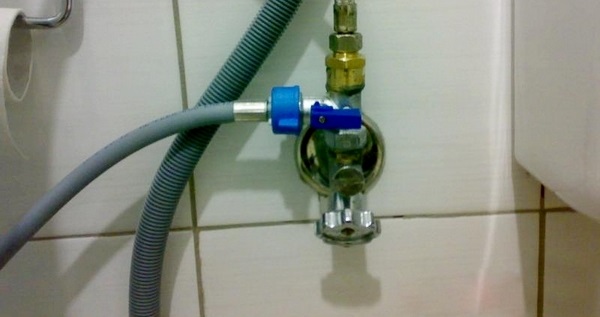
The water supply tap is opened only during washing, and remains closed the rest of the time for safety.
Connecting a washing machine to the water supply yourself is easy, especially if there was a different machine in the house before. Simply attach the inlet hose to the existing outlet. Then, open the shutoff valve and check for leaks at the connection. If there's no existing outlet, you'll have to create one yourself or call a professional. A special tee will need to be installed to create a connection to the pipe. Be sure to check the water pressure in the water supply system - the readings must comply with the standards specified in the manual.
Connecting the drain correctly
The drain is installed separately. The easiest way is to lower one free end of the drain hose into the bathtub or toilet. However, it's important to understand that this option is unsightly and unhygienic. Residual dirty water, hair, and other debris will settle on the plumbing fixtures. Another drawback is the inconvenience: the hose must be constantly removed and reinstalled.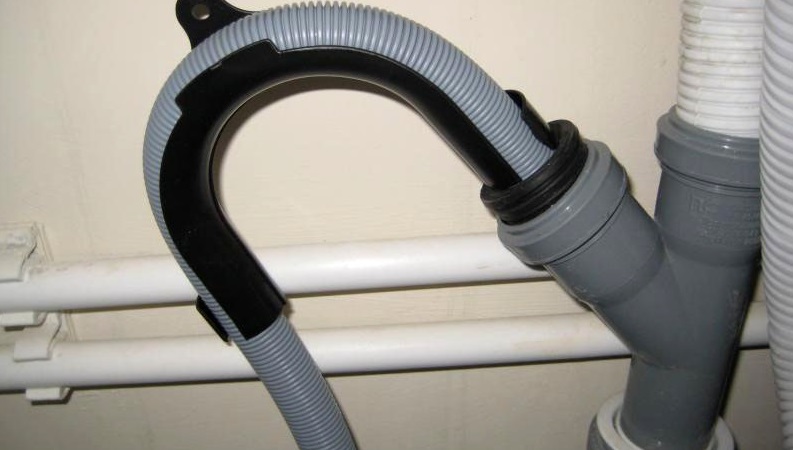
It's much safer and more convenient to connect the washing machine directly to the sewer system: through a pipe or a trap. The connection is securely fastened with a clamp to prevent leaks. Be sure to check the hose height and its bend – all required specifications are detailed in the instructions.
Typically, you need to raise the hose 50-60 cm from the floor and use a special "hook" to bend the hose. This will create a water seal, preventing odor and dirt from entering the Haier tank. Once the drainage, water, and power supply are in place, you're ready to begin the final steps. Adjust the machine body using a spirit level, adjusting the feet if necessary. Then, plug in the Haier and run a test wash.
Interesting:


1 reader comment
Add a comment
Headings
Washing machine repair


For buyers


For users


Dishwasher


Thank you! Accessible and understandable!