Vibratory plate made from a washing machine motor
 Leveling the ground for a sidewalk or foundation, compacting the soil at the bottom of a ditch or pit—these are common tasks for homeowners. While you can certainly do the job yourself, it's much easier to entrust it to machinery. A vibratory plate compactor made from a washing machine motor can help. Let's explore how to build a vibratory plate compactor. We'll explain what tools and equipment you'll need. What are these homemade devices made of?
Advantages and design of such a vibratory plate
There's no point in buying expensive equipment just for occasional gardening. You won't use it very often, and it's quite expensive. The best option is to assemble a vibratory plate yourself using a working electric motor from an old washing machine.
A homemade vibratory plate has several advantages:
- minimum costs for materials and components;
- Full compliance with the owner's requirements - you can determine the weight and dimensions of the device yourself;
- simplicity of design;
- reliability of homemade products.
Of course, there's a downside. While a ready-made device can be purchased at a store, making one yourself will require several hours of free time. If that's not a problem, you can get started.
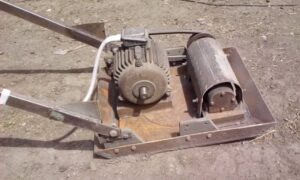
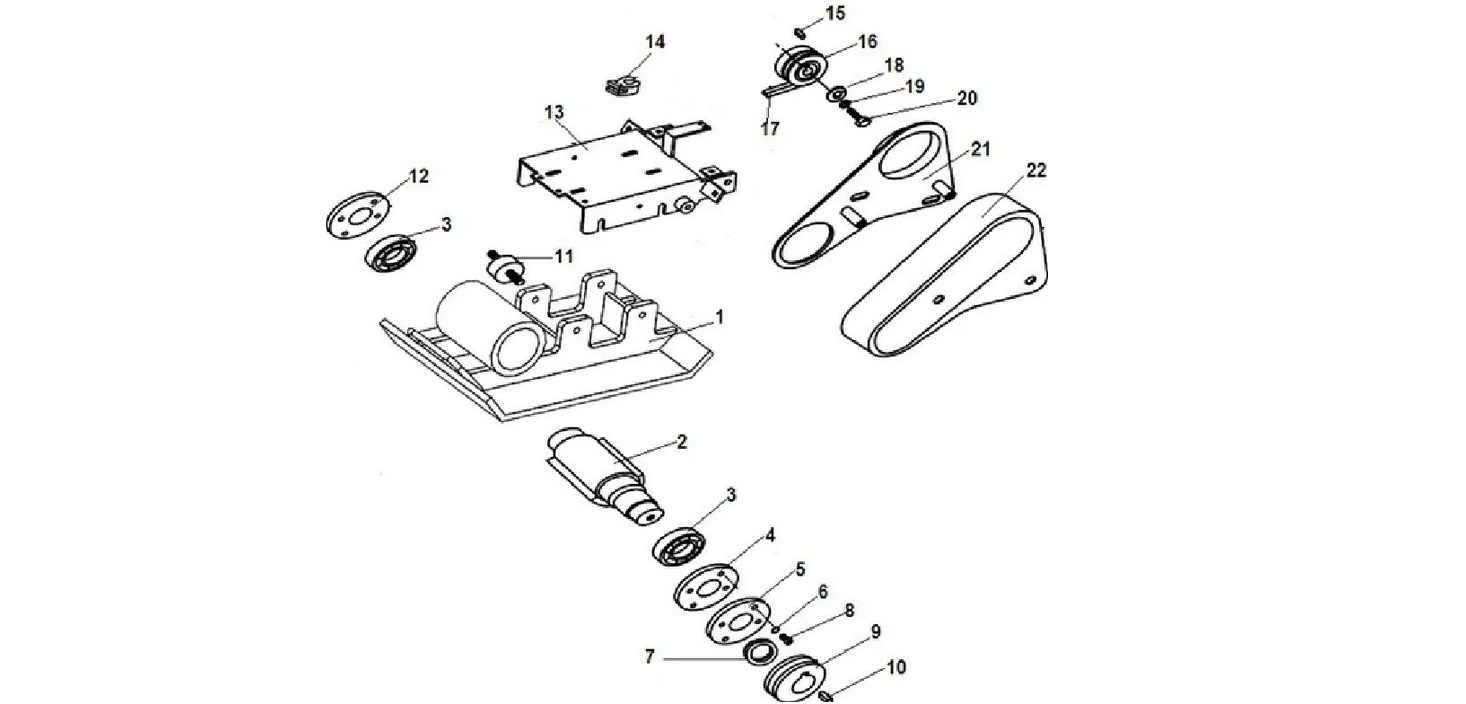
A homemade vibratory plate consists of the following elements: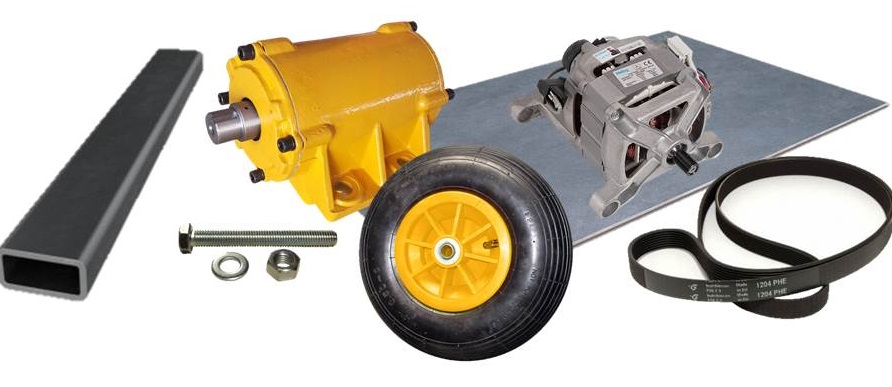
- The slab itself. It should have curves on the sides to accommodate uneven ground;
- eccentric roller;
- washing machine motor;
- frames on which the electric motor will be mounted;
- handles - you can use them to turn the device in the desired direction;
- wheels – required for transporting the vibratory plate;
- various fasteners.
Most of the components can be found in your garage or attic. Some may need to be purchased separately. In any case, a homemade vibratory plate compactor will be cheaper than a store-bought unit.
Let's gather everything we need
The process of making the device will require quite a few tools. While most homes have them, you may need to borrow some from your neighbors. You'll need to prepare:
- grinder;
- welding machine;
- welding electrodes;
- hammer;
- set of wrenches;
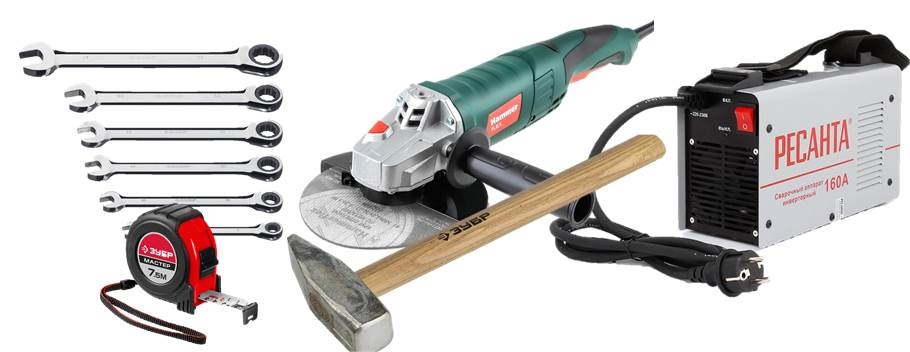
- pencil, ruler, tape measure;
- soldering iron.
During the manufacturing process of the vibratory plate, it is necessary to use personal protective equipment: a welding mask and gloves.
The heart of the homemade stove will be the motor. This can be a simple asynchronous motor from a Vyatka-automatic washing machine. If you use a brushed electric motor, you can adjust the speed. However, in this case, you'll need to add a variable resistor to the circuit.
You will also need the following during the assembly process:
- wires with plugs;
- power plug;
- A metal plate, approximately 8-10 mm thick. Carbon steel is best. Cast iron is acceptable, but make sure it is free of defects.
- channels and metal corners for frame assembly;
- handle (it is recommended to take a round pipe with a diameter of about 2-3 cm and a length of 3 meters);
- a set of fasteners (screws, bolts, nuts, etc.);
- Vibration damping elements. You can salvage parts from an old car, such as bushings, springs, etc. In a pinch, rubber shock absorbers cut from car tires will do.
These are the basic "little things" that will come in handy during the process. Once you've prepared the components, you can get to work. We'll explain how to make a vibratory plate.
We design a vibratory plate
First of all, it is necessary to calculate the future project. Draw a diagram of the vibratory plate and think about the depth to which it should compact the soil. The following devices are distinguished:
- Lightweight, weighing no more than 75 kg, they can compact soil to a depth of 15 cm. Ideal for use in garden plots and surrounding areas. Suitable for creating garden paths, sidewalks, and other simple projects.
- medium-sized, with a maximum weight of 90 kg and a compaction depth of up to 25 cm. Suitable for laying asphalt, sidewalks, etc.;
- Medium-heavy – weighing from 90 to 140 kilograms. The compaction depth of these devices can reach 160 cm. They are used for shoring up sewer pits and other more ambitious tasks;
- Heavy – weighing over 140 kg. These are professional devices used in construction.
For home use, vibratory plates weighing up to 75 kg are optimal.
The electric motor must be sized to support the weight of the homemade device. For every 100 kg of vibratory plate weight, 3.7 kW of power is required.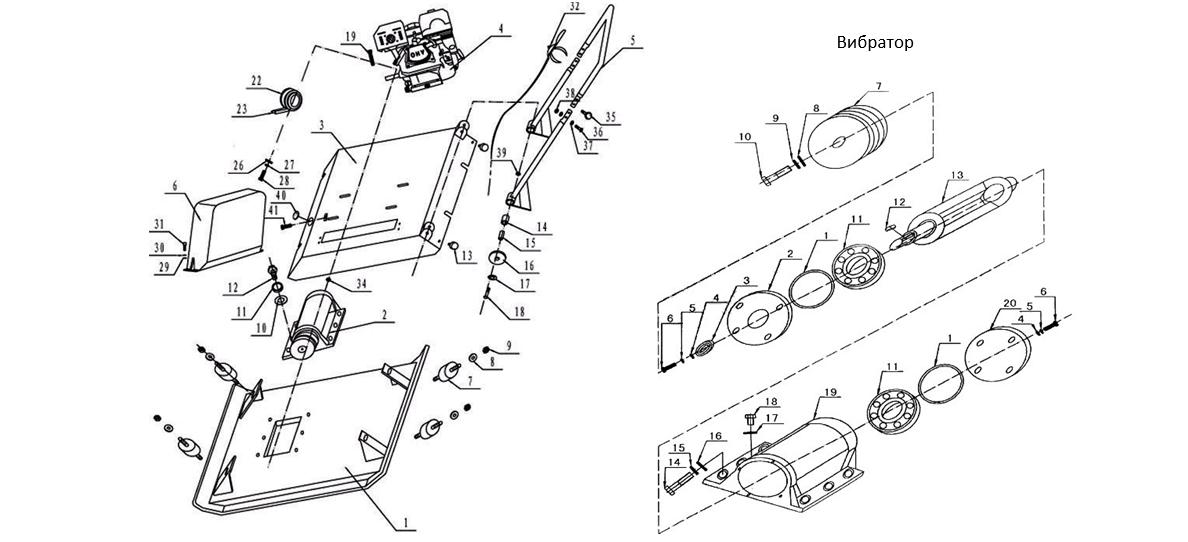
When using a single-phase motor, it's necessary to calculate the required transmission gear. The eccentric rotates at 180 rpm, or exactly three beats per second. The motor's frequency can be found on its housing or in the data sheet. Let's say it's 1000 rpm.
Then the gear ratio will be 1000/180 = 5.5. Based on this, it can be concluded that the eccentric pulley should be five and a half times larger than the pulley on the engine. Once the calculations are complete, installation can begin. It's important to remember safety precautions during the work.
First, assemble the working part. The sequence of actions will be as follows:
- From a sheet of metal, cut out a rectangle of the required size (for example, 720x400 mm), sharp edges must be rounded;
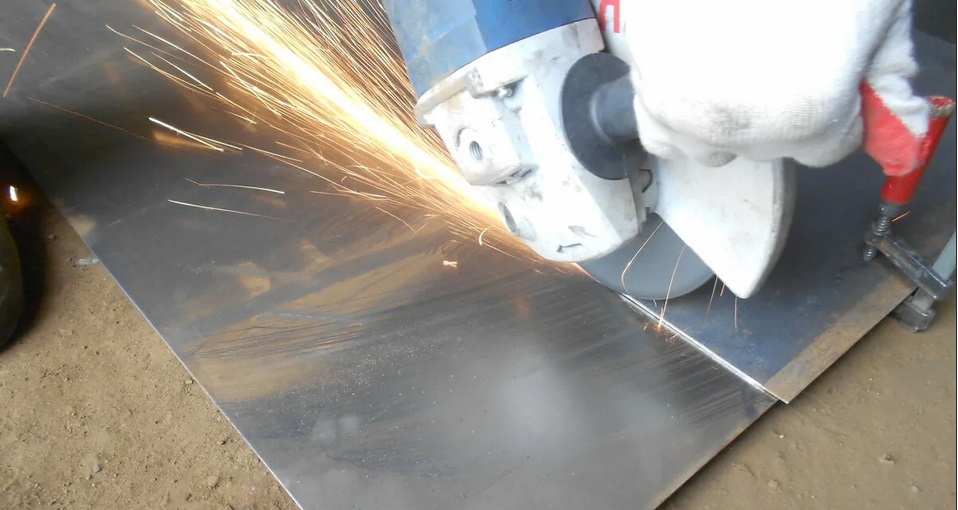
- Bend the front edge of the workpiece by 10 cm and the back edge by 7 cm. To do this, use a grinder to cut small cuts at the fold points;
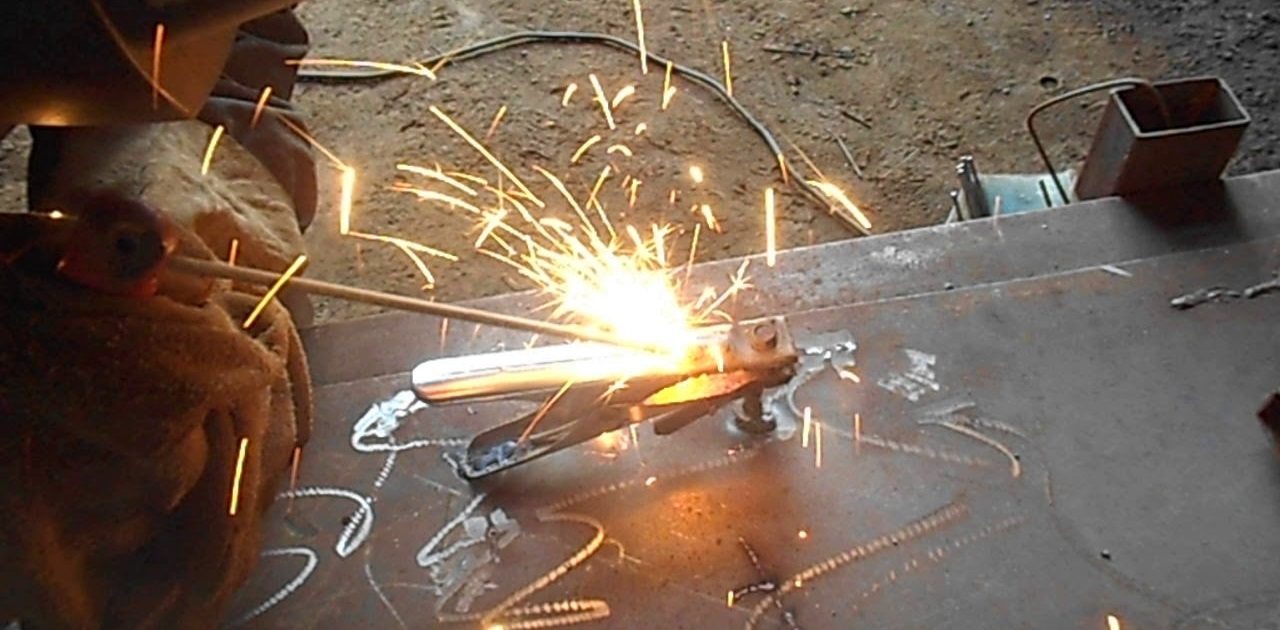
- After the edges are bent, weld the cut;
- If necessary, reinforce the fold with gussets.
Thus, the working part is prepared. Next, do the following:
- secure the motor to the frame using rubber shock absorbers;
- make a vibrator (this will be a shaft installed with eccentricity, that is, a slight tilt);
- attach a heavy metal plate to the vibrator (for imbalance);
- install plain bearings (this type will be best for operation in vibration conditions);
- install the shaft and connect it to the electric motor (via a V-belt drive);
- Treat all moving parts with a special lubricant;
- hide the drive mechanism under the protective cover;
- Assemble and secure the handle. It should be hinged to prevent vibration from being transmitted to the user's hands;
- Prime the structure and paint it. There's no need to treat the slab itself—it'll wear away quickly from constant contact with the ground.
During installation, keep in mind that the shaft pulley and the motor must be located on the same line.
This is how you assemble a vibratory plate yourself. It's certainly not a quick process, but in just a few hours you can have a working unit that's just as functional as a store-bought machine. The savings are significant.
Safety precautions when working with a vibratory plate
When working with any electrical appliance, it's essential to observe safety precautions. A vibratory plate, if handled improperly, can easily cause harm to human health. Therefore, before using this homemade device for the first time, be sure to:
- check all fasteners - they must be securely tightened;
- Treat all moving parts of the structure with a special lubricant or solid oil;
- Use a multimeter to measure the insulation resistance of the electric motor. The reading should approach infinity.
It's advisable to perform these checks before each use of the vibratory plate. The lubricant must be renewed, as it loses its properties over time.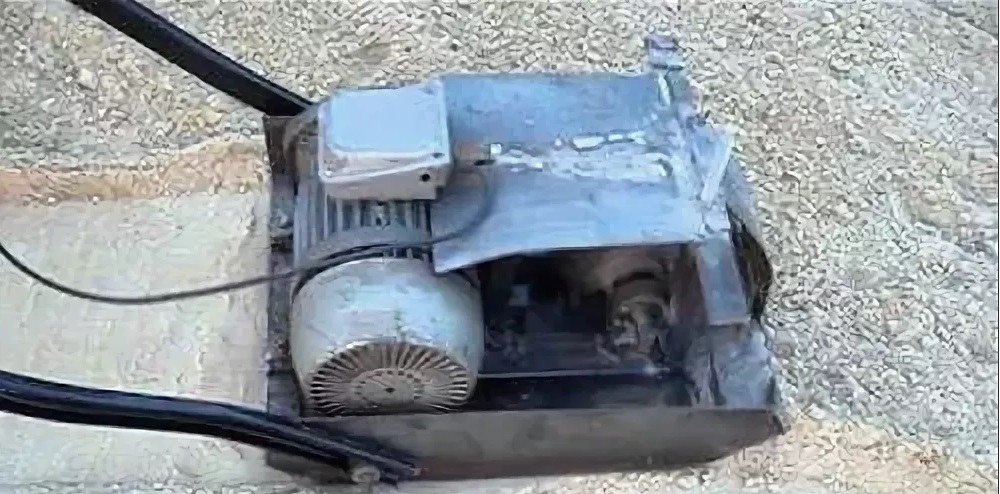
When using the vibratory plate, please observe the following recommendations:
- Do not use the device on asphalt or concrete – the machine is not designed to work on hard surfaces;
- Connect the device to the power supply through a residual-current device (RCD). This way, if the engine overheats, the vibratory plate will automatically shut off.
- Before cultivating the soil, water the area you want to plant. Wet soil is easier to compact;
- The homemade device must be stored in a dry place.
During operation, the vibratory plate moves automatically. The user uses the handle to direct it in the desired direction. To avoid constantly turning the device, the motor can be reversible by incorporating a toggle switch into the circuit.
Interesting:


")
Readers' comments
Headings
Washing machine repair


For buyers


For users


Dishwasher


Add a comment