How to replace the shock absorber on a Whirlpool washing machine?
A terrible noise, banging, or clanking during the spin cycle is a clear sign that it's time to replace the shock absorber in your Whirlpool washing machine. If you don't want to waste time, simply call a specialist, and they'll perform the repair quickly and efficiently. But if you want to save money and do it yourself, read the instructions below. This will help you avoid many mistakes and problems.
Gaining access to broken elements
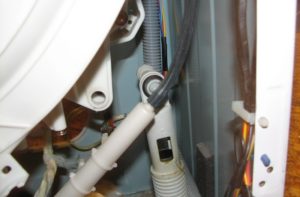
Any washing machine repair begins with disconnecting the appliance from its utilities: water, power, and sewer. The disconnected hoses should be twisted and secured to the back of the machine. Now you can move the appliance to a convenient location and begin the repair.
Step one: remove the Whirlpool top cover. To do this, unscrew the two screws on the panel tabs, slide the cover back, lift it up, and remove it. There's a plastic tab in the rinse aid compartment. Press it down and pull the detergent dispenser out of its niche.
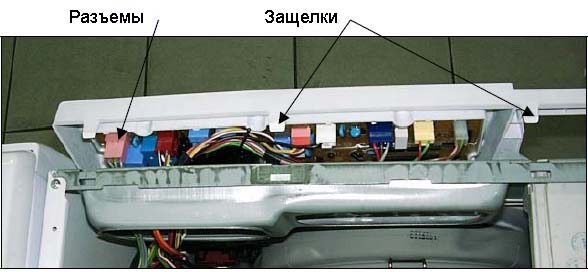
Locate and remove the screw on the side of the control panel. Also remove the fasteners located near the detergent drawer. Remove the panel itself and hang it on the right side of the case (be careful with the plastic clips). Be careful not to damage the wiring.
Now you can lay the machine on its back and remove the screws from the front, near the feet. Next, with the Whirlpool door open, pry up the clamp holding the rubber seal. Loosen it and remove it. Tuck the seal inside the machine to keep it out of the way while you work.
Disconnect the front section of the unit housing. The wiring from the sunroof locking device will follow, and it will need to be carefully separated. This will give you access to the shock absorbers and allow you to replace them.
Important! To ensure comfortable work, remove adjacent parts as needed—this will free up space and improve precision.
Some repairmen claim that removing the shock absorbers requires completely disassembling the Whirlpool machine and even removing the tub. Replacing the part will be easier, but it will also add to your workload. We try to take the shortest possible route.
Changing elements
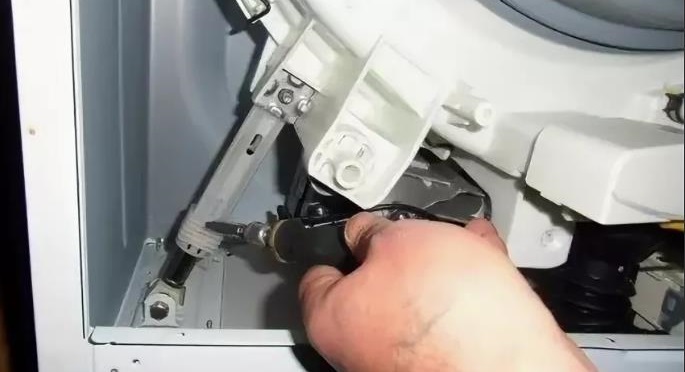
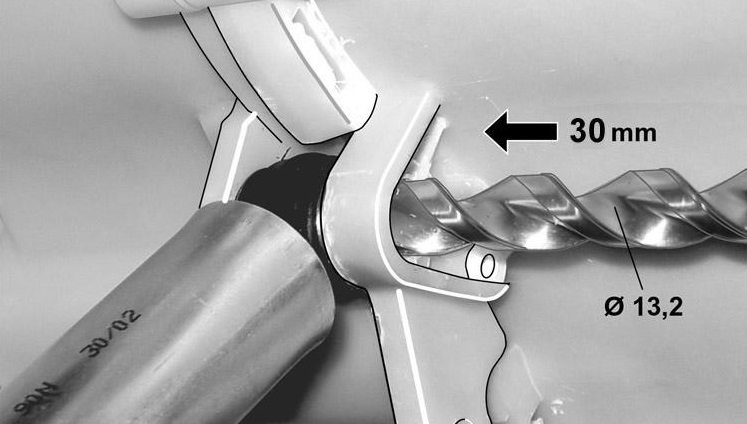
First, pump the shock absorbers to ensure they are not damaged. Unscrew the lower fasteners connecting the parts to the car body. The upper part of the shock absorbers is attached to the gas tank with plastic elements; to remove them, you will need a 13.2 mm drill bit. Insert the drill bit into a screwdriver and unscrew the fasteners. Separate the broken elements.
Before replacing parts, make sure you haven't mixed up the right and left shock absorbers. Install and bolt the new parts to the body and tank. In practice, the original bolts supplied with the shock absorbers are too long and need to be shortened by literally a couple of millimetres. Otherwise, they may jam the drum during installation. Shake the tub to check the operation of the parts. Reassemble the Whirlpool in reverse order. If you have any questions about DIY repairs, we suggest you watch our instructional video.
 A terrible noise, banging, or clanking during the spin cycle is a clear sign that it's time to replace the shock absorber in your Whirlpool washing machine. If you don't want to waste time, simply call a specialist, and they'll perform the repair quickly and efficiently. But if you want to save money and do it yourself, read the instructions below. This will help you avoid many mistakes and problems.
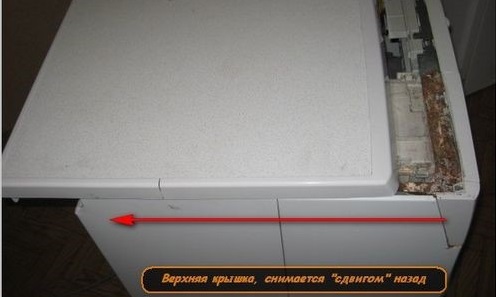


Add a comment