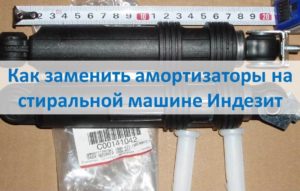
How to replace shock absorbers on an Indesit washing machine
Most washing machine shock absorber replacements are quick and easy, but not with Indesit washing machines. Accessing the Indesit shock absorbers requires removing the electric motor, drive belt, and the tricky clips on the shock absorbers themselves. This task can be challenging to accomplish blindly, so we recommend familiarizing yourself with the step-by-step instructions, including the challenges and nuances of installation. Read on for a complete explanation.
Let's get to the details
Worn shock absorbers make themselves known through increased noise, vibration, and the machine jumping during operation. To avoid worsening the drum balance issue, the dampers need to be replaced. But the "diagnosis" is confirmed by disassembling the machine, so let's get to work. We follow the established procedure strictly.
We disconnect the unit from the power supply, turn off the water supply, and disconnect the drain and inlet hoses.
We provide free access to the washing machine from all sides.
We drain the residual water through the waste filter.
We remove the tray.
We unscrew the bolts at the back and remove the back wall.
We remove the drive belt by pulling the rubber towards ourselves while simultaneously rotating the pulley.
We disconnect all the wires leading to the engine.
Important! To facilitate reassembly, note the location of the motor wires with notes, markers, or a photograph.
Using a 13 mm wrench, loosen all fasteners holding the electric motor.
We pry up each fastener with a flat-head screwdriver, pushing out the stuck joints.
We pull the engine towards ourselves and remove it.
The path to the shock absorbers is open, but they can only be reached from the bottom. So, cover the floor with rags and turn the machine on its side. Be prepared for some water to spill out; quickly mop it up, avoiding contact with the wiring and control board.
Problems removing shock absorbers
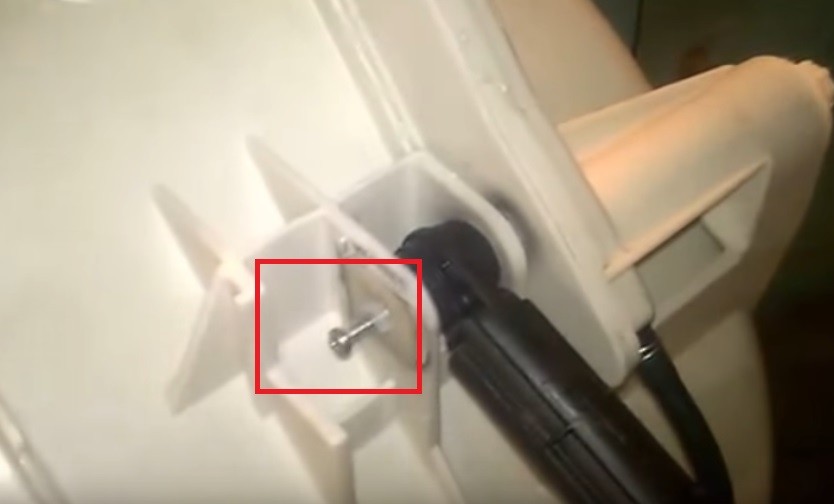
The shock absorbers on an Indesit car can be difficult to remove quickly and easily due to special fasteners in the form of expanding plugs, known to repairmen as "nails." Each plug passes through the shock absorber and two plastic plates that hold the strut in place on either side. Its outer base is completely smooth, so it is almost impossible to pull it out.
Caution! It is not recommended to try to reach the plug from the other side with a screwdriver—there is a high risk of damaging the thin plastic and compromising the pressure in the pressure switch system.
The problem can be solved by upgrading the plug in the following way:
find a drill with a diameter of 2-2.5 mm and a length of at least 20 cm;
Use a drill or screwdriver to drill a hole in the middle of 3-4 cm, but you can also go all the way through;
screw a self-tapping screw into the hole made, leaving 3-4 cm on the surface;
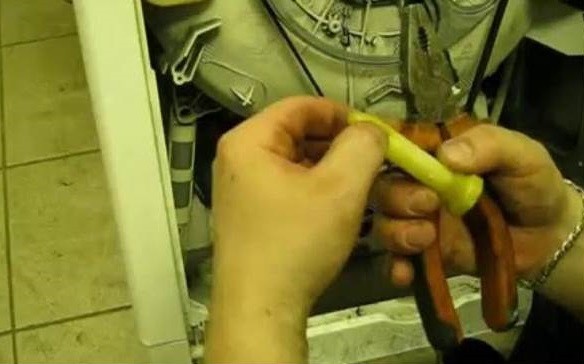
Use pliers to grab the screwed-in screw and pull it towards you.
carefully remove the screw with the “nail”;
pull the damper out of the grooves.
To remove the second shock absorber, repeat the algorithm, turning the washing machine over onto the other side. The main thing is to select a drill bit of the optimal length and reach the lock. If you cannot get close to the racks, it is recommended to take the tank out and try again.
Installing a new part
Now it's time to replace the old shock absorbers. Naturally, this will require new parts, which can be purchased at service centers or online. There are two ways to find suitable parts: bring the previously used shock absorber to a consultant or write down the make and serial number of the washing machine. Reassembly is as follows:
we take out the shock absorber and, applying force, place it in special grooves;
take the previously used plug and carefully drive it into the hole on the damper through both partitions;
we install the drill bit into the drill and, turning on the reverse gear, remove the screw;
we check the reliability of the fixation;
repeat the steps with the other stand, turning the machine over onto the opposite side;
if the tank was removed, then we install it back into the body;
we put the engine back in place, tighten the screws securely and connect all the supply wiring;
we put on the drive belt, not forgetting to rotate the pulley;
We lift the machine gun “to its feet” and screw on the back wall.
The final step is to run the washing machine on the maximum spin cycle. If the machine is stable throughout the entire cycle, vibration is moderate, and there is no humming or knocking noise, then the DIY repair has been completed correctly. Otherwise, return to the disassembly stage and tighten the retaining shock absorbers.
Hi everyone. I had to replace the shock absorbers on my Indesit wiu82. As expected, I watched a ton of videos and was prepared for the hassle, but my machine's drum mount turned out to be a little different, further from the seam. In the end, I was able to easily push the bushings out using a wrench and wooden watches of varying lengths. I then used the same watch to push them back in. I didn't remove anything from the drum; the entire job was done with the machine lying on its side. The only thing I did was secure the drum with shipping screws—it's more convenient that way.
 Most washing machine shock absorber replacements are quick and easy, but not with Indesit washing machines. Accessing the Indesit shock absorbers requires removing the electric motor, drive belt, and the tricky clips on the shock absorbers themselves. This task can be challenging to accomplish blindly, so we recommend familiarizing yourself with the step-by-step instructions, including the challenges and nuances of installation. Read on for a complete explanation.
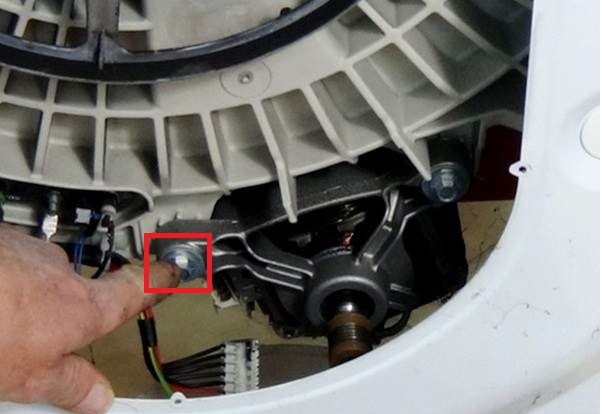


Hi everyone. I had to replace the shock absorbers on my Indesit wiu82. As expected, I watched a ton of videos and was prepared for the hassle, but my machine's drum mount turned out to be a little different, further from the seam. In the end, I was able to easily push the bushings out using a wrench and wooden watches of varying lengths. I then used the same watch to push them back in. I didn't remove anything from the drum; the entire job was done with the machine lying on its side. The only thing I did was secure the drum with shipping screws—it's more convenient that way.