How to replace the shock absorbers on a Zanussi washing machine
 Every modern washing machine is equipped with a high-quality shock-absorbing system to prevent excessive vibration during the wash and spin cycles from damaging your "home helper." The wash tub is supported by dampers at the bottom, while springs hold it in place at the top. Unfortunately, this system isn't perfect and can begin to fail over time. If you've noticed your machine making strange noises during the cycle, wobbling, or even bouncing, you likely need to replace your Zanussi washing machine's shock absorbers. Let's learn how to properly test and replace this important component.
Let's take a look at the parts that need to be replaced.
Removing old dampers and installing new ones is very easy if you follow our instructions carefully. You don't even need any special tools other than those you can find around the house. At the same time, doing the repair yourself will allow you to save on calling a specialist, who may ask for several hundred dollars to replace this unit.
First, you need to carefully study the element's design to make it easier to work with. Zanussi equipment includes friction dampers, which have a fairly simple design.
- Frame.
- Piston.
- A movable plate through which the spacer is fixed.
- Spacer.
- Guide.
- Sliding surface.
Each of these components is essential for effective vibration handling. The element's housing is stationary, while the piston extends slightly from the housing, and a guide ensures the movement of each element in the desired direction. The individual parts move to create resistance. Ultimately, the damper absorbs the increased vibration of the wash tub and dampens it, preventing damage to other key components of the washing machine from the high loads. The newest Zanussi "home helpers" have dampers without ageing springs, and therefore last approximately 5-8 years.
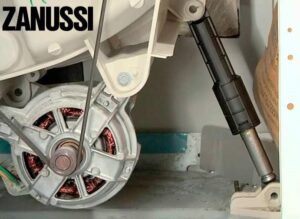
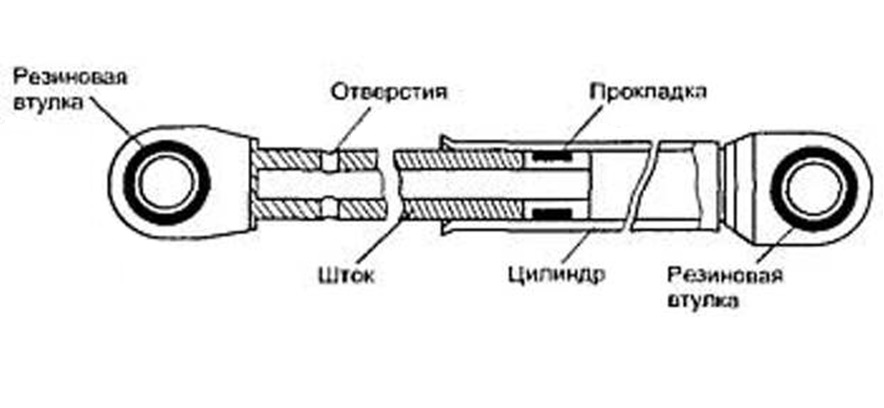
As for older SMs from this company, they feature classic shock absorbers consisting of a housing, cylinder, and sliding rod. This device also contains a rubber seal with a special non-drying lubricant, necessary for ensuring perfect sliding.
The damper itself is attached to the appliance body at the bottom with a silent block, while the movable plunger-piston is bolted to the washing machine's drum at the top. Special sliding supports are located near the dampers to ensure longitudinal movement. To prevent axial displacement, these supports are secured with dowels.
We make sure that the shock absorber system requires repair.
As already mentioned, on average, original dampers work effectively for 5-8 years, and sometimes even longer. However, the shock absorber unit may only last a few years if the user does not follow the basic operating rules. What generally influences the condition of dampers?
- Wear and tear during active use of the device.
- Failure due to excessive loads and continuous increased vibration.
- Washing out technical grease from the damper housing.
- Failure to comply with the rules and safety precautions, such as frequently overloading the device, installing it on an uneven floor covering, not leveling it with a building level, etc.
Most often, dampers fail due to ignoring the operating rules of the washing machine.
The last point deserves closer examination. It includes regularly overloading the drum, for example, washing 7 kilograms of clothes when the manufacturer's limit is 5 kilograms, frequent spinning at maximum speed, and washing clothes while the drum is unbalanced instead of correcting it. Each of these factors, taken individually, significantly reduces the lifespan of the shock-absorbing unit, not to mention the situation where the user regularly violates all the manufacturer's recommendations. How can you tell when the shock-absorbing unit needs replacing?
- The machine started to wobble and vibrate heavily during the spin cycle.
- The device started making strange noises while operating, such as knocking and rumbling.
- The washing machine jumps in place or even moves around the room by jumping.
- The drive belt regularly falls off the pulley.

- A leak has appeared from under the hatch due to the fact that the drum regularly hits the body of the device, the rubber seal breaks and water flows out through the damaged cuff during the working cycle.
Any of these symptoms may indicate the dampers are gradually failing. However, there's no need to rush to install new ones, as the problem could lie in another key component of the Zanussi washing machine. Therefore, a system diagnostic is necessary to accurately pinpoint the problem.
Fortunately, it's very easy to check the quality of the shock absorbers at home. To do this, remove the washing machine lid, press down on the drum so that it drops at least 5 centimeters, and then quickly release it. If the drum immediately returns to its normal position, everything is fine. However, if the drum begins to rock erratically, the shock absorber assembly needs to be replaced immediately.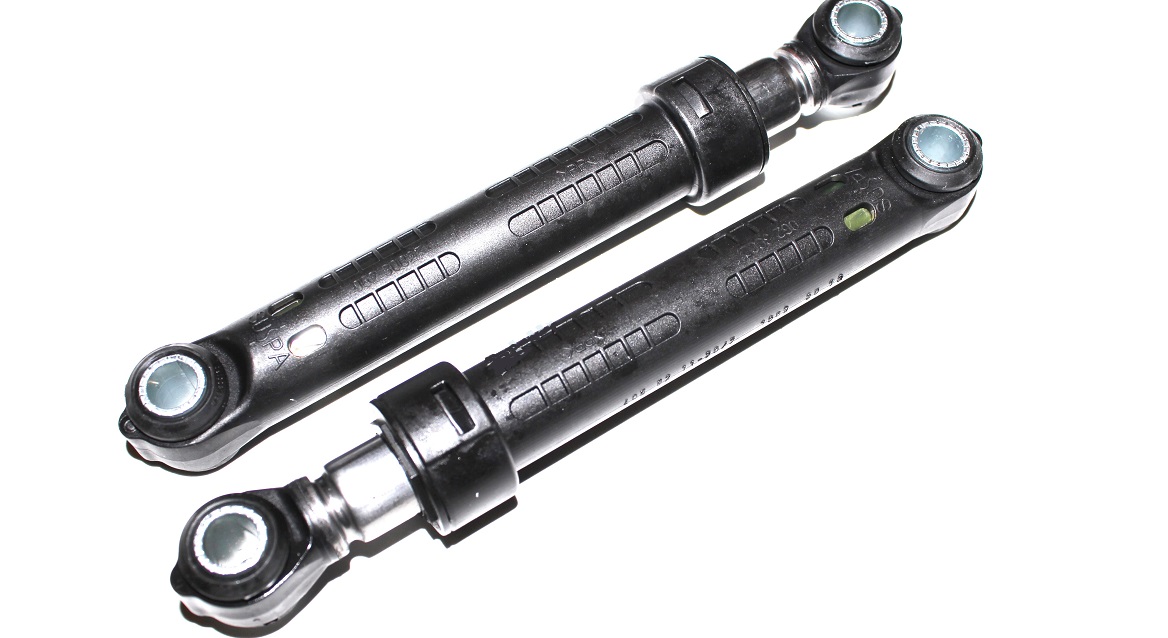
Using the machine in this condition is not recommended, as you risk damaging not only the dampers but also the bearings and the wash tank. Therefore, if the tank continues to wobble for a long time after the inspection and does not return to its original position, you should further inspect the racks. These can be found at the bottom of the machine, which requires partial disassembly.
How to get to the racks?
You can also disassemble household appliances yourself, even if you have no previous experience repairing washing machines. To do this, you need to prepare thoroughly and follow the instructions carefully.
- Disconnect the Zanussi washing machine from the water supply, sewerage system and electricity.
- Disconnect the drain and inlet hoses.
- Move the device away from the wall to make it easier to work with.
- Remove the bolts holding the top panel in place, then remove the cover itself.
- Remove the detergent drawer.
- Unscrew all control panel fasteners.
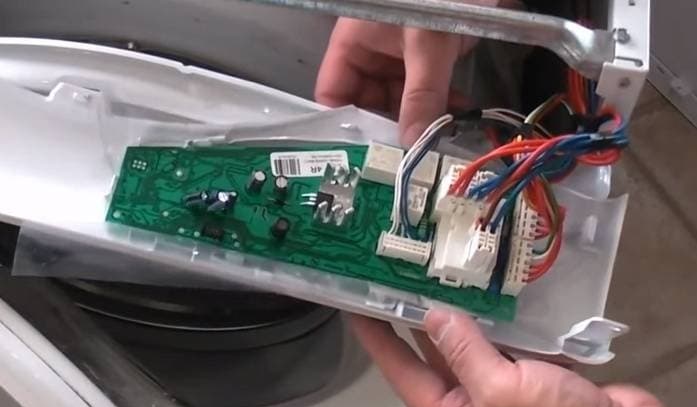
- Carefully remove the control panel itself.
Take a photo of the correct wiring connections to the control panel to make it easier to put back in place during reassembly.
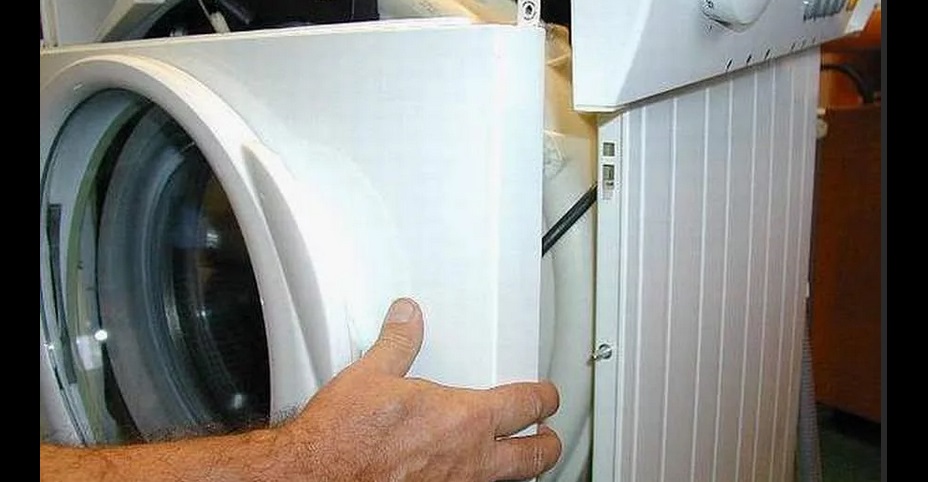
- Place the machine on its back wall, having first placed some unnecessary towels or rags underneath it.
- Remove the fasteners holding the bottom of the device.
- Open the hatch door and remove the outer rubber seal clamp.

- Insert the cuff into the drum.
- Disconnect the wires from the door lock.
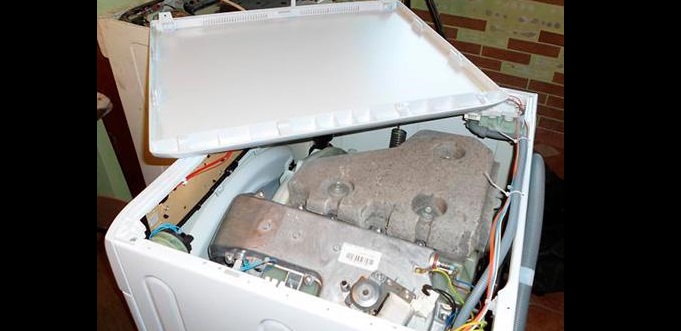
- Remove the front panel of the CM.
Once you remove the front panel of the cabinet, you'll be able to see the dampers. Repair technicians typically disassemble the appliance down to the wash tub to make removal easier, but you can shorten the process and replace the dampers by laying the appliance on the floor without removing the tub.
We dismantle damaged parts and install new ones.
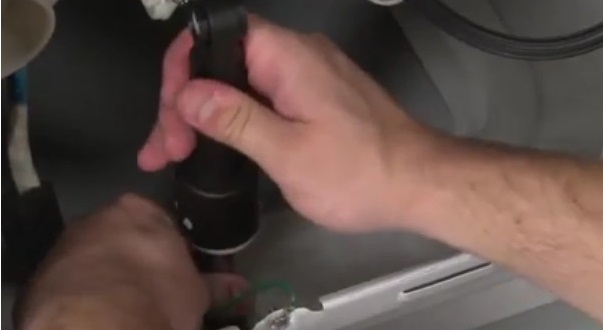
The last step in replacing a damaged shock absorber unit is to remove the dampers themselves. This is easy to do from below, where you only need to loosen the fasteners, but from above you will have to tinker a little, since the parts there are secured with special plastic holders that are not so easy to remove. What to do for this?
- Take a 13 mm drill bit.
- Prepare a regular screwdriver.
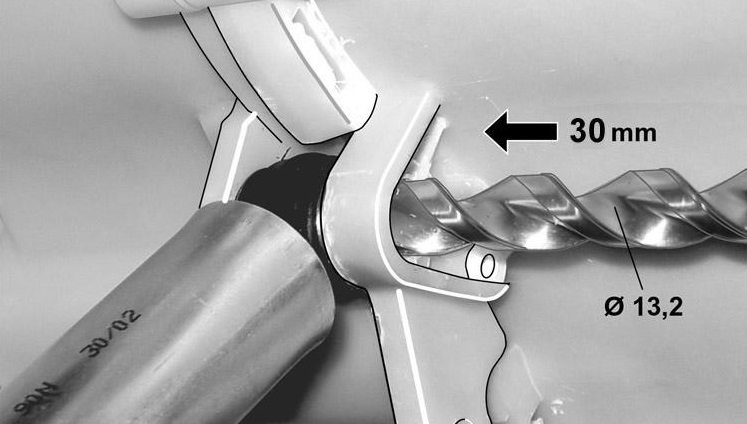
- Carefully drill the fasteners.
Do not attempt to repair damaged original dampers from a Zanussi washing machine, as they can only be replaced with new ones.
After disassembling, you should take the damaged parts to the store as a sample to make it easier to find a suitable spare part. You can also simply write down the washing machine's serial number to use for searching for a replacement.
Be sure to clean the mounting surfaces of the components before installing the dampers. It's also a good idea to apply a special lubricant to the grooves after cleaning. After these steps, you can install the new strut, secure it with bolts from below, and then attach it to the tank through the pre-drilled holes.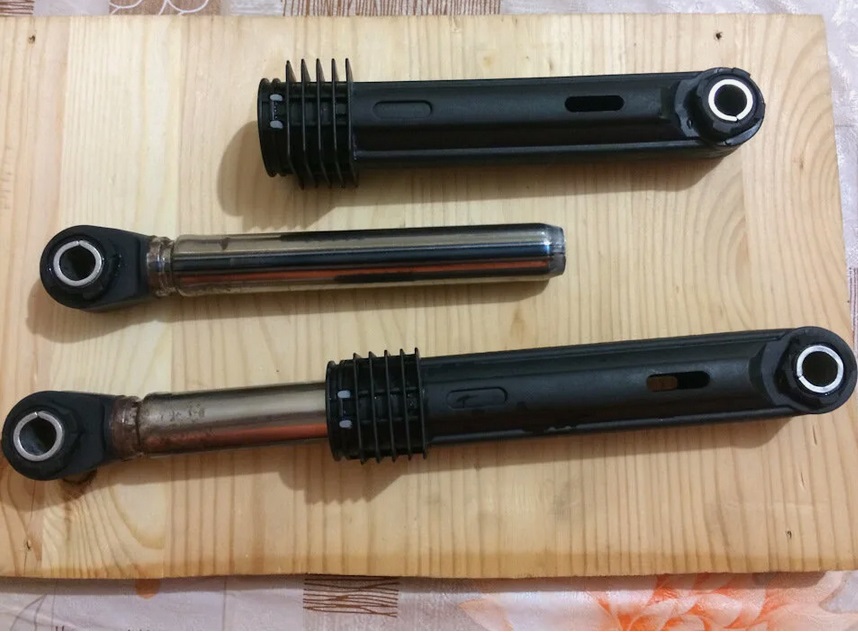
Once the replacement is complete, you'll need to reassemble your "home helper" following our instructions in reverse order. To do this, you'll need to attach the front panel, connect all the wires to the door locking device, return the rubber seal to its normal position, secure it with a clamp, and replace the bottom of the machine. Finally, all that's left to do is place the washing machine in an upright position, secure the control panel, and insert the detergent drawer.
At this point, you can check the dampers again by manually pressing on the wash tub to see how quickly it returns to its normal position. If everything is OK, you can close the hole with the top panel and run a test cycle to ensure the unit no longer makes noise during operation, bounces, or shifts.
Interesting:


Readers' comments
Headings
Washing machine repair


For buyers


For users


Dishwasher


Add a comment