How to replace the spider on an Ariston washing machine
Many users, upon hearing the phrase "drum spider," don't even understand what they're talking about. This part secures the washing machine's metal drum to the spindle. If the spider is damaged, the washing machine cannot be used.
Replacing the spider on an Ariston washing machine is no easy task. However, if you're willing, you can do the job yourself, without the help of a professional. We'll explain how to remove the old part and install the new one, as well as the tools you'll need. We'll also explain in detail the disassembly process.
Let's start disassembling the washing machine.
It should be noted right away that the work ahead will not be easy. To replace the drum spider, you will have to almost completely disassemble the Ariston automatic machine. The first step requires only a screwdriver and a drill. Here, you'll remove the top, front, and rear panels of the car, detach the instrument cluster, and remove the powder-cooling tray.
Before disassembling, be sure to de-energize the washing machine by unplugging the power cord from the socket.
Never disassemble a washing machine while it's plugged in. This is the most important safety rule. Always ensure the power is off. Here's what to do next:
turn off the water inlet valve at the machine entrance;
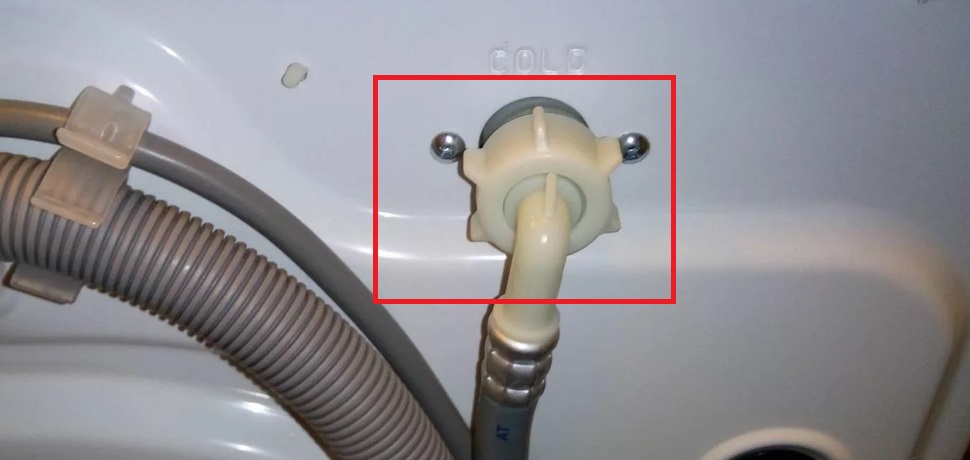
unhook the inlet hose from the washing machine body (it is screwed on at the back, in the upper corner of the washing machine);
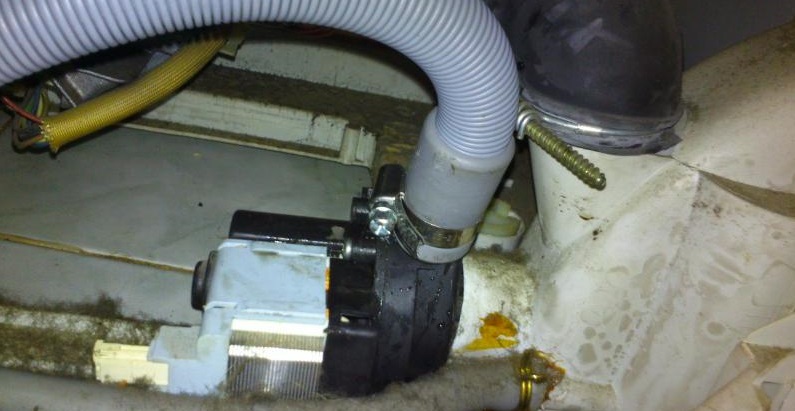
disconnect the drain corrugated pipe (it is connected from below to the pump);
Having dealt with the latches, remove the lower decorative panel of the washing machine;
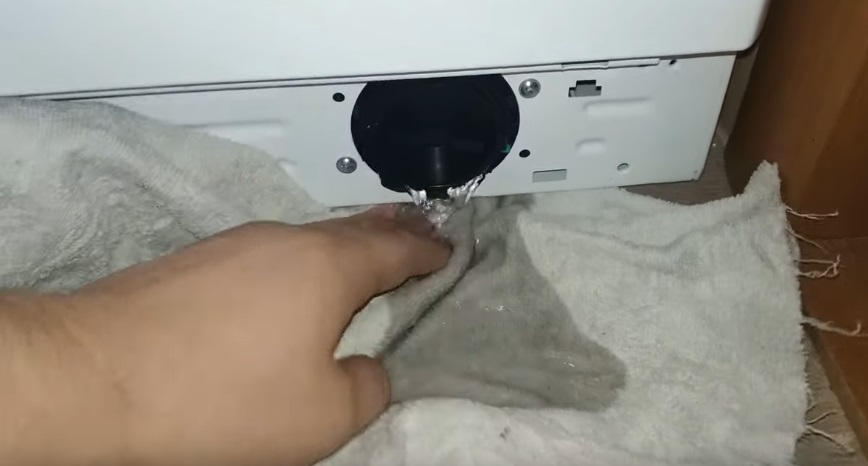
Place a small container under the washing machine, in the area where the waste filter is located;
unscrew the waste container plug half a turn (water will flow out of the hole);
remove the debris filter completely;
Move the washing machine to the center of the room to have access to the body from all sides;
remove the two bolts securing the top panel of the machine;
pull off and set the “top” of the case aside;
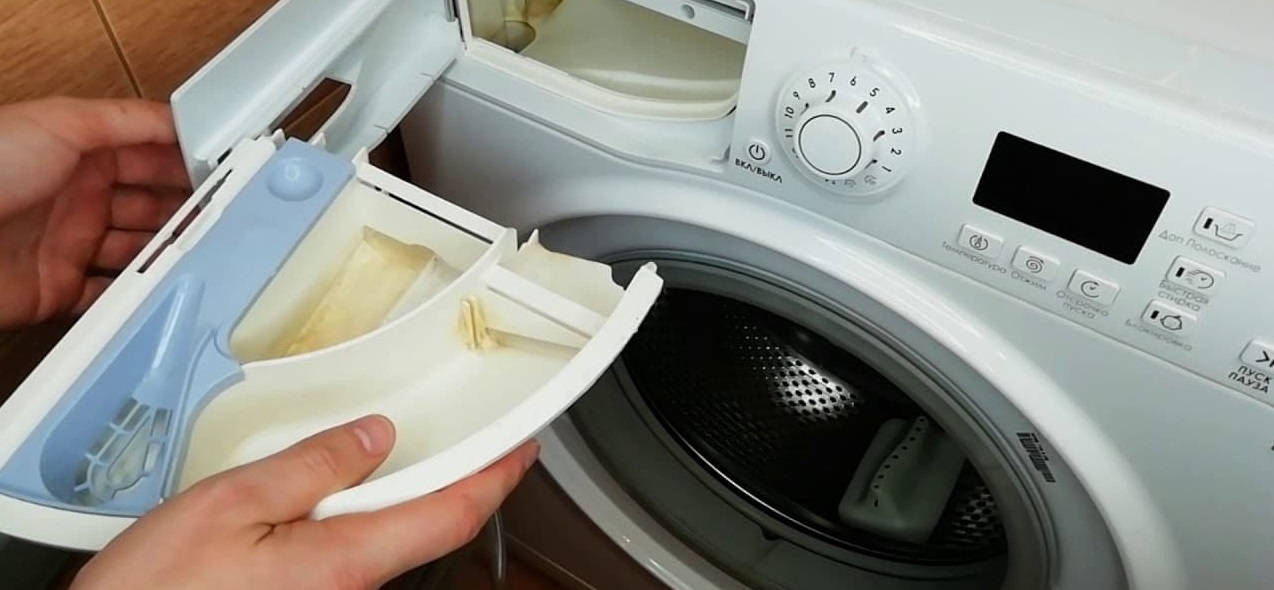
remove the detergent drawer;
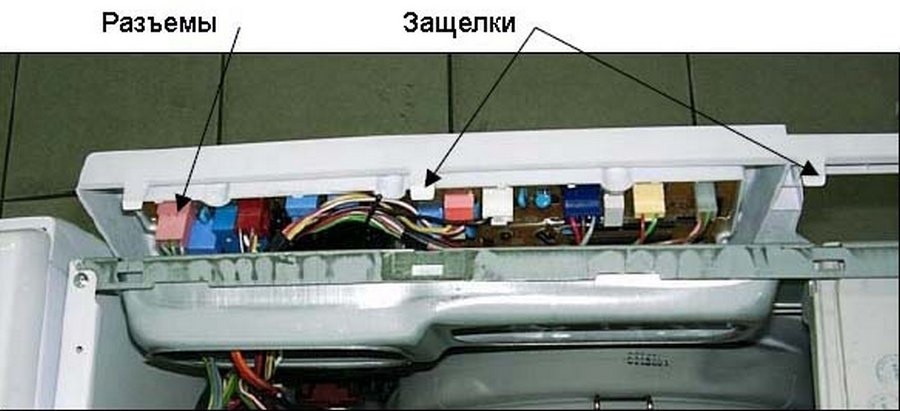
unscrew the screws securing the control panel;
Take a photo of the wiring diagram running from the control panel to the electronic module;
unhook the contacts from the dashboard and set it aside;
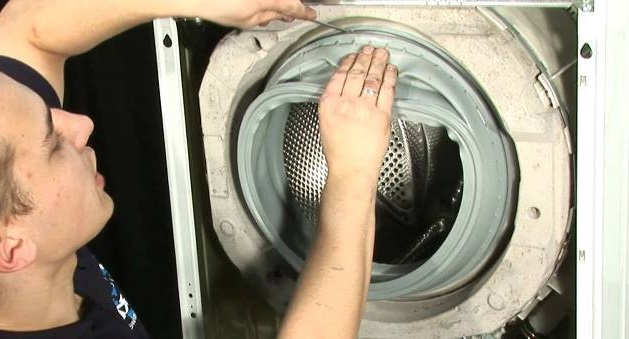
open the hatch door wide;
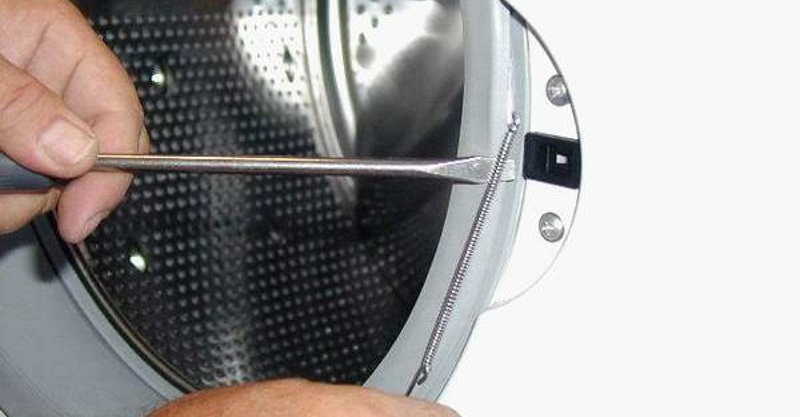
Use a screwdriver to hook the spring that secures the outer clamp of the drum cuff;
remove the clamp from the washing machine;
insert the sealing rubber into the drum;
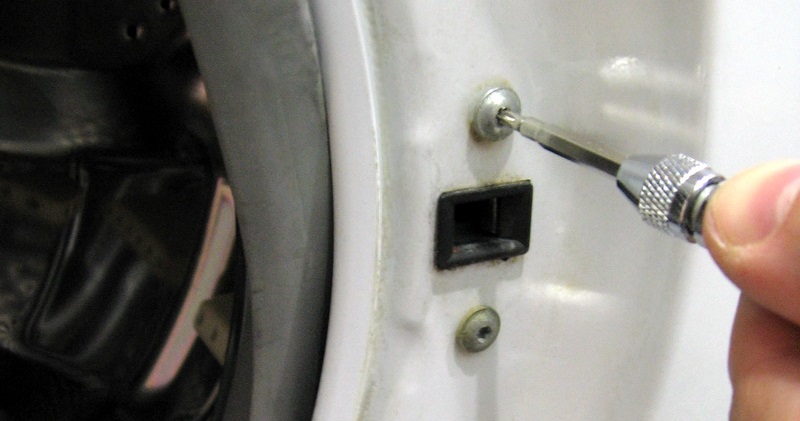
remove the screws located around the perimeter of the front wall of the machine;
Unscrew the bolts securing the hatch lock, remove the wiring from the lock;
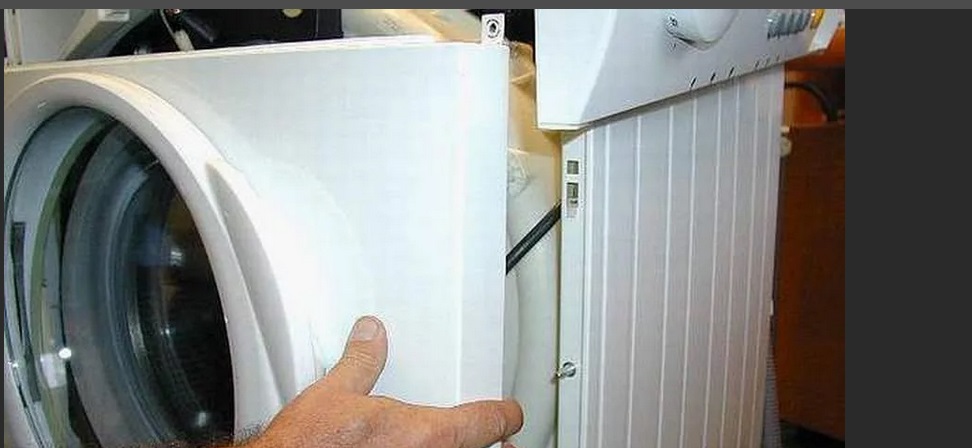
remove the front wall of the case;
remove the top iron bar;
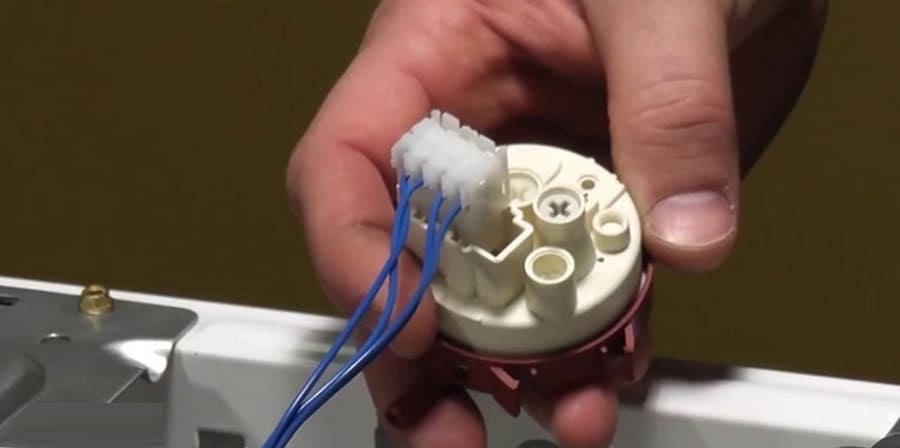
unscrew the bolt securing the water level sensor;
disconnect the fitting and remove the pressure switch from the washing machine;
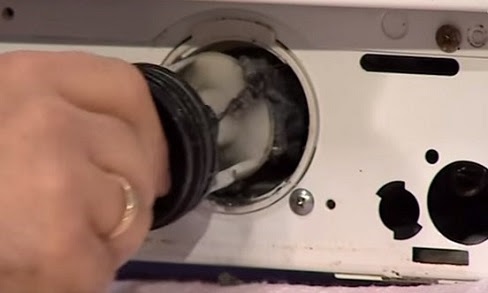
remove the inlet valve fasteners, reset its plugs and pull the elements out of the machine;
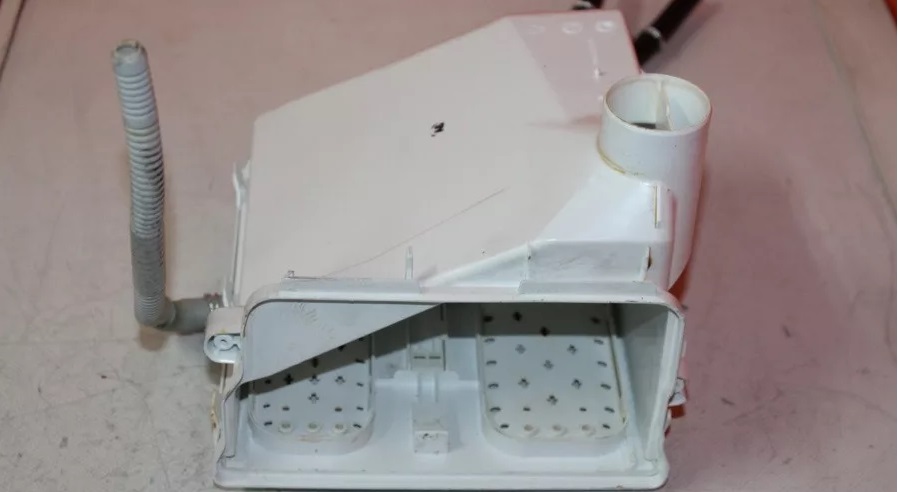
Remove the detergent dispenser hopper along with the filling valve and hoses from the washing machine body.
It's best to photograph the wiring diagram, connector locations, and valve locations—this will help you avoid making mistakes when reassembling the Ariston washing machine.
This is the order in which you disassemble the body of your automatic washing machine. If you have no idea where any of the parts are, check out the manual. It contains a schematic diagram of the washing machine's internal structure.
Don't scatter the screws you remove. It's important not to lose any fasteners. This will prevent problems during reassembly.
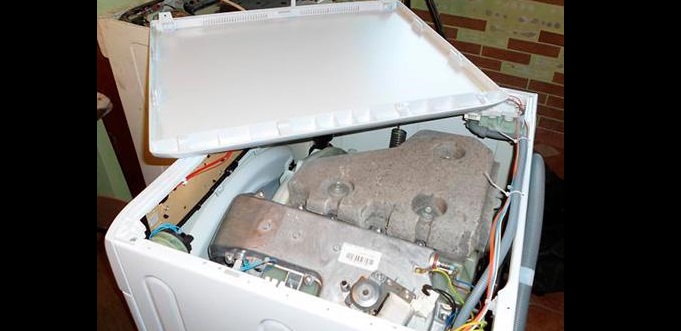
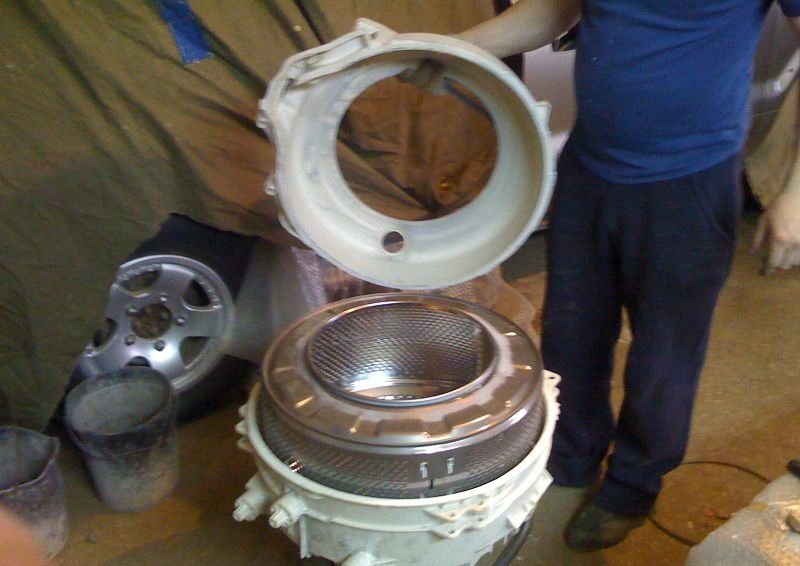
Removing the main tank from the machine body
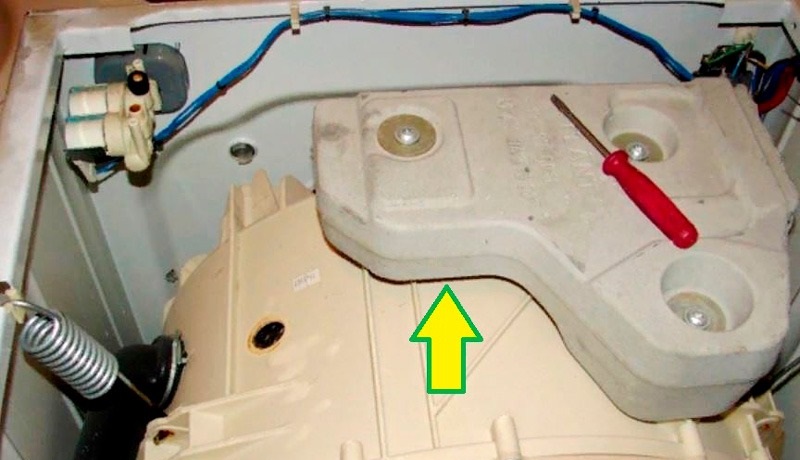
After the first stage of disassembly, access to the washing machine's tank and its associated components is available. Now, all components that interfere with the tank's removal must be removed one by one. It is necessary to remove the counterweights, engine, heating element, drive belt, drain pump, pipes, and shock absorbers.
First, the counterweights are removed. The top weight is removed first. The stone is secured with a pair of fasteners; these need to be unscrewed. Then, the concrete block itself is dismantled.
There's another weight at the bottom, in front. The bolts that secure the counterweights are loosened with a crank. A suitable socket is placed on the handle. Care must be taken; dropping the concrete block can not only break it but also injure you.
Further algorithm of actions:
remove the rear wall of the case;
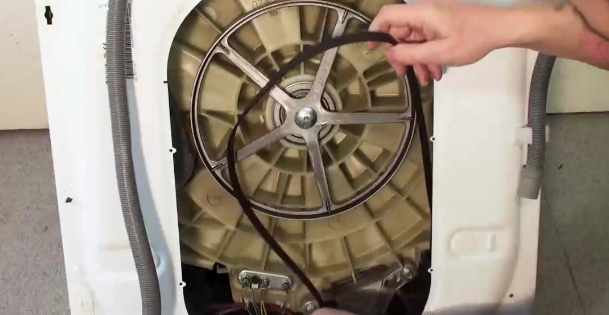
remove the drive belt from the drum "wheel";
remove the inner clamp of the drum cuff;
remove the sealing rubber from the tank;
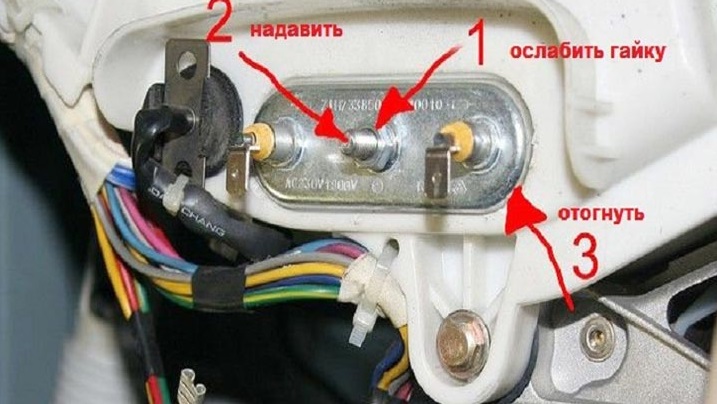
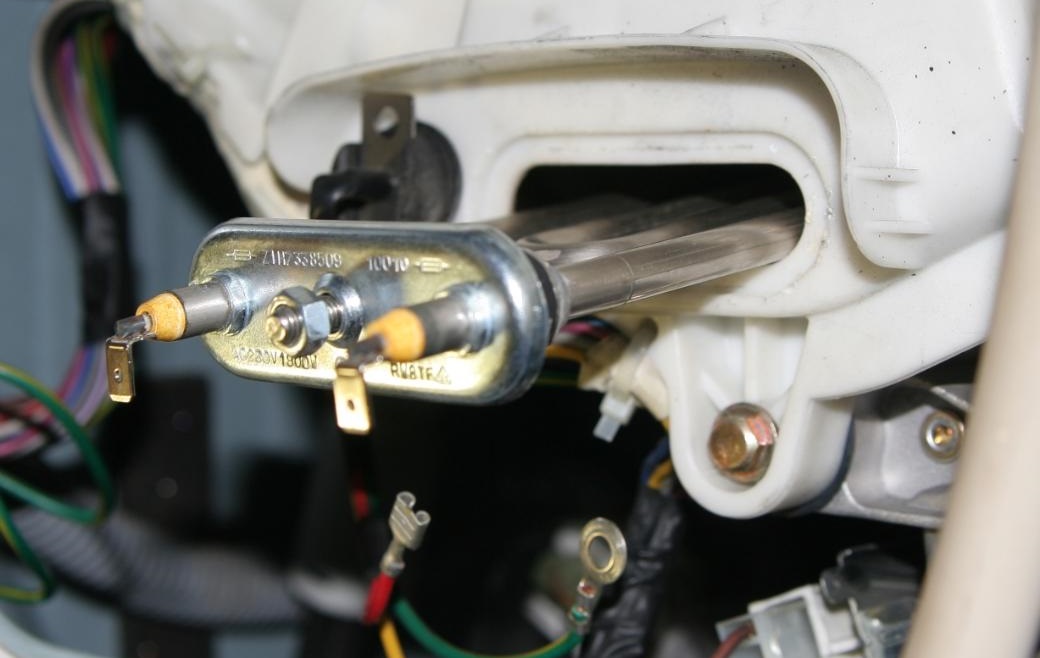
reset the heating element contacts (there will be three wires in total, a pair of power wires and ground);
disconnect the temperature sensor connector from the tank;
loosen the nut securing the heating element;
countersink the central bolt, then remove it from the heating element housing;
disconnect the drain pipe from the tank;
Disconnect the electric motor connector and the remaining wires going to the motor;
Remove the bolts that secure the shock absorbers.
To remove the lower shock absorber mounting brackets, you'll need a 13mm socket. The bolts can be removed from all sides. The gas tank hangs from above on four springs, which will need to be unhooked. Once the struts and upper springs are disconnected, nothing will interfere with the reservoir's removal.
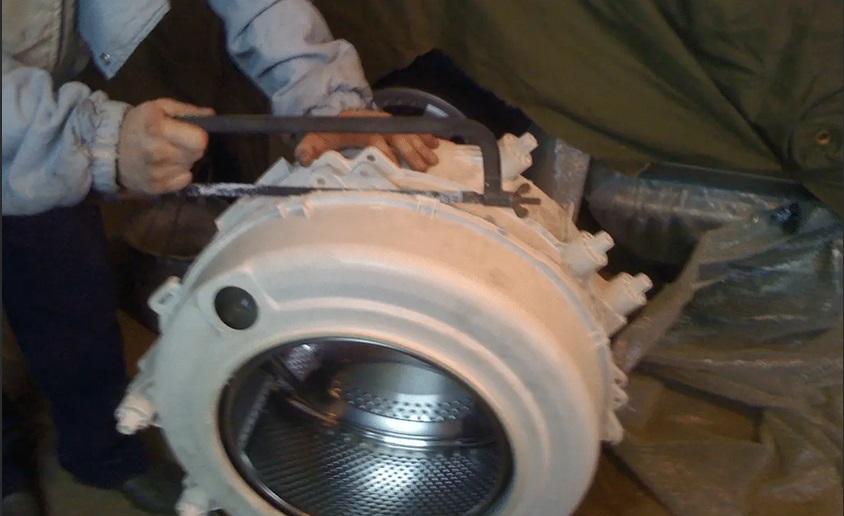
The drum is accessed through the top of the washing machine. It's difficult to remove the drum alone; it's best to have a helper. The drum and tank weigh several dozen kilograms.
Place the tank on a flat, horizontal surface, preferably the floor, with the pulley facing up. Now disconnect the electric motor from the tank. The motor is held in place by two bolts, which need to be removed.
Next, the shock absorbers are disconnected from the tank. Once the shock absorbers are removed, you can begin disassembling the tank itself. To replace the universal joint, you need to gain access to the inside of the plastic tank.
We remove the crosspiece from the non-separable tank
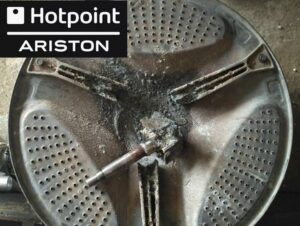
And finally, the most difficult stage of repair. Ariston washing machines are equipped with non-detachable tanks. You will have to cut the container in half in any case, so you will need to be resourceful here.
To replace the crosspiece, you will have to cut the non-separable plastic tank of the Ariston washing machine.
The tank is cut using a hacksaw or grinder. Before you begin, mark six dots along the center edge of the tank and drill holes. The purpose of this is to allow the tank halves to be screwed together during reassembly.
Now we can begin disassembling. The tank is cut along the weld seam. It's important to take your time and do everything evenly and carefully. The top half of the tank can be set aside; we'll continue with the bottom half.
The next task is to remove the drum from the plastic half. The crosspiece is located at the back of it. Usually, this is easy to remove.
In severe cases, if the universal joint is severely damaged, the drum will easily "pop out" of the tank, with the shaft remaining in the plastic container. In any case, the procedure is as follows:
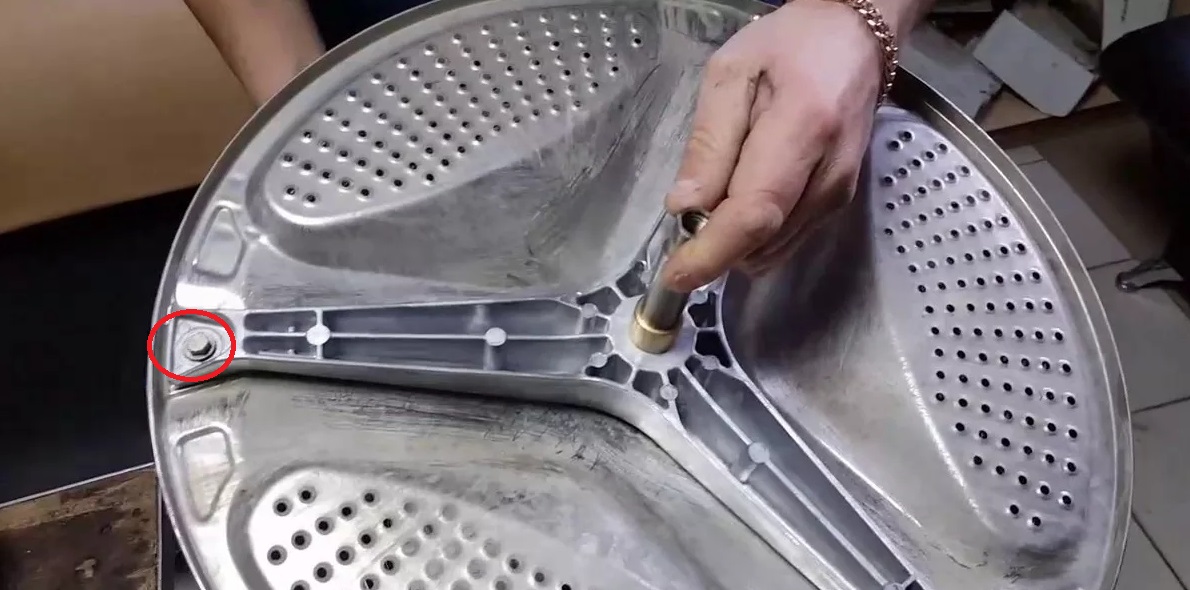
remove the screw securing the drum pulley;
unhook the pulley from the tank and set it aside;
push the bolt into the plastic container;
Remove the three bolts securing the drum crosspiece.
If the fasteners are stubborn or show signs of wear, treat them with WD-40. Then try removing the universal joint again.
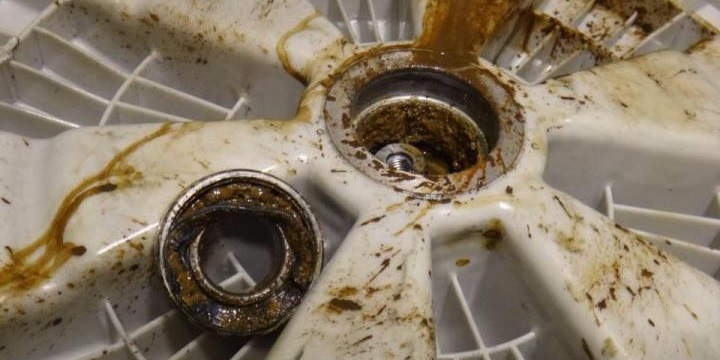
Components are purchased for a specific Ariston washing machine model. It's important to clean the mounting surface of any dirt, rust, or wear marks. Only then can a new universal joint be installed.
It's recommended to immediately inspect the bearing assembly to avoid repeating such a complex disassembly in the near future. If the rings are damaged, they should be replaced along with the seal.
Wear of bearings is indicated by knocking during spinning, humming, play in the drum, and strong vibration of the washing machine body.
The new crosspiece is secured with three bolts. Then the drum is placed in the tank, and the pulley is attached to the structure. Now comes another challenging task: assembling the plastic container so that it remains airtight. Here's the procedure:
sand the edges of both halves of the tank;
lubricate the edges of the parts with silicone sealant (water-resistant);
place one half of the tank on top of the other;
wait 2-3 hours for the sealant to harden;
screw the tank parts together with bolts (using the holes made earlier).
After this, the automatic washing machine is reassembled in reverse order. The tank is returned to the housing, suspended by springs, and secured with shock absorbers. Now all previously removed parts, wires, and hoses are connected to the tank.
Finally, reassemble the washing machine body, replacing the control panel, front panel, and lid. Be sure to run a test cycle with no laundry in the drum. Observe how the machine handles the task, whether it completes all program steps, and whether there are any leaks.
A spider doesn't fail in a couple of days. The component breaks gradually. The first "symptoms" of a malfunction may appear several months later. The washing machine will begin humming and knocking during operation.
What causes spider wear? Hard water, poor-quality detergents, exceeding the load capacity, and drum imbalance. Prevention is better than cure. Therefore, it's important to minimize any negative impact on the component.
 Many users, upon hearing the phrase "drum spider," don't even understand what they're talking about. This part secures the washing machine's metal drum to the spindle. If the spider is damaged, the washing machine cannot be used.
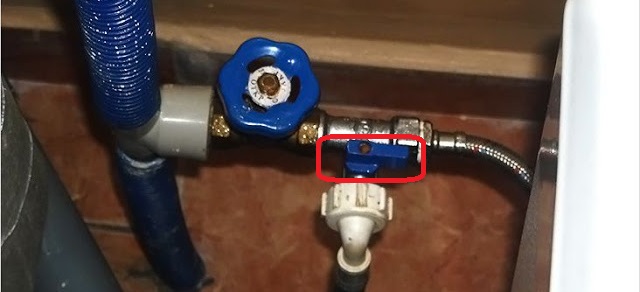


Add a comment