How to replace the spider on a Candy washing machine
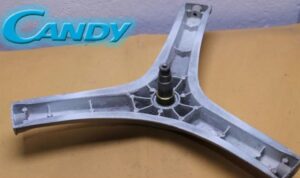
Many users don't even realize what the spider is for or where it's located in the washing machine. This part attaches the drum to the shaft. It experiences increased stress and becomes deformed over time. Repair is impossible in this case; replacement of the components will be required.
We'll explain how to replace the spider on a Candy washing machine. What tools will you need? What are the challenges of the upcoming repair?
The first stage of disassembling the machine
It should be understood that in order to replace the crosspiece, you will need to almost completely disassemble the washing machine.First, remove the outer elements: the top cover of the housing, the front wall, the control panel, and the powder receptacle. At this stage, a screwdriver or a drill will be enough tools.
Before disassembling, be sure to de-energize the washing machine by unplugging the power cord from the socket.
The job ahead is labor-intensive, but interesting. You'll need to remove the drum from the washing machine, and before doing so, disconnect all the wires, pipes, and components. So, in the first step:
de-energize the washing machine;
turn off the water supply to the washing machine by turning the shut-off valve on the pipe;
disconnect the inlet hose from the washing machine body, it is screwed on the back, in the upper corner;
unhook the drain hose - it is fixed, on the contrary, at the bottom;
remove the lower front false panel;
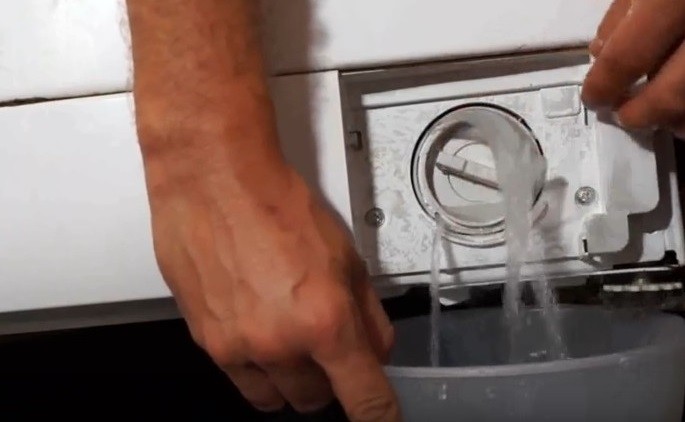
Place a low container under the machine in the area where the dust filter is located;
carefully unscrew the drain filter (when you remove the “trash can,” water will flow out of the hole);
Move the machine away from the wall and furniture so that you can reach it from all sides;
Unscrew the screws securing the washing machine lid;
remove the top panel and put it aside;
remove the powder tray;
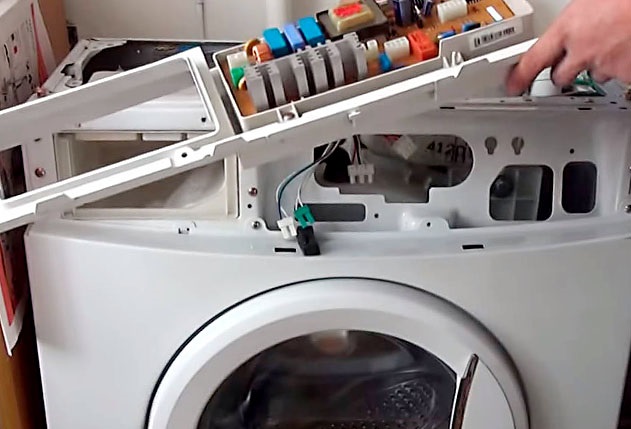
remove the bolts holding the instrument panel;
Take a photo of how the wires connecting the instrument panel and the electronic module are connected;
reset contacts from the control panel;
move the dashboard aside;
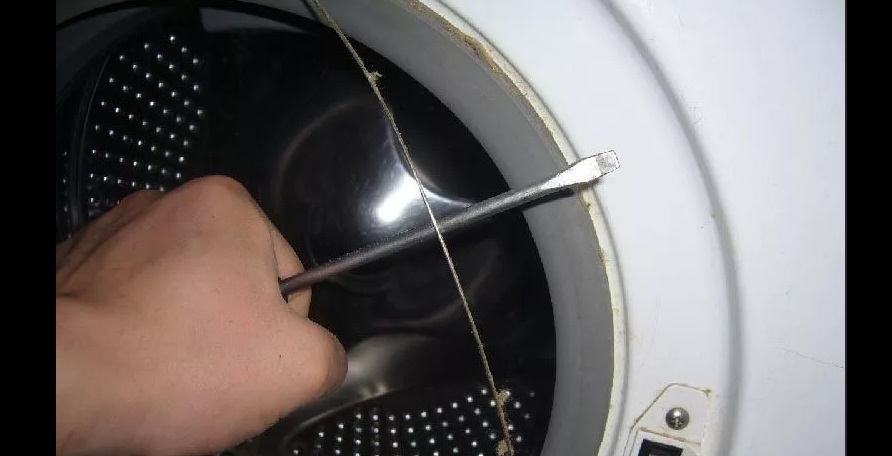
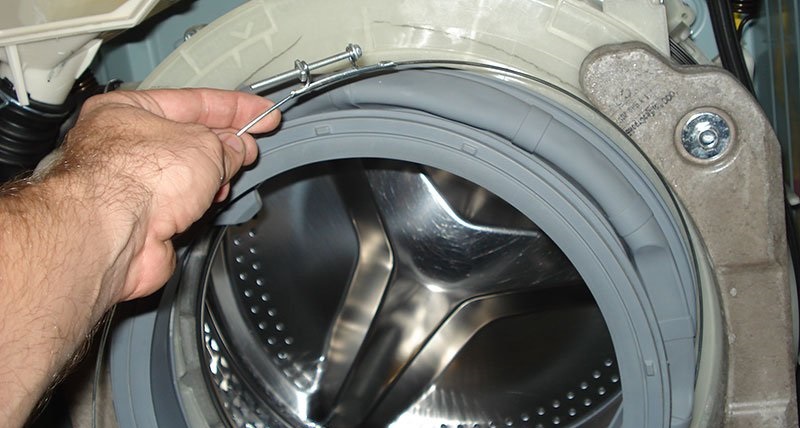
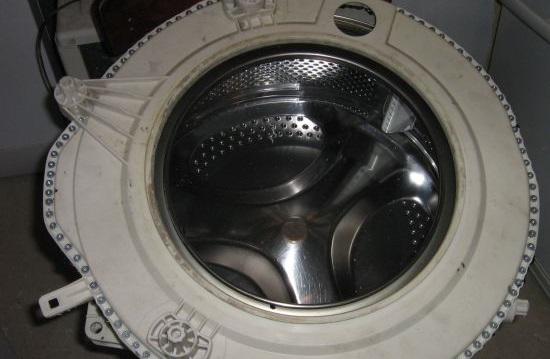
open the washing machine drum door wide open;
Use a screwdriver to secure the clamping mount of the cuff;
Once you have secured the fastening, remove the metal ring from the washing machine;
tuck the edges of the cuff into the drum;
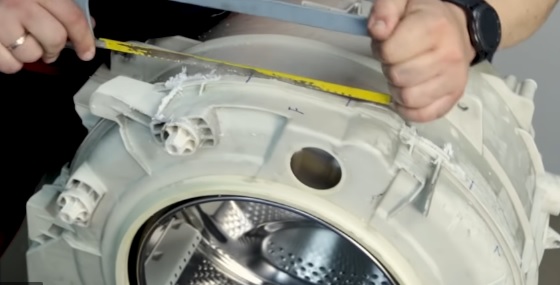
unscrew the bolts holding the front wall of the device;
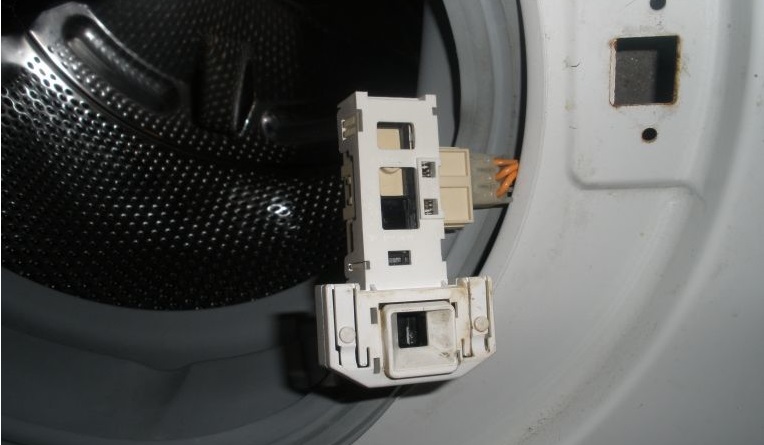
disconnect the UBL contacts;
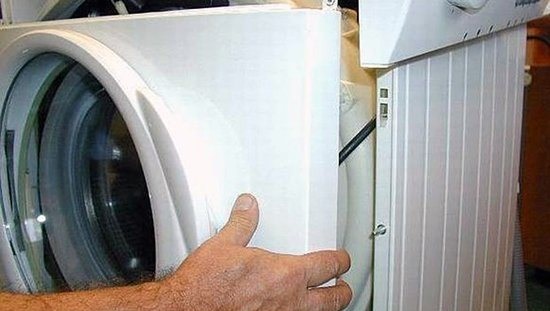
remove the front panel of the machine;
remove the iron bar from the top of the machine;
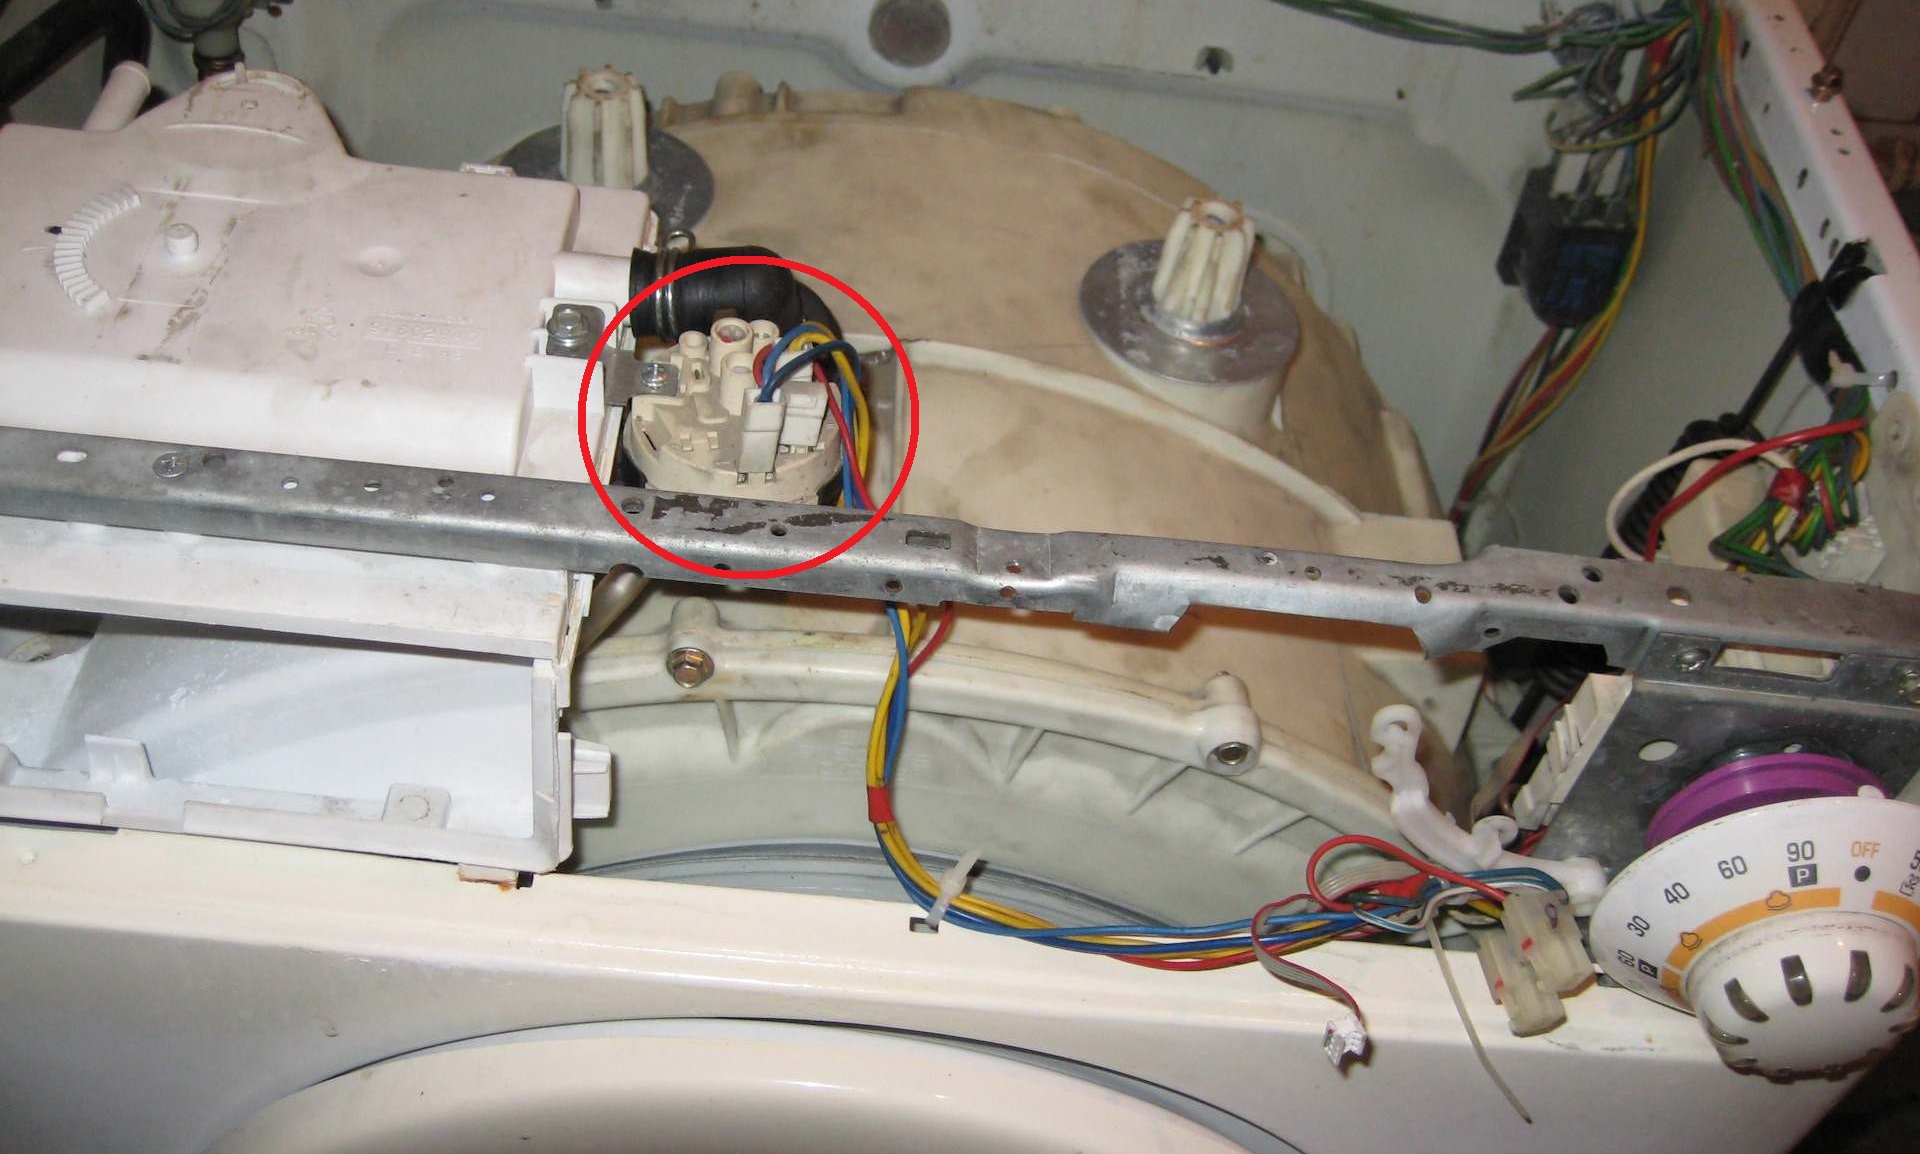
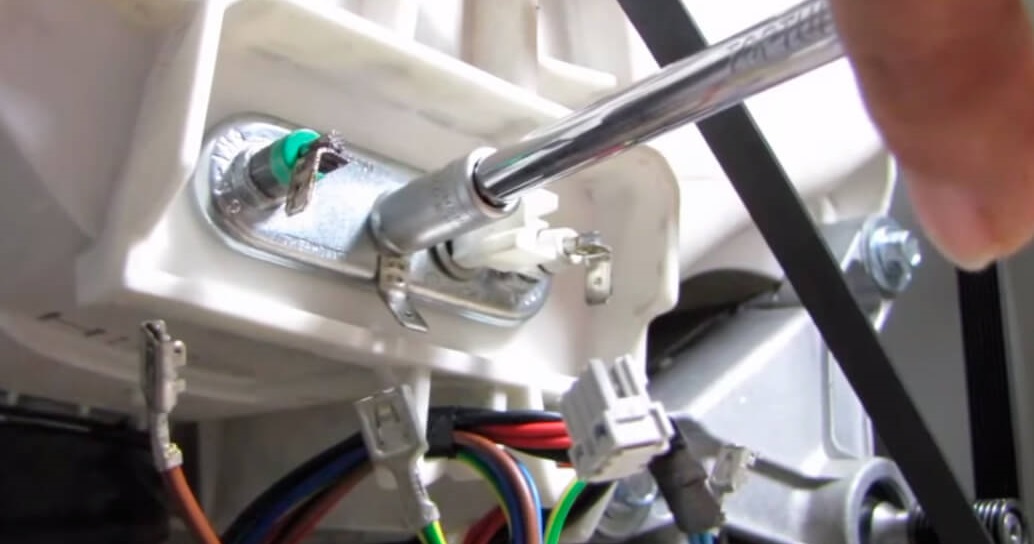
remove the bolt holding the pressure switch, take out the level sensor;
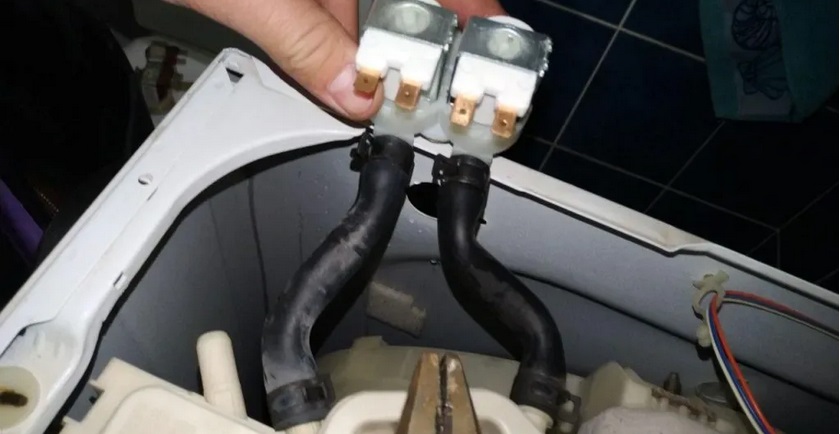
unscrew the filling valve screws and detach the plugs from it;
Remove the powder receiver hopper from the housing together with the filling valve and hoses.
When removing contacts and disconnecting hoses, it is better to take a photo of their initial position to avoid confusion during reassembly.
In this order, one by one, remove the external components of a Candy automatic washing machine. When you first begin disassembling the washing machine, it's best to first study the instructions for your "home helper." This will help you understand how the machine is constructed and where the various components are located.
In the second stage, we remove the unnecessary parts and take out the tank.
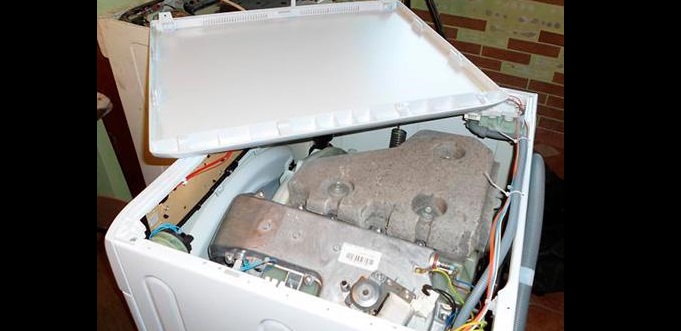
Now, after removing the front and top panels, you'll have access to the tank and all its connected components. Remove all components that interfere with the assembly, one by one. The counterweights, electric motor, pump, pipes, heating element contacts, and shock absorbers are detached from the plastic container.
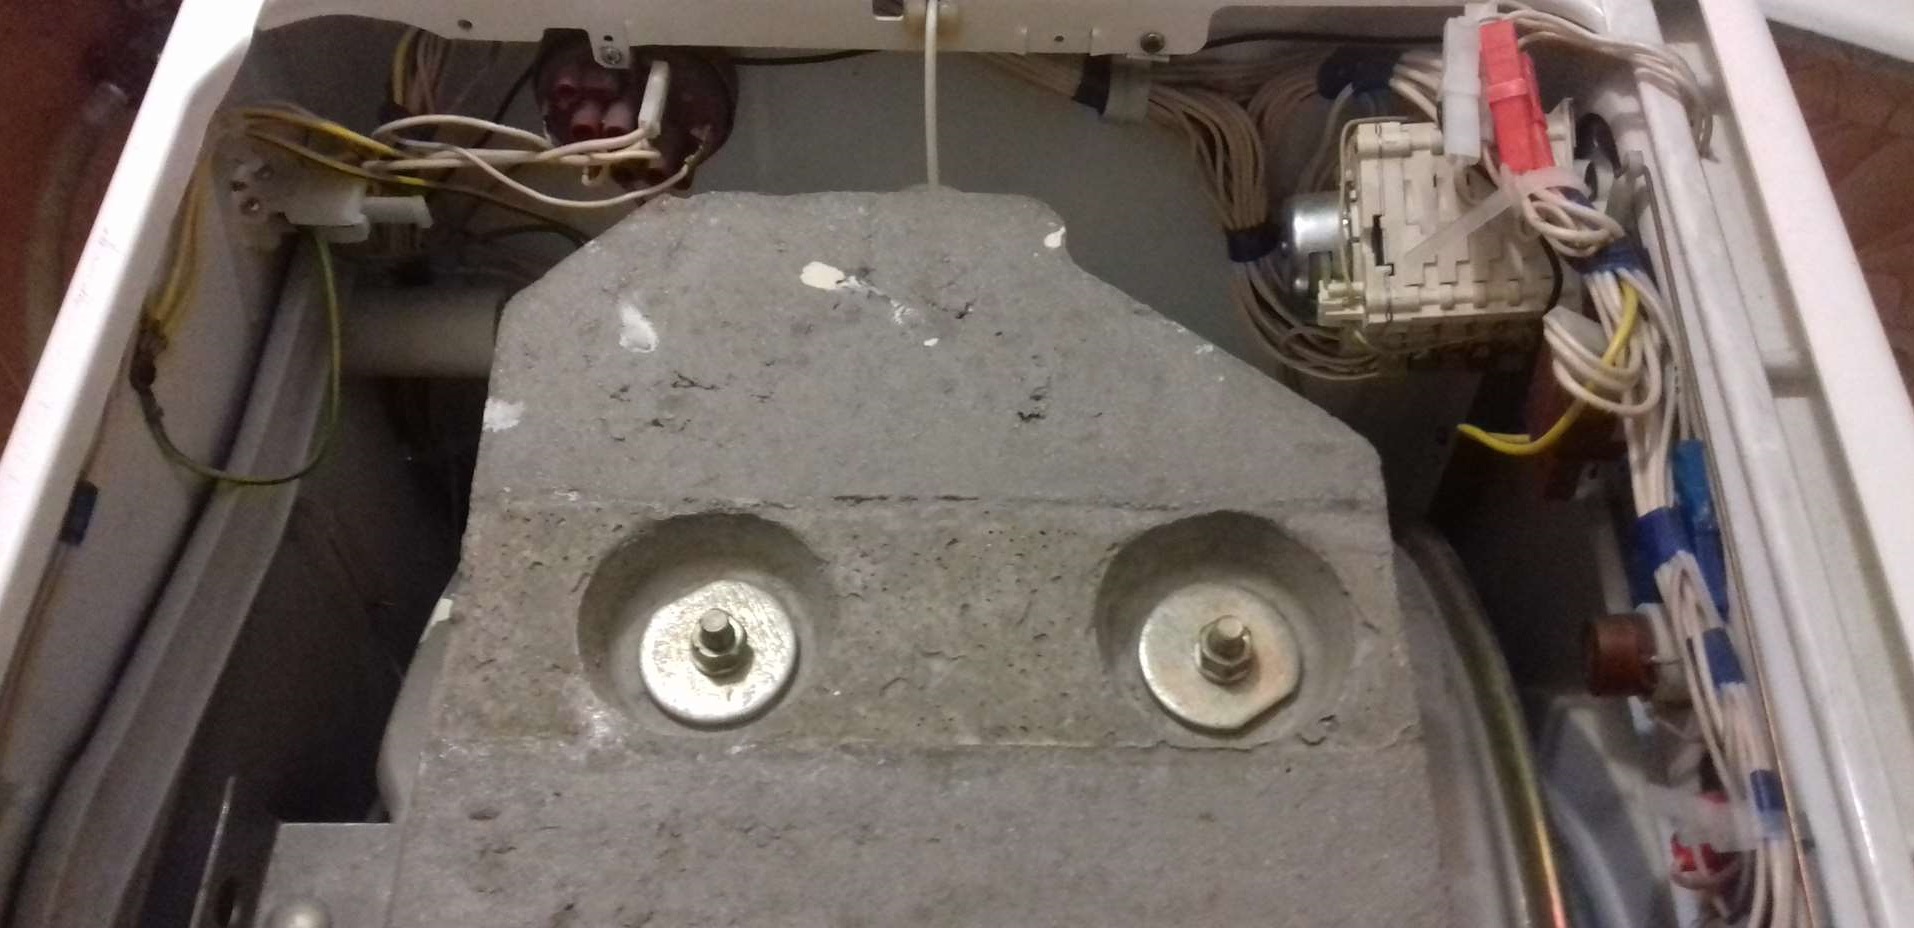
First, work on the upper counterweight. This block ensures the Candy washing machine's stability. Remove the concrete block by unscrewing the fasteners holding it in place.
There's another counterweight underneath. It, too, will need to be removed. The bolts securing the concrete blocks are removed with a crank and a suitable socket. Then, the remaining components that prevent the tank-drum assembly from being removed must be removed.
What to do next:
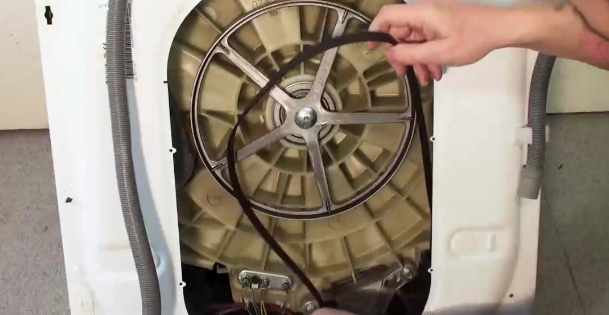
remove the drive belt from the pulley;
remove the inner clamp of the cuff and pull the rubber band itself off the tank;
unhook the heating element contacts from the plastic container (these are two power wires and ground);
reset the thermostat chip;
remove the heater by removing the nut that holds it in place;
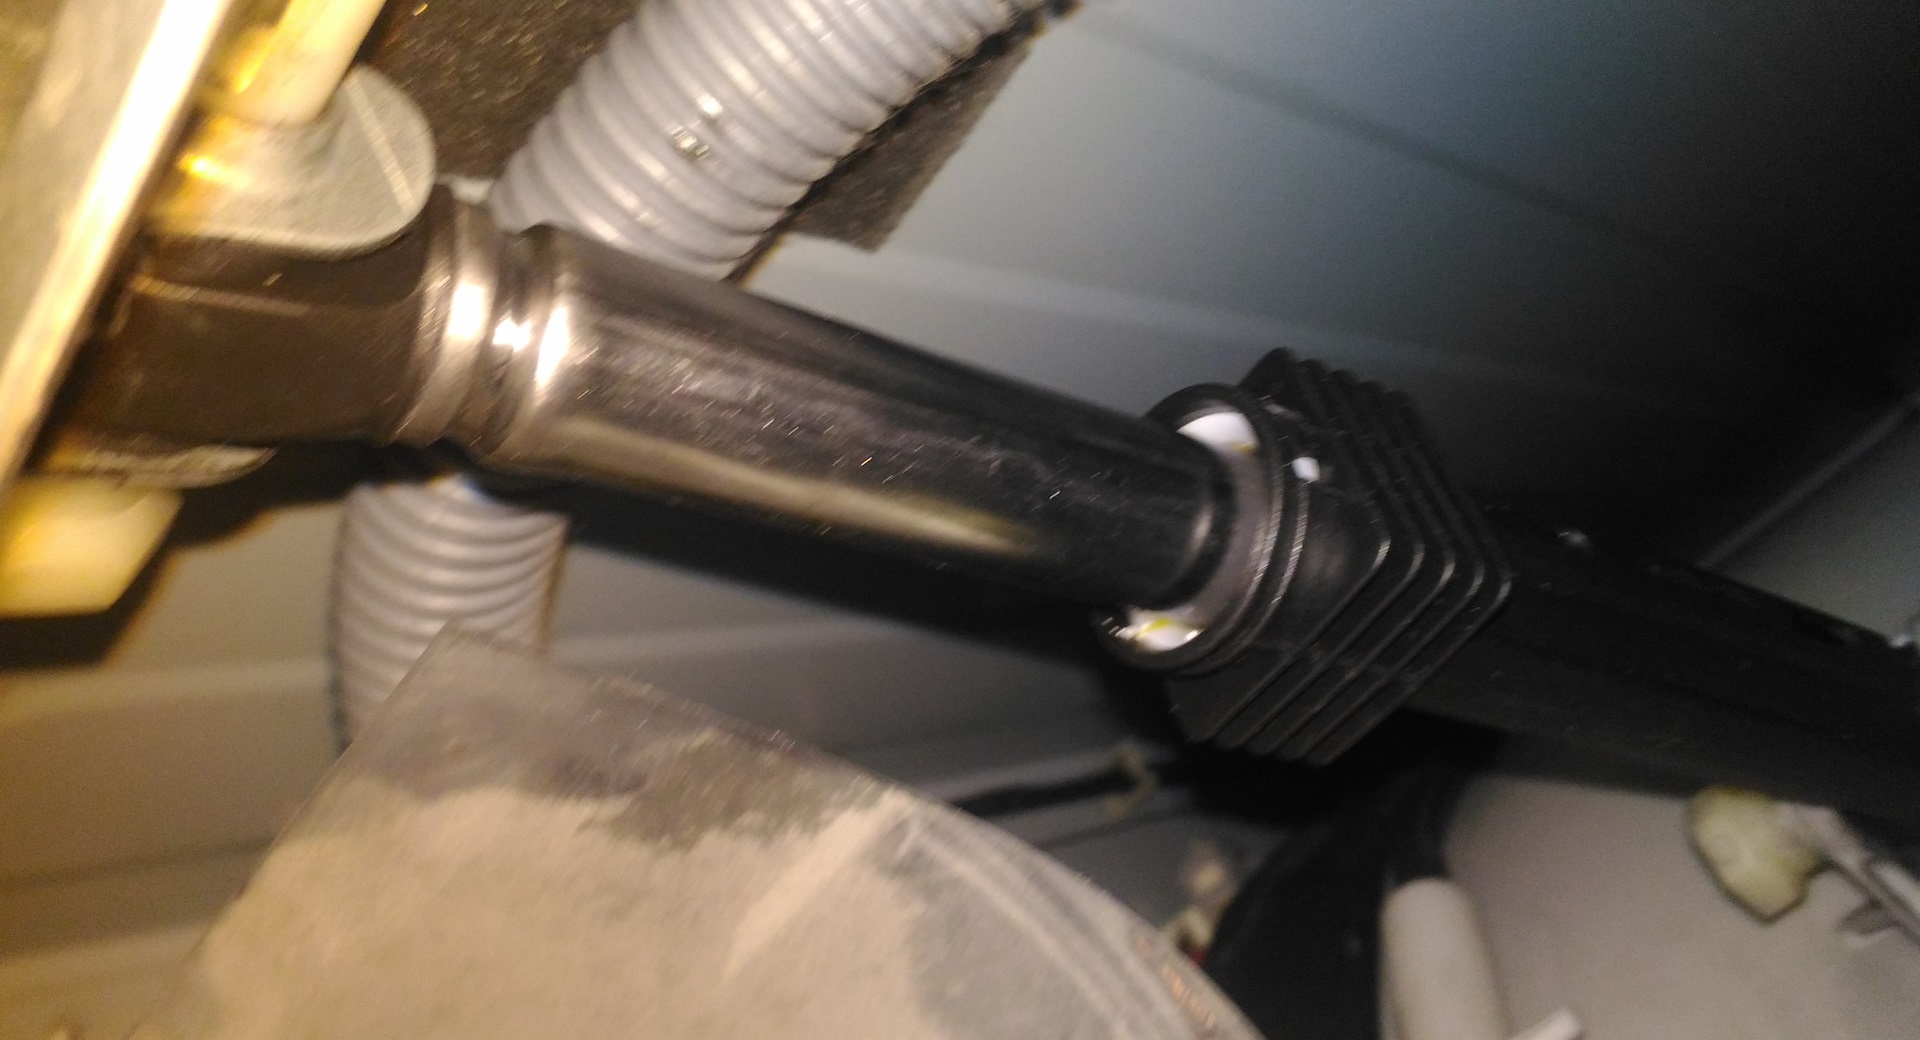
disconnect the pressure switch fitting from the tank;
disconnect all the wires connected to the tank and the remaining pipes;
reset the engine connector and disconnect the connector that goes to the engine;
deal with the bolts that secure the shock absorbers.
To remove the lower shock absorber mounts, you'll need a 13mm socket. The bolts will need to be removed from all sides. The gas tank is held in place by four springs; these will also need to be unhooked. This will ensure there's no interference when removing the unit.
Removing the drum alone is difficult. It's best to call a helper. The plastic container is removed through the top of the washing machine.
Next, place the tank on a level floor with the pulley facing up. Now you need to disconnect the motor. Unscrew the two screws and remove the motor. Then, unhook the dampers.
Now you need to gain access inside the plastic container. The tanks of most Candy washing machines are non-detachable. Therefore, here you will have to show ingenuity, dexterity and perseverance.
How to disassemble something that cannot be disassembled?
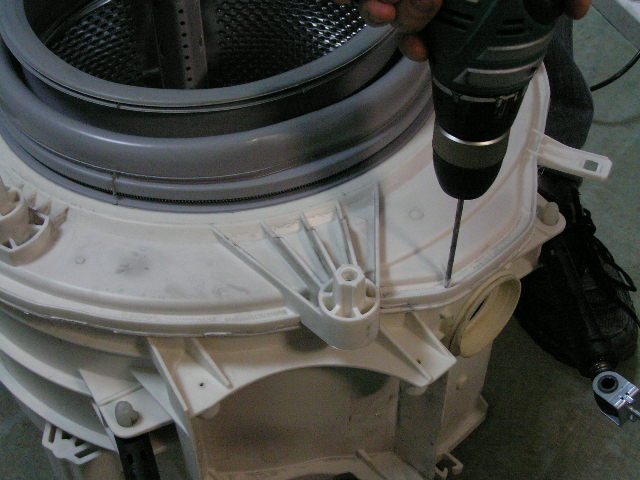
One of the most difficult steps is disassembling the tank. Candy's manufacturer doesn't provide this option, so the cast tanks are sawed directly along the factory seam. This requires a hacksaw or grinder.
Before cutting the tank, mark 6-7 points along the perimeter of the central rib and drill holes. This is necessary so that the tank can be bolted together during reassembly. It's important to remember this procedure.
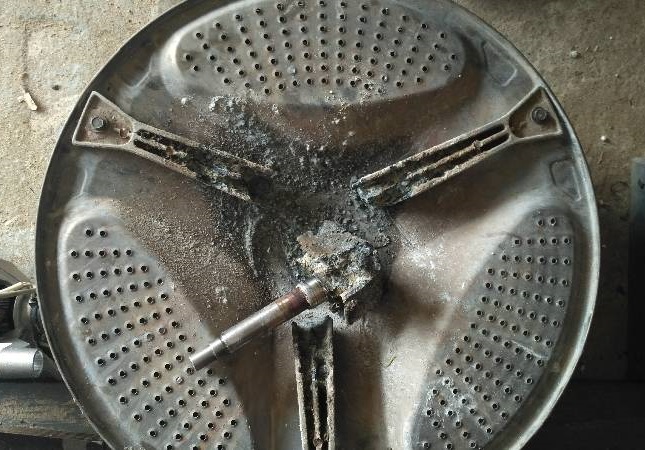
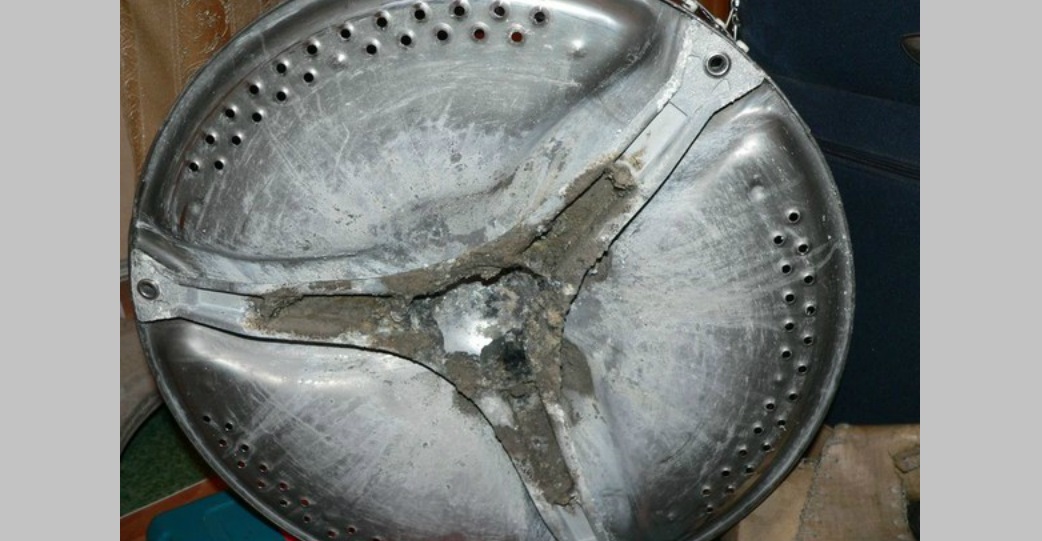
After cutting the tank along the seam, set the upper half of the structure aside. Next, you'll work on the lower half. The goal is to remove the drum from the plastic, which is where the crosspiece is located at the back.
In severe cases, the spider is so badly damaged that the drum can be easily removed from the tub, leaving the shaft itself in the plastic part. However, in both this and the standard situation, the procedure is similar:
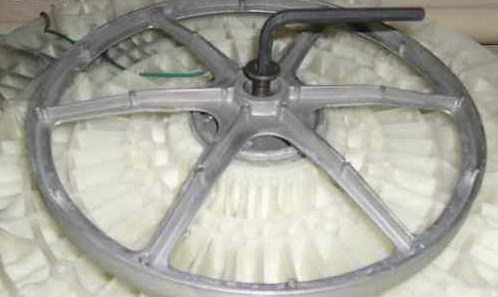
unscrew the screw that holds the drum pulley;
remove the pulley and set it aside;
press the bolt inward.
Now you can remove the warped universal joint. To do this, remove the three bolts securing it. If the fasteners show signs of wear, pre-treat them with WD-40 all-purpose cleaner.
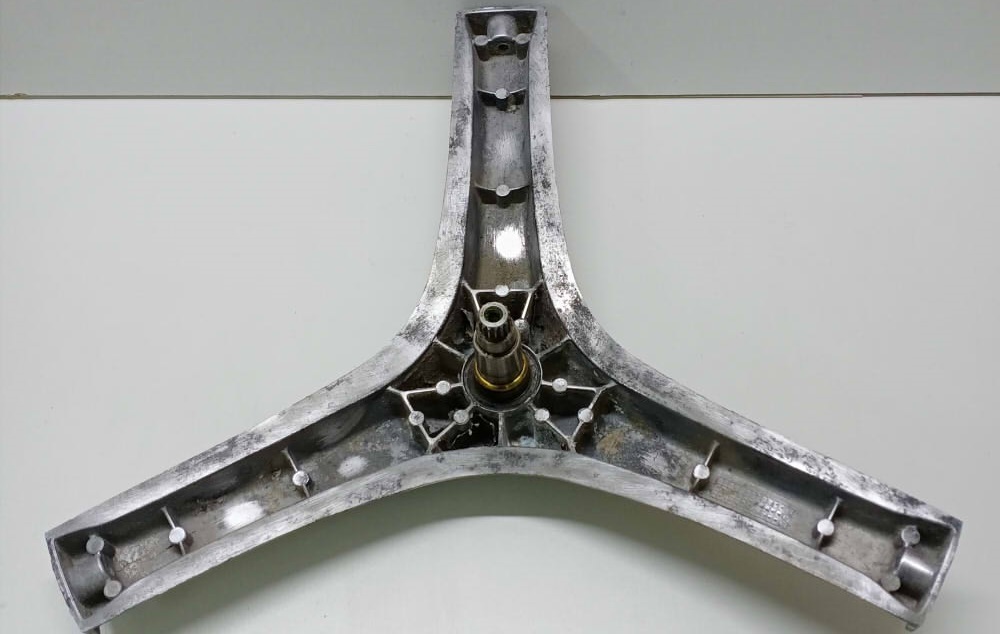
A new universal joint is purchased for a specific Candy washing machine model. Before installing the purchased part, clean the mounting surface of any dirt, rust, or deposits.
To avoid a complicated disassembly in the near future, it's best to check the bearings immediately. If they're damaged, new rings and seals will be needed. The main symptoms of bearing wear include a loud knocking and grinding noise during the spin cycle, and looseness in the drum.
The new crosspiece is secured in place with three bolts. Then the drum is returned to the tank, and the pulley is secured. The next task is to assemble the plastic tank. Here's how it's done:
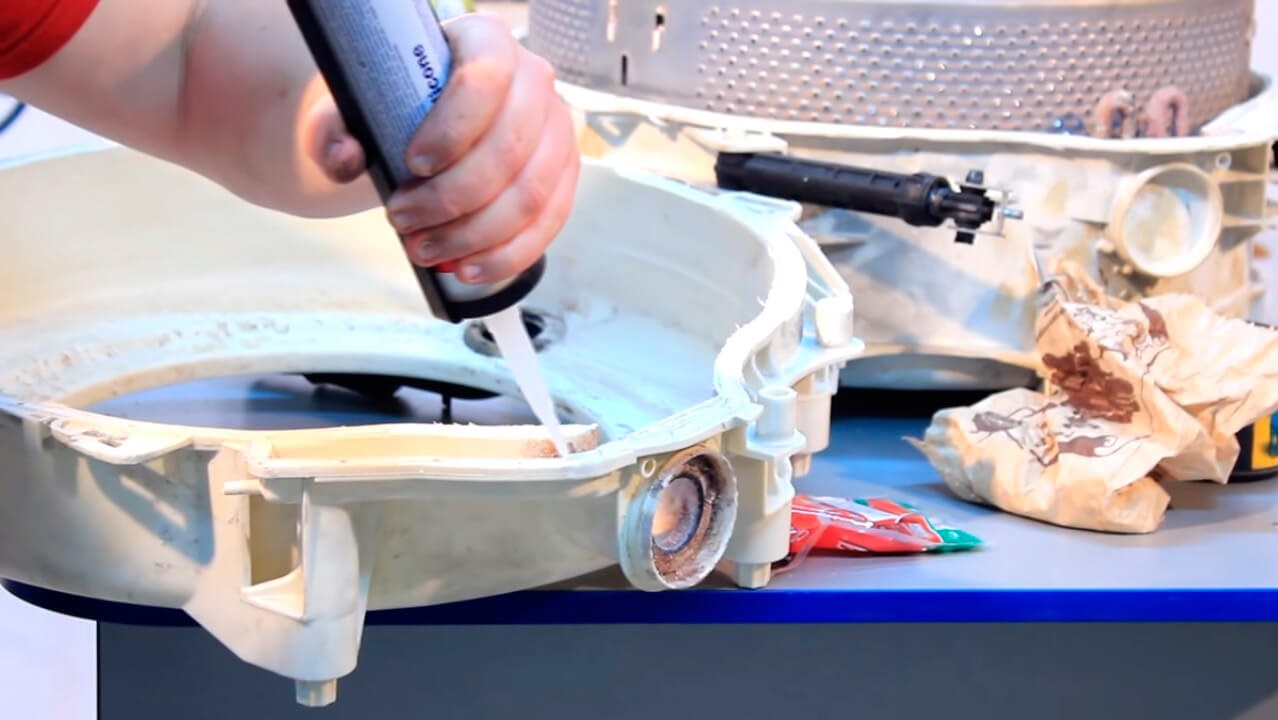
sand the edges of the halves;
Place a silicone waterproof sealant along the seam of the bottom part;
place the top half of the tank on the bottom half;
leave the structure for a couple of hours to allow the sealant to harden;
screw the halves together using the holes you drilled earlier.
Careful attention must be paid to the reassembly of the tank - the container must remain sealed.
The tank is then returned to the machine body. It is attached to springs, and shock absorbers are installed underneath. Now all the components, hoses, connectors, and wires can be connected to the plastic container. Finally, the front and top panels, as well as the dashboard, are secured.
Before you celebrate the repair, run a test cycle without any laundry in the drum. This will help ensure everything was done correctly. Observe the machine for any leaks or unusual noises.
The universal joint doesn't break suddenly. It fails gradually, and the symptoms of the malfunction appear several months before the "day X." The machine begins to hum and make noise during operation.
The destruction of the crosspiece can be caused by:
hard water, which causes scale to form on internal parts;
low-quality powder used for washing clothes;
failure by the user to comply with the recommended loading weight;
drum imbalance;
worn bearings.
Therefore, it's important to monitor water hardness and use softeners. It's also important to avoid overloading the washing machine or unbalancing the drum. Be sure to use only high-quality detergents. Replacing the spider is difficult, but this will help avoid time-consuming repairs.
 Many users don't even realize what the spider is for or where it's located in the washing machine. This part attaches the drum to the shaft. It experiences increased stress and becomes deformed over time. Repair is impossible in this case; replacement of the components will be required.
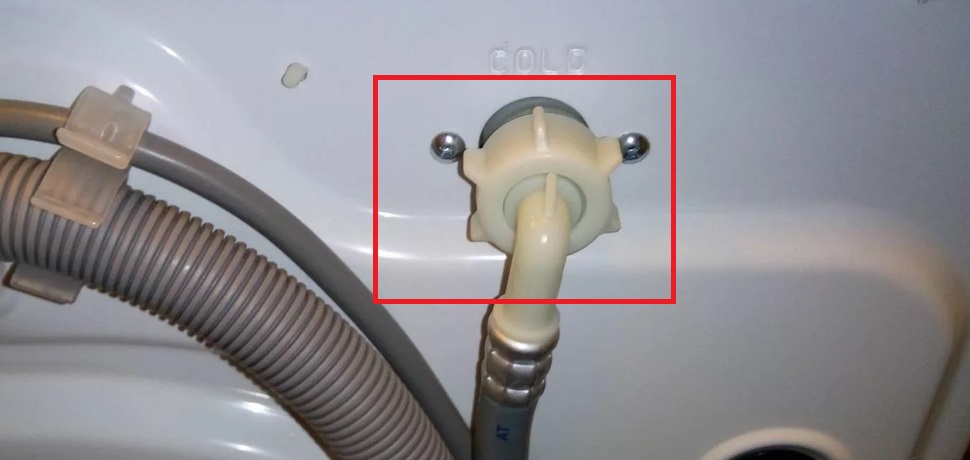


Add a comment