How to replace the seal on a Whirlpool washing machine?
Replacing the door seal on a Whirlpool washing machine is quite simple. Removal requires only a screwdriver (sometimes you might also need pliers), and the job itself takes literally half an hour. Let's look at how to properly remove the old seal and install the new one.
Getting rid of the old cuff
Replacing a rubber seal is within the power of any Whirlpool washing machine owner. So, if you notice cracks or black spots on the seal, don't rush to call a technician. You can easily install a new gasket yourself, without overpaying for service center specialists.
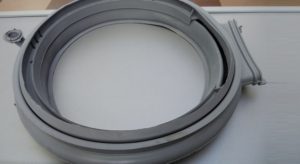
First, you need to purchase a new door seal that matches the damaged one. Simply tell the sales assistant your Whirlpool washing machine model and serial number. Ideally, you should also refer to the markings written directly on the seal.
Before removing the cuff, be sure to disconnect the washing machine from the power supply and turn off the valve responsible for the water supply.
Afterwards, wipe the machine body with a dry cloth. Next, you can begin removing the rubber seal. The procedure is as follows:
open the hatch door;
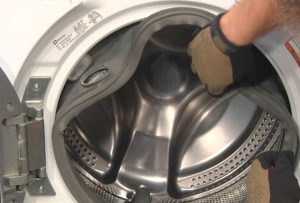
Use your hands to locate the two clamps securing the cuff. If they are made of plastic, use a flat-head screwdriver to pry up the tabs and remove the rims. If the clamp is made of metal, loosen the screw lock and hook the spring with a thin screwdriver.
remove both the inner and outer clamps from the device;
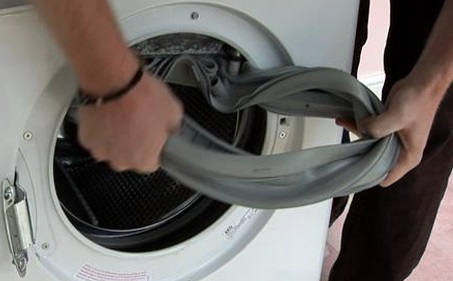
“unhook” the front part of the sealing rubber from the body;
Locate the mounting mark on the seal that indicates the position of the gasket relative to the drum. On most Whirlpool models, this is a small protrusion;
mark this place on the body;
remove the rubber cuff from the recess.
This makes removing a damaged seal from the housing easy. Before installing a new seal, it's important to clean the sealing area to remove any debris, dirt, or residue. Take a soapy sponge and scrub the recess. After cleaning the sealing area, lather it again with detergent. Dishwashing liquid works well. It will facilitate the installation of the new seal and act as a lubricant.
Installation instructions
The hardest part of the job is getting the seal back on. The tight factory gasket will resist installation, and this is the main challenge of the repair. To replace the rubber seal, strictly follow this procedure:
Place the rubber band over the recess. The mark you made earlier on the body and the mounting mark on the cuff must align;
Start installing the gasket from the outside. Hold the already stretched part of the seal with one hand, and continue to push the rubber band with the other;
Pull the inner edge of the seal over the edge of the plastic tank;
touch the cuff, make sure that it is “settled” in place, tightly “grasping” both the edge of the tank and the body of the washing machine;
Make sure the marks on the rubber seal and the front panel match. If not, you'll have to reinstall the seal.
On Whirlpool washing machines, you can change the sealing rubber without removing the front panel of the machine.
If desired, you can disassemble the machine by removing the top cover and front panel. This will make work easier and provide easy access to the inside of the machine. However, this will take a little more time. After tightening the gasket, be sure to secure it in the washing machine. The internal clamp is more difficult to secure. If the ring is metal, you need to unscrew the screw "latch," position the rim on the seal, and tighten the fastener.
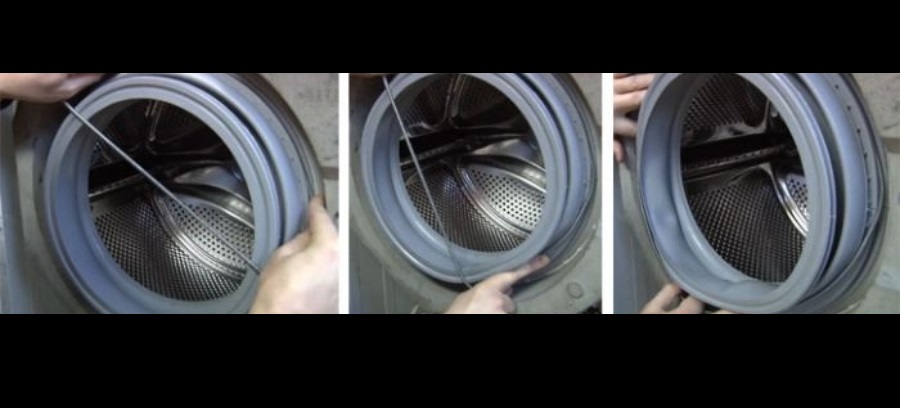
If the clamp is made of plastic, the procedure is different. Take the ring and loosen it by pressing on the joint where the "tongues" meet, then push it back into place and secure it to the cuff. Older Whirlpool washing machines may have wire fasteners. In this case, you'll need to place the wire around the entire seal and tighten the ends with pliers. The resulting "knot" should be hidden in a special recess in the cuff.
Next, install the outer clamp and secure it in place. The ring is secured in place in the same way as the inner rim. Only intact old clamps can be reused. Therefore, inspect them carefully before installation. If the clamps are damaged or deformed, be sure to replace the rings.
If all installation instructions are followed, the seal and clamps will fit tightly against the housing. Once installation is complete, check the system for leaks:
open the shut-off valve;
connect the washing machine to the power supply;
run the “Rinse” or “Express Wash” mode (there should be no laundry in the drum);
Check to see if there is water leaking from under the hatch door.
If the area underneath the machine is dry, the seal replacement has been successful. If you see drops of water under the door, or even worse, trickles, you'll need to think further. Drain the water from the machine, open the door, and check that the seal is tightly sealed against the body and the drum. Try tightening the clamps securing the seal further. If this doesn't help, you'll have to remove the seal again and reinstall it.
 Replacing the door seal on a Whirlpool washing machine is quite simple. Removal requires only a screwdriver (sometimes you might also need pliers), and the job itself takes literally half an hour. Let's look at how to properly remove the old seal and install the new one.
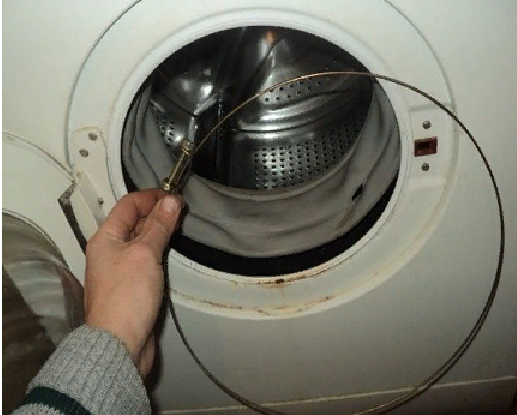


Thank you very much, your advice helped me.