How to change the cuff on an Ardo washing machine?
 The drum seal can become damaged due to careless handling. For example, a foreign metal object left in a pocket can ruin the seal. Regardless of the cause, replacing the door seal on your Ardo washing machine is essential as soon as possible. The system loses its seal, causing a leak. Let's find out how to repair the machine.
We'll buy a new part
First, you need to buy a new door seal. It's best to remove the old seal and bring it to the store. The salesperson will be able to offer you a replacement part that's identical to the one you removed.
When purchasing a new cuff, it is important to tell the seller the article number (number plate) of the gasket.
If you can't get the old rubber seal out before purchasing a new one, use the model and markings of your Ardo washing machine as a reference. The "nameplate" is located above the door and contains all the information about the appliance (year of manufacture, series, serial number, etc.). It's best to take a photo of the entire manufacturer's label and show it to the manager. During the repair, in addition to the new seal, you'll need a flat-head screwdriver and pliers. You should also have liquid soap and a sponge on hand. Once you've gathered everything you need, you're ready to begin.
Proper removal of the old cuff
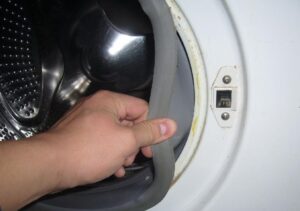
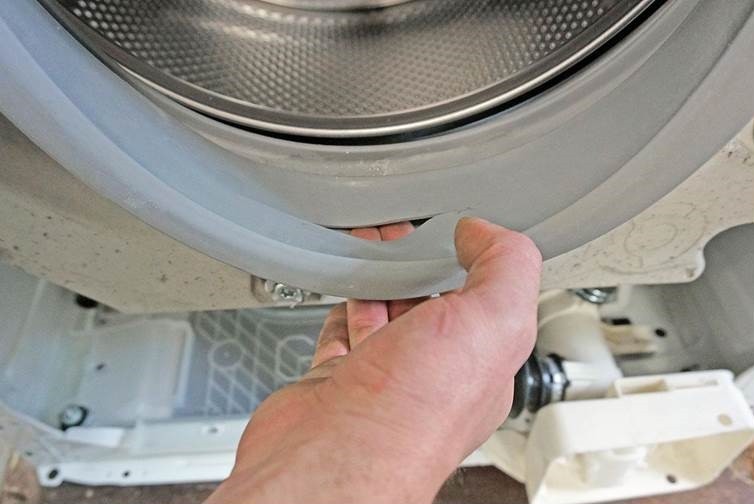
To change the sealing rubber, you will first have to remove the old cuff. The gasket is fixed in the machine with an external and internal clamp. These "rings" must be removed by loosening the latch. Proceed as follows:
- Use your hands to find the outer "ring." Ardo washing machines have a plastic clamp;
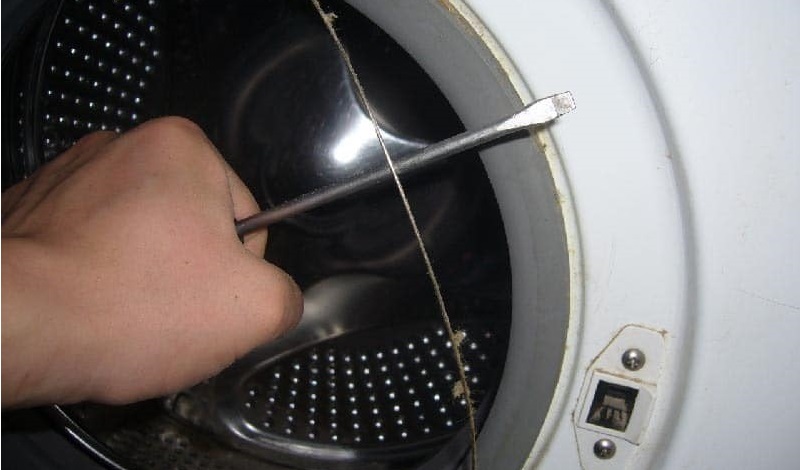
- Use a screwdriver to hook the rim spring, pull the retainer to the side and remove the clamp;
- remove the lower decorative panel of the washing machine, behind which the waste filter is hidden;
- remove the powder compartment from the machine;
- unscrew the bolts securing the front wall of the case;
- carefully set the front panel aside without damaging the UBL wiring;
- Use a screwdriver to pry up the inner rim in the same way as the outer clamp. Remove the plastic ring from the washing machine;
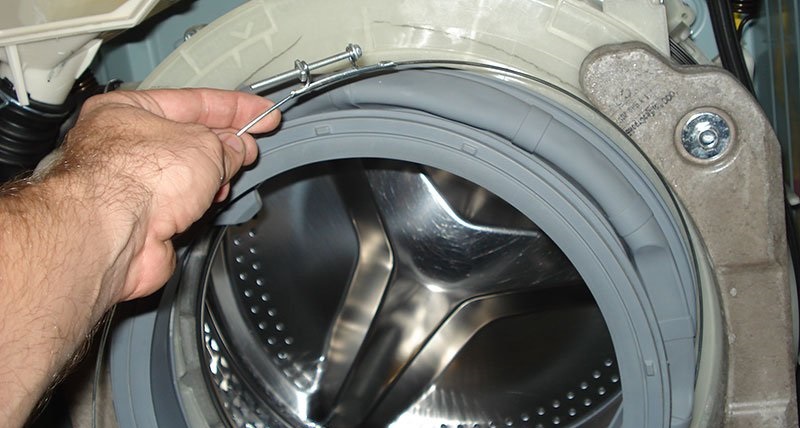
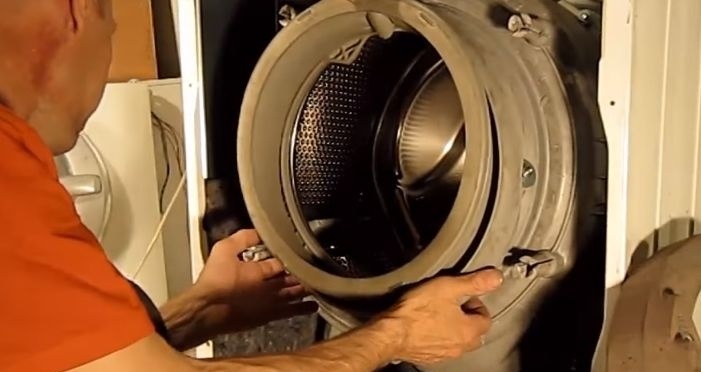
- carefully remove the cuff from the recess.
This is how you can remove the gasket. Once you have the seal in your hands, inspect it closely, looking for any cuts or cracks on the surface. This will help you determine what caused the damage to the gasket and prevent it from happening again.
Installing a new rubber band
Installing a new door seal is a little more difficult than removing the rubber seal. You'll have to apply some force to get the seal to fit into the grooves. But if you follow all the instructions, even a novice can handle this job. The procedure is as follows:
- Clean the seat. Soap and a sponge are useful for this. It's important to remove all dirt and debris from the recess. After washing, don't wipe it dry—the foam will make the seal installation easier.
- Find the mounting marks on the rubber seal and align them with the markings on the housing;
The drain holes on the cuff must be strictly at the bottom.
- place the gasket into the recess;
- put the drum cuff on all the way around
- install and secure the internal retaining clamp;
- Assemble the washing machine body by returning the front panel to its place and securing it with screws;
- install the lower decorative panel back;
- Pull the outer edge of the cuff over the protrusion of the drum;
- Insert the outer clamp into the recess, be sure to place the spring side down, and pull the rim around the circumference.
This is how you can change the rubber seal on your Ardo washing machine. Next, you need to check the system for leaks. To do this, run a short cycle, such as "Rinse." It is important to remain near the machine during the test cycle in order to notice a leak in time and react to it promptly.
Causes of cuff damage
While removing the seal and installing a new one isn't all that difficult, it's best to avoid repairs. The rubber seal can function reliably for 10 to 15 years if the appliance is used carefully and with care, preventing premature damage to the seal. There are several reasons why the door seal may fail. This could be due to:
- Careless replacement. The rubber seal is very easy to puncture during installation, for example, by making a sharp movement with a screwdriver. Therefore, it's important to carefully tighten the seal and secure it with clamps;
- Low-quality detergents. Harsh chemicals used for washing or cleaning the washing machine can cause deformation of the seal. Therefore, it's best to choose detergents without critical components that could have a detrimental effect on the rubber parts of the washing machine.
- Increased friction. If you continually exceed the permissible load weight, the laundry will rub against the elastic with great force. Buttons and sharp embellishments on items can damage the elastic;
- Damage from sharp objects caught in the drum. For example, a bra underwire can pierce a soft cuff in an instant. Keys and hairpins left in pockets can also cause damage;
- Careless operation. The condition of the gasket may deteriorate due to careless loading and unloading of laundry from the drum;
- Mold and mildew. If you don't follow basic rules—not ventilating the machine and not thoroughly wiping the seal and drum walls—harmful microorganisms will begin to attack the insides. Fungal and moldy deposits will eventually eat away at the rubber from the inside.
By following basic rules and using your washing machine carefully, you can delay wear and tear on the drum seal for a long time. However, if you notice a leak under the door, don't delay repairs. Inspect the seal as soon as possible and replace it if necessary.
Interesting:


3 reader comments
Add a comment
Headings
Washing machine repair


For buyers


For users


Dishwasher


Guys, not a single expert in the comments or videos has explained how to insert the nipple of the seal into the bottom opening of the machine's plastic tub when replacing the door seal on an Ardo A 610 washing machine. That's how expert they are.
I'll explain how to do this, based on my own research, without any expert help or YouTube videos. Simply turn the Ardo A 610 and similar washing machines upside down, with the feet facing upward, and tilt them at an angle of approximately 30-45 degrees. This will ensure the opening of the plastic tank is at the top, not the bottom as it normally is. Lubricate the new seal with a soapy sponge. Apply sealant to the seal attachment point (automotive grade, water- and heat-resistant), and gently insert the seal into the tank opening. Let the sealant dry according to the instructions, then slide the inner seal over the grooves around the tank, pull the metal ring over the seal, and tighten the screw on the ring. Before doing this, check that the seal fits securely over the protruding surface of the tank.
Only then do we place the outer part of the cuff on the outside of the machine's front panel and secure it with a metal hoop and spring around the entire circumference. I hope I've made this clear.
And all the "experts" who repair these machines are simply a disgrace. Not a single one has explained how to do it properly. The front door of this machine can't be removed at all; it's welded shut, and in the normal washing machine position—lid up—it's simply impossible to fit the nipple over the opening of the drum. These are just some worthless experts. Learn from them.
Does the Ardo 800x have a non-dismountable front end?
How do I change the seals on an Ardo A800x? Should I use sealant too? And do I need to turn the car upside down? Please help.