How to replace a bearing in an Ariston washing machine
 Replacing bearings in any washing machine, including an Ariston, is a fairly complex, physical job that requires skill and time. When disassembling the machine for the first time, it can take up to two days to do everything yourself. Therefore, you'll need to stock up not only on tools and detailed written and video instructions, but also on patience.
Preparing the tool
Begin any project by preparing what you might need. For example, you might need a room or a spacious area where you can easily disassemble the machine and store the parts so they're easy to find later. This is often the first hurdle to repairing your washing machine yourself. After disconnecting the machine from all communications and placing it in a convenient place, we prepare the tool. You may need:
- hammer;
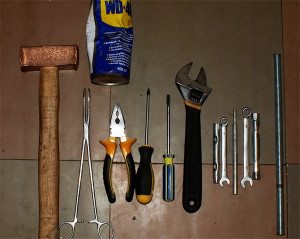
- pliers
- flat and Phillips screwdrivers;
- metal rod;
- bearing puller;
- WD-40 waterproof lubricant;
- sealant;
- open-end wrenches;
- marker.
You'll also need new bearings and seals. If you know what you need in advance, you can buy them at the store. If not, disassemble the machine and remove the faulty bearings, check their markings, and buy similar ones.
We disassemble the machine: we take out the tank
As you disassemble your washing machine step by step, you can take photos to use when reassembling it. This isn't necessary, though, as the video on this topic already explains everything in detail and documents everything.
So, we will present the disassembly of the Ariston front-end machine in the form of the following algorithm:
- Unscrew the plastic cover located on the back wall of the case.
- We unscrew the bolts holding the top cover and remove it.
- We also remove the back wall of the case.
- We loosen the clamp on the pipe attached to the washing machine tank and remove the pipe.

- We take out the connector with wires from the electric motor.
- Removing the drive belt. In an Ariston machine, it's removed like in many other washing machines. This process is described in detail in the article about How to change a washing machine drive belt – video.
- Loosen the 2 bolts holding the engine.
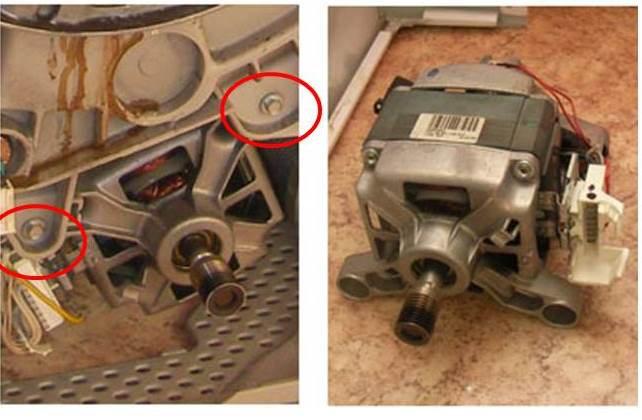
- Gently press on the bolts while holding the engine, then unscrew them completely and remove the engine from the car.
- Next, we disconnect the power supply contacts from the heating element located under the tank.
- We check and disconnect all sensors.
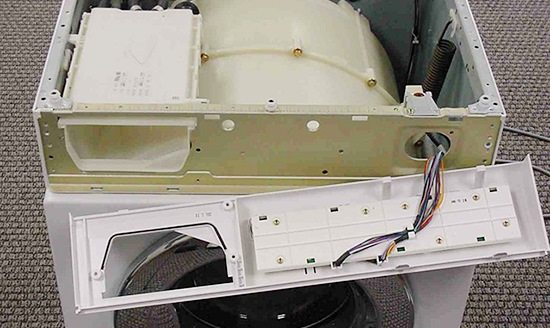
- Let's move on to the front part of the case - we take out the powder receptacle.
- Under the powder receptacle we find the bolts holding the front panel and unscrew them.
- We unscrew two more bolts from the top, they also hold the control panel, and disconnect it.
- We remove the rubber cuff from the drum.
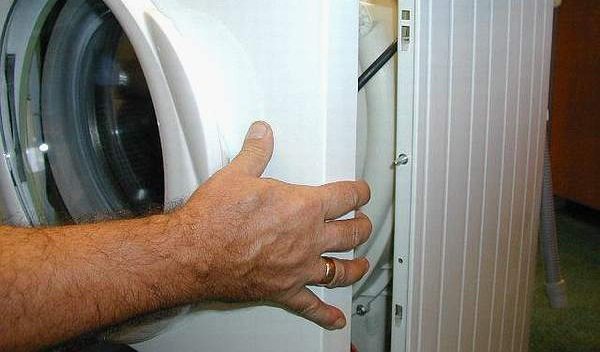
- We remove the bottom panel of the case and unscrew all the bolts that secure the front wall of the machine.
- We remove the front part of the case.
- We unscrew and remove the counterweights.
- We disconnect the filler pipe from the tank.
- We remove the hose going from the water level sensor to the tank.
- We remove the niche for the powder receptacle.
- We unscrew the shock absorbers.
- Using a flat-head screwdriver, remove the spring clips on which the tank hangs.
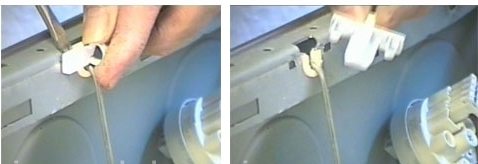
- We make sure that everything is disconnected from the tank and pull it out of the car.
Once you've removed the Ariston washing machine's drum, place it on stands with the cuff facing down. This completes half the process of accessing the bearings. And that's not even the hardest part.
Changing the bearing
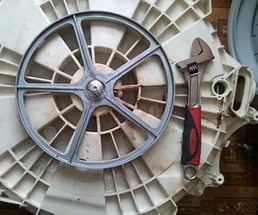 Now it's time to disassemble the plastic drum of the Ariston washing machine. We'll start by removing the pulley—this is a tricky part, as it's secured with a screw sealed with locking paste. Removing it will require patience. You can use a hammer and chisel, gently tapping the screw, or you can use a heavy-duty T40 bit and a holder.
The bit is screwed into the screw shaft, then, using the bit holder, you need to turn the screw counterclockwise. Using a marker, you can mark the correct position of the pulley so that you can easily reinstall it later. Remove the pulley by pulling it toward you with a rocking motion from side to side. Once removed, you will see the outer bearing and the end of the shaft, which needs to be driven out of the tub and drum. This is done by placing a wooden block on the shaft and striking it with a hammer.
Important! If the shaft won't come out and requires a lot of force, it's best to screw in an unnecessary bolt and then strike the bolt.
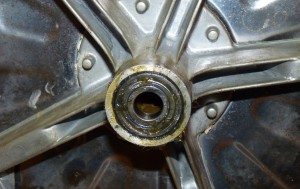
Next, you need to separate the drum into two halves. In some Ariston washing machine models, these halves are held together with bolts; removing these bolts allows the drum to be disassembled. The part of the tank on the side of the cuff is removed from the drum quite easilyThe second part will need to be carefully knocked off the drum, being careful not to damage the plastic. After removing the drum from the tank, inspect the shaft bushing for wear. To do this, wipe it with a cloth and install a new bearing. If there is even the slightest play, the shaft and its universal joint will also need to be replaced.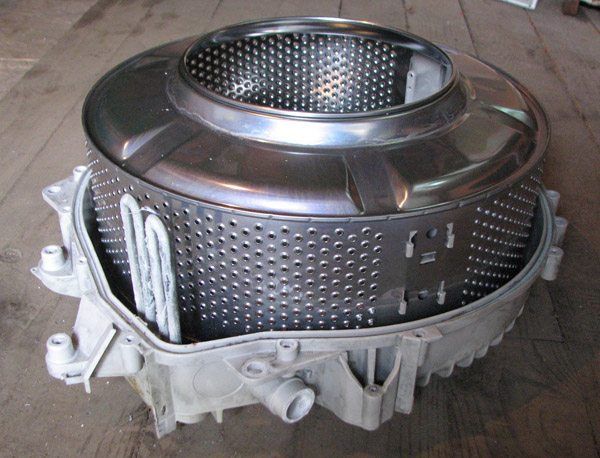
If the tank is not disassemblable, but is one piece, then it will have to be sawed along the seam. To learn how to do this, watch this video.
And finally, we tackle the bearings. First, knock out the outer bearing. This is done using a metal rod and a hammer. Place the rod against the bearing rim and lightly strike it with the hammer, then reverse the rod and strike again. This way, we knock the bearing out in a circular motion. Once the bearing is removed, turn the tank over and knock out the second bearing from the inside using the same method. We also remove the seal. 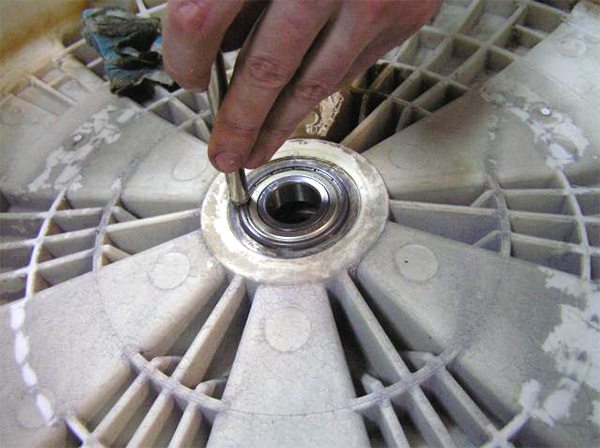
Please note! It's easier to use a special bearing puller rather than a hammer. A universal puller can be useful for more than just washing machine repairs.
 After removing the bearings, clean them from dirt and wipe the holes where they were inserted with WD-40 liquid to get rid of rust, and then lubricate them with a special lubricant or Litol-24 lubricant.
Now we install the bearings, starting with the inner one. Gently tap it in with a rod and hammer, moving the rod crosswise along the outer rim of the bearing. Place the seal on the bearing and coat it with waterproof grease. The outer bearing is tapped in the same way. Next, reassemble the tank, performing the steps in reverse order, using your own photos or videos.
Important! When assembling the two halves of the tank, be sure to clean the joint, install a rubber gasket, and apply silicone sealant. Then bolt the parts together.
We reassemble the car step by step, working in reverse order. Take your time, be careful, and be gentle.
In conclusion, we'd like to emphasize once again that replacing bearings in any washing machine is considered a fairly complex job. For a better understanding of this process, you can watch the video below. However, if after watching the video you're even more convinced that you can't replace this part yourself, then feel free to take it to a service center.
Interesting:


3 reader comments
Add a comment
Headings
Washing machine repair


For buyers


For users


Dishwasher


Everything is explained very clearly. If you have the time and resources, you can replace the bearing yourself, saving a significant amount of money. Thanks to the author.
Hello! Could you please tell me what size bearings and seal are needed for my Ariston Hotpoint ARXL 85 CSI L washing machine? Thank you in advance.
Could you please tell me what bearing is in the Hotpoint Ariston WMSG 7105 B washing machine?