How to replace a bearing in an LG direct drive washing machine?
 The following symptoms indicate it's time to replace the bearing in your LG washing machine: weak spin, grinding noise, and noise when the drum rotates. This type of repair is considered complex and requires complete disassembly of the machine. We'll explain the tools you'll need, how to access the drum, and what to look for.
Tools and accessories
At the first sign of a malfunction, it's difficult to determine that the bearings are worn out. The symptoms won't be very clear, and not everyone will be able to figure out why their direct-drive washing machine is making a knocking noise. Over time, when the component wears further, traces of wear may appear on the back of the drum. Also, when rocking the drum by hand, you may notice a noticeable play, and during the spin cycle, the machine will hum and make a noise like a rocket engine. With such obvious signs, diagnosing the problem is easier.
The bearings on your LG washing machine need to be replaced as soon as possible, otherwise the shaft will gradually deteriorate, requiring a complete replacement of the drum-tank assembly.
Before repairing your washing machine, you should gather the tools and parts you'll need. First, you'll need to purchase bearings and a seal for a direct-drive washing machine. It is important to find out the model and serial number of your "home assistant" and buy the right spare parts for it. Here are some examples of the sizes of components required for specific machines: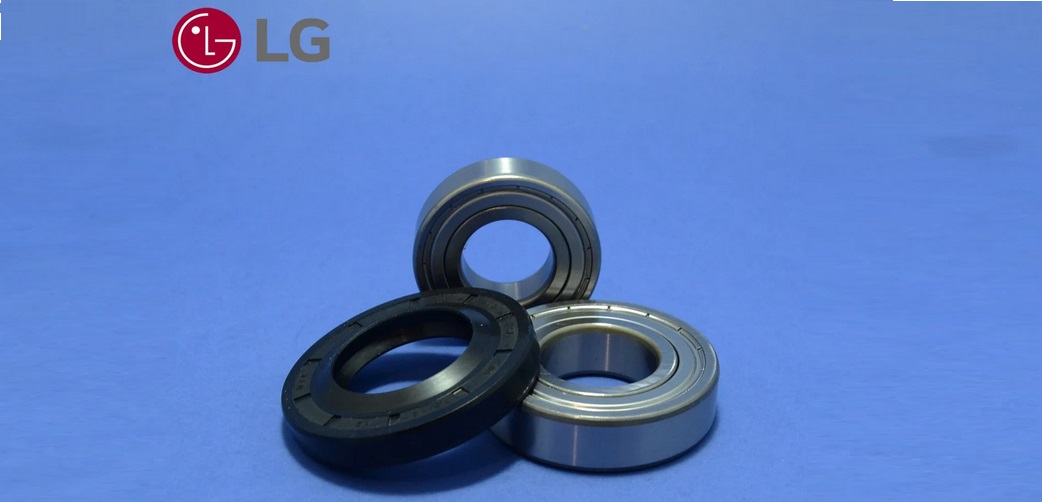
- models F 1068 LD, LG WD 1030 R, WD 1274 FB, WD 8022 CG, WD 8023 CB, WD 8050 FB, WD 8074 FB, WD 10130, WD 10150 S – oil seal 37x66x5/12, bearing 205-206;
- LG WD 1050 F, LG WD 1074 FB – oil seal 35.75x66x5, bearing 205-206;
- LG WD 6002 C, LG WD 6007 C and WD 6212 – oil seal 25x50x10, bearing 203-204.
What is a seal? It's a sealing ring that protects the bearing from water. In most cases, a damaged seal is the cause of bearing failure. If cracks appear in the seal, fluid leaks to the metal components, washing away the lubricant, and accelerating wear.
To replace components yourself, prepare the following equipment:
- screwdrivers (positive and negative);
- hammer;
- bit;
- a set of keys of different diameters;
- pliers;
- WD-40 aerosol;
- metal pin;
- moisture-resistant sealant (required when reassembling the tank).
A comfortable repair requires plenty of space. Ideally, move the direct-drive washing machine to the garage. If this isn't feasible, disconnect the appliance from the mains and move it to the center of a spacious room. Once all the tools and components are ready, you can begin disassembling the machine.
Removing the drum-tank assembly
To replace the bearings, you'll need to remove the plastic tub and drum from the direct-drive washing machine. Be sure to disconnect the appliance from the power supply, as well as from the water supply and sewer system. Disconnect the drain and inlet hoses from the rear of the machine. The next steps are as follows:
- Drain any remaining water from the machine's pipes. You can do this by unscrewing the waste filter. It's located underneath, behind the base panel. Unscrew the plug and collect the liquid in a container.
- remove the powder receptacle;
- remove the top cover of the case by unscrewing the two bolts that secure it;
- Remove the screws holding the control panel in place. It's not necessary to disconnect the wires; it's better to carefully remove the panel and hang it on the special hook on the side of the case.
- Open the hatch door, bend back the sealing cuff, and pry up the clamp that secures it. Remove the retaining ring from the machine;
- unscrew the screws around the perimeter of the front wall, remove the front panel;
- remove the top metal bar, remove the counterweights;
- Use pliers to loosen the clamp on the hose connected to the dispenser. Remove the hose and pull out the detergent container;
- disconnect the pressure switch nipple;
- Disconnect the drain hose from the washing machine's tank. It is secured with a clamp;
- remove the back wall of the machine, removing all screws;
- Take a photo of the wiring diagram, this will help with reassembly;
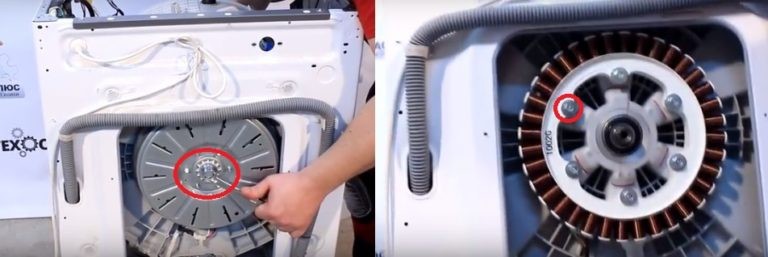
- Loosen the direct drive main screw. To do this, you'll need to secure the motor;
It is not allowed to block the engine by inserting screwdrivers into its connectors, as there are coils there that can be easily damaged.
- To remove the central bolt, hold the tank, preventing it from rotating, throw the wrench with your free hand and unscrew the fastener;
- remove the electric motor cover;
- reset the electric motor connectors, disconnect the wiring;
- remove the engine by unscrewing the screws holding it;
- disconnect the contacts from the heating element, remove the tubular heater;
- Remove the shock absorbers. To remove the damper bushing, press on its latches from the inside and pull it toward you.
Now there's nothing stopping you from removing the unit. All parts and wires connected to the machine's main tank have been removed or disconnected. You can lift the tank, removing it from the springs, pull it out of the housing, and place it on a flat, hard surface.
We change bearings and seals
Modern LG direct-drive washing machines feature a detachable tub. You don't have to saw it apart, as with non-detachable tubs; simply remove the screws holding the two halves together.
After removing the bolts, you can lift the top half of the tank and set it aside. The rest of the work will be done with the other half. The drum needs to be knocked out. Place a block or chisel on the bushing and tap it with a mallet. The drum will fall out of the plastic container.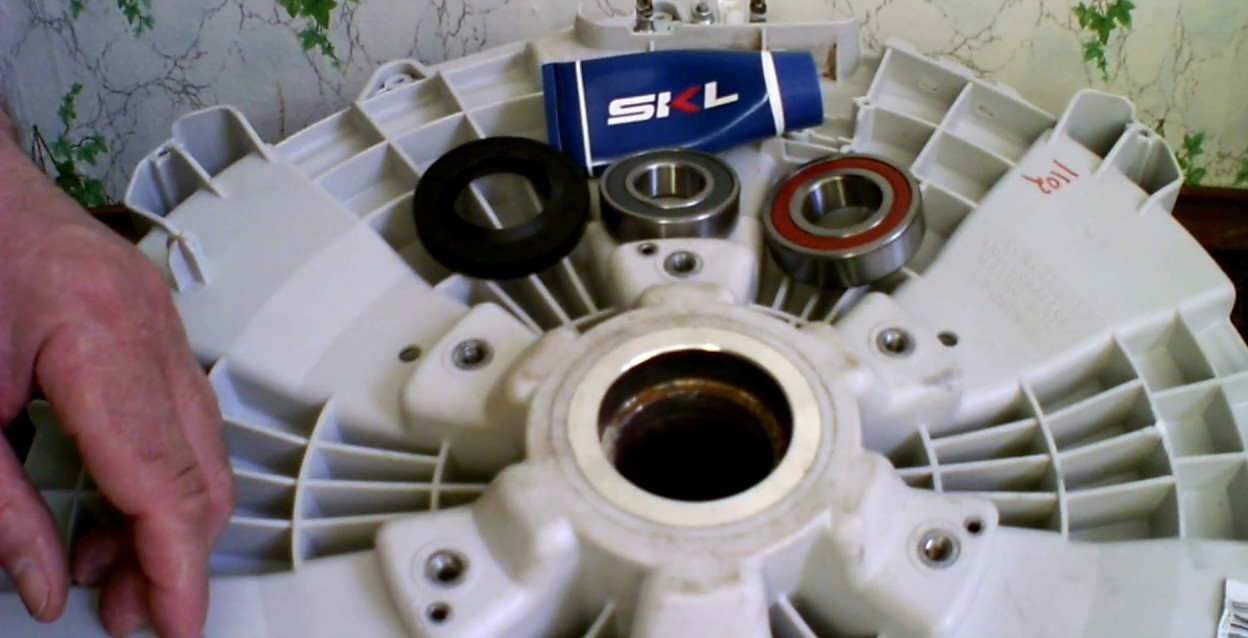
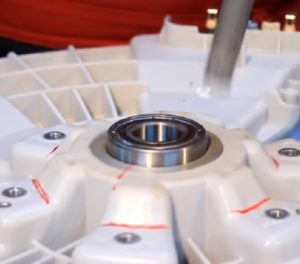
The next step will be reinstallation of components. Washing machines LG are equipped with two bearings - inner and outerFirst, knock out the "outer" ring—place the chisel on its ferrule and tap it with a hammer. The chisel's position should be varied, placing it crosswise. The outer element is removed in the same manner.
Before installing new components, be sure to clean the bearing seat of any debris, rust, or old grease. Once cleaned, you can install the new bearings. Place the ring into the seat and hammer it into place. Tap only the outer race to avoid damaging the component. Place the seal on top.
During installation, it is important to treat the bearings and seal with a special protective lubricant; this will prevent water from getting inside the unit.
To prevent premature bearing wear, avoid overloading the washing machine, avoid spinning at maximum speed, and level the machine to prevent vibration. This will prevent the bearings from needing repairs anytime soon.
Interesting:


Readers' comments
Headings
Washing machine repair


For buyers


For users


Dishwasher


Add a comment