How do I change a bearing on a washing machine with a non-detachable drum?
 Many household washing machine manufacturers have switched to non-detachable tanks. Firstly, they are faster and cheaper to manufacture, as they eliminate the need for additional fasteners and screws. Secondly, soldered tanks are more difficult to repair, so if an internal failure occurs, the manufacturer purchases the entire replacement unit, increasing the supplier's profit. All this complicates and increases the cost of replacing bearings and seals at home. However, repairs can be made cheaper and easier if desired.
"Fine" disassembly of the tank
The first step is to remove the drum from the washing machine. There's no need to describe the disassembly process in detail—it's labor-intensive, but relatively simple. You must remove all removable components one by one: from the motor, counterweights, locking device, and pressure switch to the pump, hoses, and heating element. The heating element must be removed; otherwise, there's a high risk of damaging it while working on the drum. It is better to record your actions on camera to simplify reassembly and avoid errors during subsequent connection.
Having removed the drum tank from the machine, we begin disassembling:
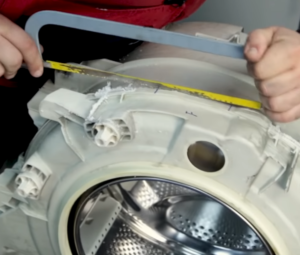
- we turn the tank with the welding seam facing upwards;
- On the seam, we make holes with a drill, 3-5 mm wide, every 5-8 cm (the distance cannot be exceeded, as the tank may leak);
- Using a hacksaw, carefully cut the tank in half, moving strictly along the seam.
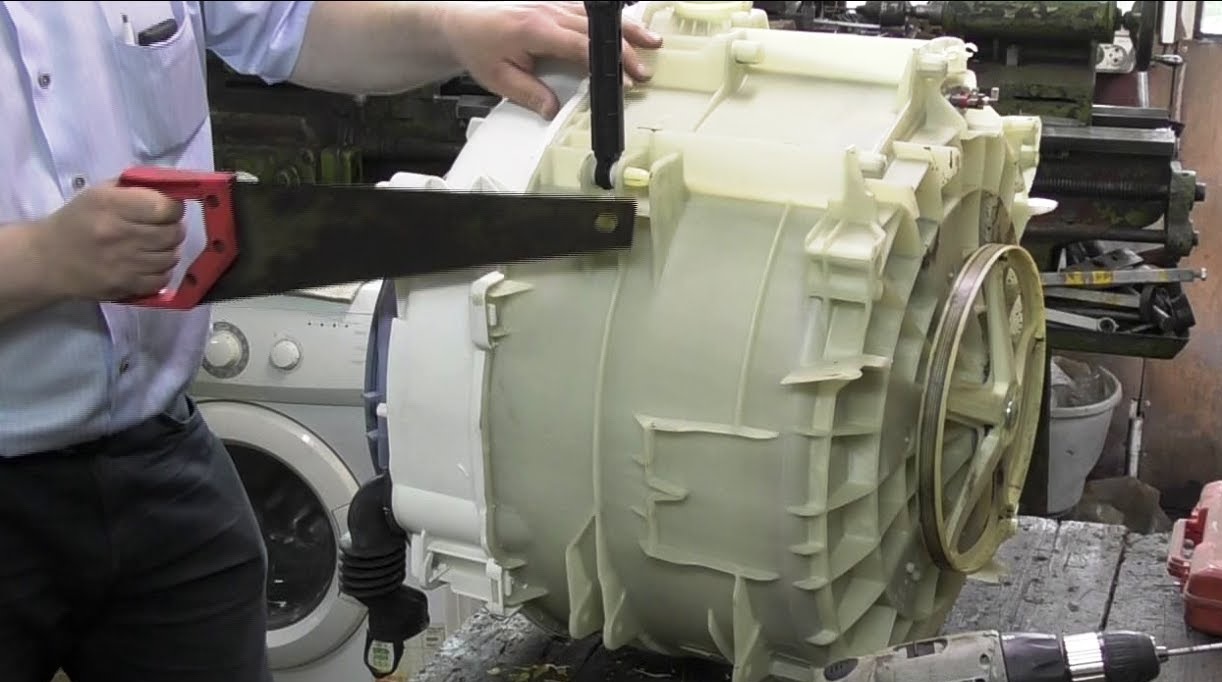
The sawing process will take a long time—the first time, it will take 1.5-2 hours. Instead of a hacksaw, you can use a fine-toothed general-purpose tool. It's easier and faster to work with. Circular saws and angle grinders are strongly discouraged, as high-speed blades often cause the blade to fly off and irreparably damage the tank.
You cannot cut the tank with a grinder or circular saw: the disc may break off and damage the tank.
After cutting, the tank will separate into two parts: the "ring" with the seal and the "back" with the drum, bearing assembly, and crosspiece. Now you need to remove the drum cylinder.
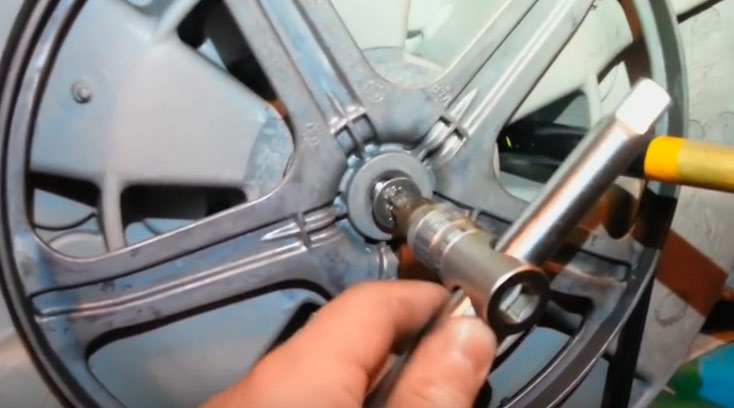
- We take the rod, fix it to the crosspiece retaining screw and hit it 2-3 times with a hammer (the blows will cause the glue, which is used to fill the bolt for reliability, to come off the fastener).
- We unscrew the screw and remove the released wheel.
- We take out the drum and install it on the blocks with the rod facing up.
All that's left is to remove and replace the bearings. There's no need to disassemble the drum any further. Take a steel rod or chisel and tap the joint around, softening the impact with a wooden block. First, tap the outside, then the inside. Remove and discard the knocked-out "rings," and polish the shaft, removing all scale and dirt. At the same time, clean the bearing seat, preparing it for future replacement. There's no need to remove the universal joint itself.
Installation of new bearings
To replace the bearings on a washing machine with a non-detachable drum, you need to find identical parts. To do this, check the machine's serial number in the manual or by looking at the markings on the rear panel. Another option is to bring the old bearings to the store and ask them to find identical parts. You can also order replacement parts directly from the manufacturer through the website.
After purchasing new bearings, we proceed to replacement:
- We install a ring of a smaller diameter on the outside of the drum, acting through the back wall;
- we hammer in the bearing with a hammer and a punch;
- When driving in, we rest the tool only against the outer part of the collar, since impacts on the inner side will destroy the seal of the ring;
The smaller diameter bearing is driven in first, and the larger ring is installed on top.
- insert the second bearing into the hole;
- we fix the position of the ring by hitting it precisely with a hammer once;
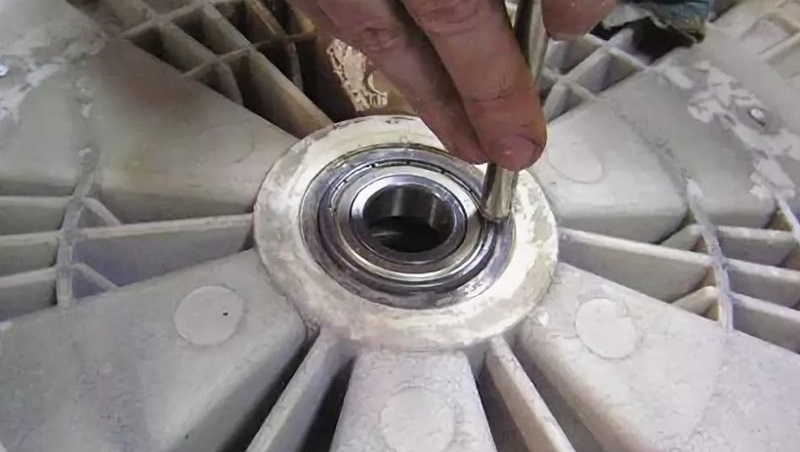
- Using a punch and a hammer, press the bearing firmly;
- We close the bearing with an oil seal.
Don't forget about the sealant. The seal, the joint area and the drum shaft must be treated with a water-repellent lubricant. This is necessary to improve the performance of the rubber gasket and extend the life of the bearing assembly. Otherwise, water from washing clothes will seep into the ring and damage it.
Assembling the tank
After replacing the bearings and seals, you can begin assembling the drum and the entire machine. First, take the drum and secure it to the crosspiece so that the rod fits into the bearings. Next, tighten the pulley ring by tightening the corresponding screw.
The next step is to seal the tank around its perimeter with a special moisture- and heat-resistant sealant. Don't skimp on the lubricant, nor cover the entire surface—it should be applied sparingly. Then, join the halves together and securely fasten the tank with fasteners.It is recommended not to skimp on fasteners, using a suitable screw, nut, lock nut and a couple of washers.
The disassembled tank must be securely connected: treated with moisture-resistant grease and tightened with fasteners.
It's important to allow the sealant to dry completely. The waiting time depends on the type of lubricant, but it's best to be on the safe side and extend the recommended period by an additional 1-2 hours. If the sealant has leaked out of the seams, there's no need to remove the hardened areas. Before reassembling the machine, it's recommended to test the tank. Cover the openings for the hoses and pressure switch with rags, fill the tank with water, and check for leaks. If there are no drips or runs on the seam, everything is fine.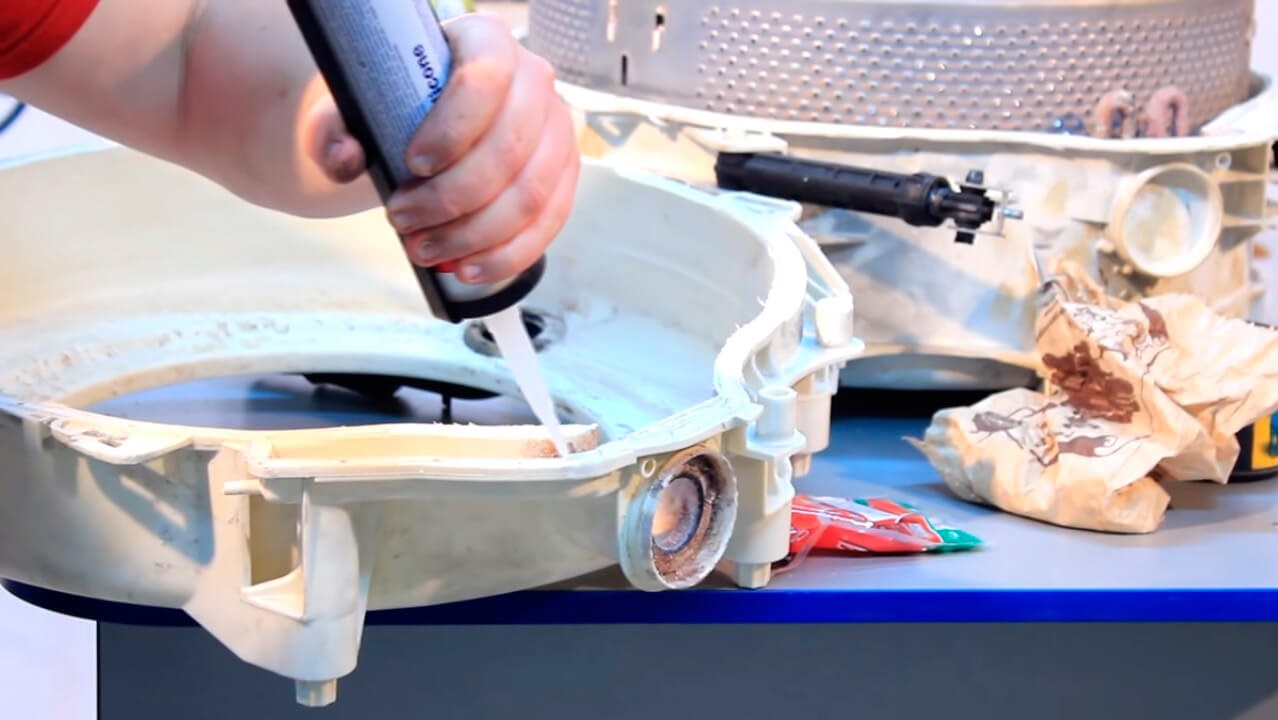
Now it's time to reassemble the washing machine. First, replace the drum, securing it to the spring and shock absorbers. Then, using the video as a guide, reassemble all the previously removed components. Once the machine is ready for use, run it on a high-temperature cycle and inspect the seam after the cycle is complete. If any leaks are detected, contact a service center and have the entire drum unit replaced.
Interesting:


Readers' comments
Headings
Washing machine repair


For buyers


For users


Dishwasher


Add a comment