How to replace bearings on a Hansa washing machine
 Every part of a washing machine has a service life specified by the manufacturer. The bearings in a washing machine typically function reliably for ten to fifteen years. However, these components can fail sooner, as can happen if the machine is used improperly, such as by exceeding the maximum load capacity.
Signs of wear include a specific noise during the spin cycle, visible play, and often the drive belt slipping. You can replace the bearing on your washing machine yourself, without the help of a professional. We'll explain how below.
We are carefully preparing for the renovation
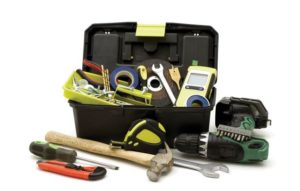
To replace the bearings on a Hansa washing machine yourself, you'll need a complete set of tools, as well as the new parts needed for the repair. Let's look at what you need to prepare:
- small hammer;
- open-end wrenches of various sizes;
- grinder (grinder);
- pliers or pliers;
- gas wrench;
- two types of screwdrivers: Phillips and slotted;
- sealant;
- a lubricant intended for treating washing machine bearings (can be replaced with lithium grease);
- A smartphone with a good camera or a camera. It's a good idea to film the process of disassembling the washing machine, disconnecting the wiring, and so on, so that you can properly reconnect all the parts and cables when finished.
As for spare parts, you should purchase two new bearings and an oil seal. When visiting a specialized store, you can tell the manager the model of your washing machine and ask him to select the parts. If you're ordering components online, we recommend disassembling the machine before purchasing, removing the components, and searching for equivalents in an online store using their part numbers.
Try to find original spare parts; they will function much longer. Also, choose bearings specifically for automatic washing machines (closed type).
Before starting the main work, prepare the washing machine itself. Unplug the machine from the wall outlet, turn off the water supply to the apartment, and disconnect the inlet hose. Afterwards, drain any remaining water from the drum. Remove the drain hose and move the washing machine to a convenient location for repairs, such as a spare room, a spacious hallway, or a garage. You can also work in the entryway, but be sure not to disturb your neighbors. The preparatory work is now complete, and you can begin the main repair.
We remove the tank with the drum
The parts that need to be replaced by hand are located deep inside the machine's housing, so to remove the faulty bearings, you'll have to completely disassemble the washing machine. It is necessary to remove many of the main parts of the unit to ensure free access to the machine tank, then pull out the tank with the drum, disassemble the tank body and only then replace the non-functioning bearings. The scope of work may seem enormous, but if you follow the instructions carefully, the repair will be completed in no time.
So, the algorithm of actions for removing the tank with the drum from the automatic washing machine will be as follows:
- remove the top cover of the washing machine body by unscrewing all the mounting bolts that hold it in place;
- detach the false panel located at the bottom of the washing machine from the front wall;

- remove the tray for washing powder and other detergents from the housing;
- Loosen the screws holding the machine's main control panel, carefully pull it away from the body, and let it hang to the side. You can secure the panel with mounting tape if desired.
- remove the cross metal bar and carefully unfasten the pressure switch;

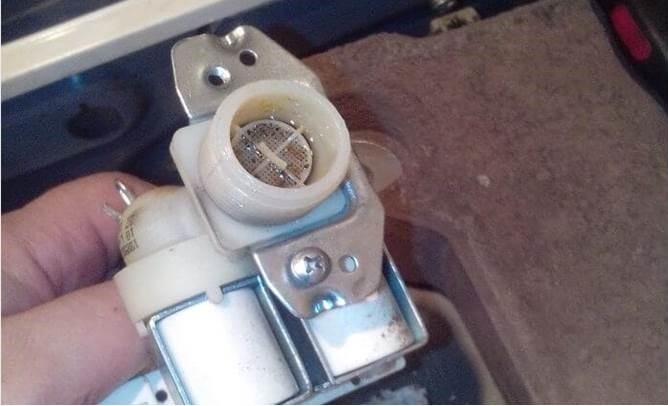
- Unscrew the bolts located on the back of the housing that are responsible for holding the water inlet valves;
- Check the mesh of the inlet filter; if the mesh is clogged, use a screwdriver and pliers to remove it, rinse it well and put it back in place;
- remove the counterweights - concrete blocks responsible for the stability of the equipment; they are very heavy, so remove the parts carefully to avoid damaging the rest of the system;
- detach the spring, keep in mind that Hansa washing machines are equipped with one spring and three shock absorbers;

- remove the dispenser, remembering to first move the clamp from the pipe below;
- Open the hatch door and begin removing the seal—the rubber band located around the circumference. To do this, tighten the outer and inner clamps holding the gasket in place and carefully, without damaging it, pull the seal out. Remove all the bolts holding the front panel of the housing, and set it aside.
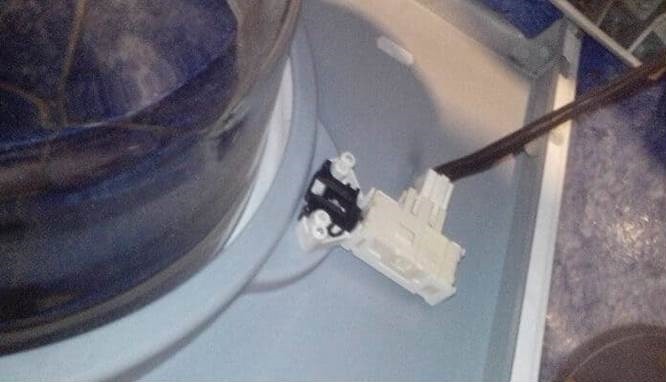
At this stage, pay special attention to the hatch locking device; it must either be unscrewed or the plug removed from the hatch locking device.
We continue to approach the tank.
- Remove the counterweights located near the cuff.
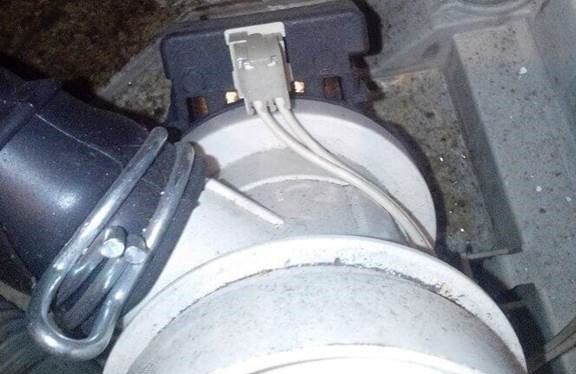
- Disconnect the contacts and ground from the motor.
- Unscrew the bolts, carefully pull off the drive belt and remove the washing machine's electric motor from the housing.
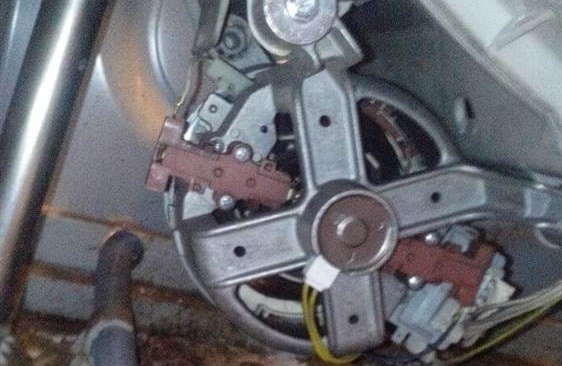
- Disconnect the contacts from the heating element.
- Use special nippers to cut off the plastic ties that connect the wiring harness to the machine's tank.
- Remove the pump terminals and unfasten the hose.
The wiring harness should be carefully routed to the side to prevent unintentional connection breakage.
Once the above steps are completed, you can begin removing the tub and drum. It's quite heavy, so it's best to call someone for help. Reach into the drum and carefully lift it. Since the main parts of the washing machine are now removed, the tub will slide out of the washing machine housing safely.
We disassemble the tank and change the bearings.
Disassembling the tank is less labor-intensive than removing it. We'll explain the steps needed to access the damaged bearings:
- unfasten the drum pulley;
- Using an adjustable or gas wrench, unscrew the mounting bolt;

- Unscrew all the retaining screws located around the perimeter of the tank;
- Carefully separate the tank into two halves and pull out the drum. This procedure isn't easy; you'll have to tap the shaft lightly with a hammer to remove the drum.
- Carefully examine the exposed surface. If a washing machine with this defect has been in use for a long time, part of the damaged bearing may have become stuck to the shaft, creating a groove.
- If wear is detected, take a grinder and carefully cut off the edges of the bearing, then take a gas wrench and pull out the hard-to-remove part of the element.
If you encounter difficulties dismantling metal parts during the work, use special lubricant WD-40.
After removing the old parts, thoroughly clean the surface of the tank, drum, and shaft seats. Be sure to use bearing grease. Grease the shaft and seal. Install the new parts in their designated locations. To securely hold the new bearings, we recommend using Supermoment adhesive or sealant.

We restore the machine to working order
Reassembly is carried out either from memory or based on photographs taken during the work. Assembling the unit using photographs is much easier; the likelihood of mixing up the locations of parts, terminals, connectors, and wires is then negligible.
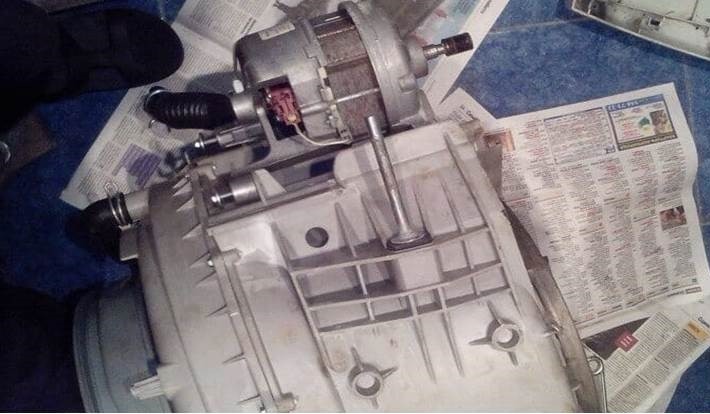
I'd like to highlight one crucial point regarding reinstalling the motor in Hansa washing machines that don't have rear access. In this case, installing the drum first and then the motor will make it difficult to get the drive belt into place. To properly tighten it, lay the washing machine on its side and carefully slide it on, inserting your hand through the opening between the body and the drum. Another, easier method is to install the motor and tighten the drive belt before beginning final assembly.
Interesting:


Readers' comments
Headings
Washing machine repair


For buyers


For users


Dishwasher


Add a comment