How to replace bearings on a Vestel washing machine
 The bearing system ensures the drum rotates smoothly and evenly. A sudden knocking, vibration, or rattling sound during the spin cycle clearly indicates the need for a bearing replacement. Vestel washing machines are no exception – the symptoms and treatment for problematic spinning are no different from the standard procedure. The key is to prepare everything you need and follow the instructions. All the necessary procedures and recommendations are provided in the article.
Let's gather everything we need
To replace the bearings on a Vestel washing machine, you first need to prepare for the process. First, find a puller or hammer, a flat-head and Phillips-head screwdriver, a set of wrenches and Allen keys, a screwdriver, a chisel, a rubber mallet, pliers, and side cutters. A couple of clean rags will also come in handy.
In addition to tools, you'll also need new spare parts. To do this, visit a local market, service center, or specialty store, or place an order online. In any case, it's best to use the model's serial number, which is always indicated on the label/sticker on the back of the machine. It's recommended to replace both seals along with the bearings, and for top-loading machines, the calipers are also included. It is also important to have seal lubricant, kerosene or universal WD-40.
Important! To ensure the correct bearing and seal size, remove the damaged part and refer to the markings on it.
Next, we prepare the washing machine itself for repair:
- disconnect the unit from the power supply;
- turn off the water supply and disconnect the inlet hose;
- unscrew the drain hose;
- For convenience, we twist all the hoses and cords;
- We move the equipment away from the wall or take it out of the cabinet to such a distance that we can easily approach the back wall.
Another tip: don't be lazy and grab a camera and a notepad beforehand. Carefully jotting down all the steps you take to disassemble the machine will make reassembly easier and avoid many mistakes. Once everything is assembled, proceed to disassembly.
Preparatory stage
Replacing a bearing assembly yourself is quite difficult, but it's entirely possible if you avoid experimenting and exercise extreme caution. If you have any doubts, it's best to contact a professional repairman to avoid worsening the problem and requiring a major overhaul. Therefore, first, read the instructions and assess the complexity of the work involved.
- First, let's check the condition of the bearings again. Spin the drum and listen carefully. If there's a creaking, knocking sound, or a sudden stop, we'll begin disassembling.
- Reach behind the machine and remove the two bolts holding the top cover in place. Then return to the front and gently push the top away from you. Once the latches release, remove the cover and set it aside.
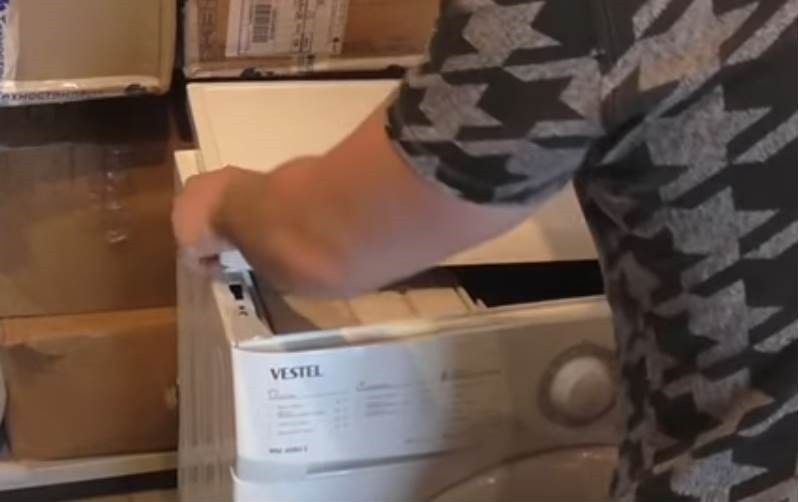
Note! The removed cover can be turned over and used as a stand for all the small parts and fasteners to prevent loss.
- Tilt your body back slightly.
- We take out the external dispenser by pulling it sharply towards ourselves.
- We unscrew the bolts holding the front panel on both sides of the case, as well as the fasteners on the powder receptacle.
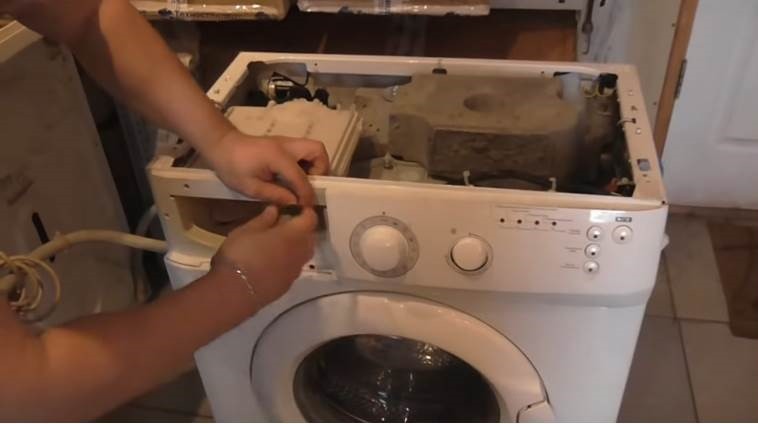
- We move the removed panel to the side.
- Let's move on to the hatch cuff. Remove the front clamp and tuck the rubber inside.
- We remove the front bar. We unscrew the four screws, one in each corner, close the door, lower the panel down until the latches engage, move the door lock and remove the part.
- We take out the second part of the strip by unscrewing two screws on both sides.
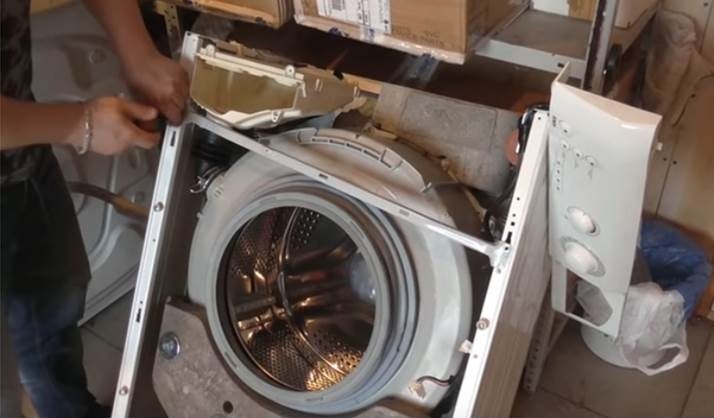
- We select suitable heads and unscrew the counterweights from below and above.

- We disconnect the remaining part of the dispenser by removing the valve and pulling out the pipe.
- Using pliers, release the clamp on the lower pipe.
- We apply all clamps to the existing wires.
- We release the wiring.
- We pull out the shock absorbers manually and disconnect the pressure switch.
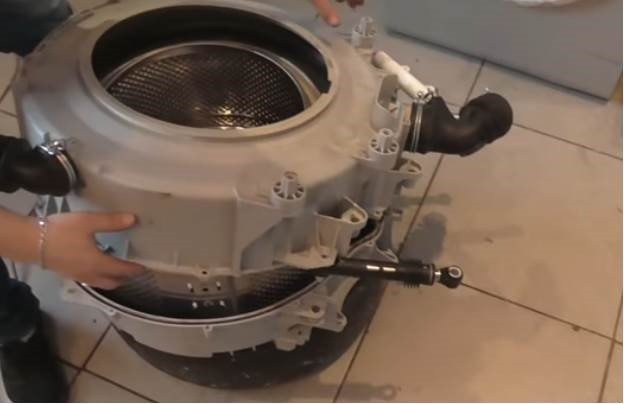
The prep work is complete. All that remains is to remove the tank, holding it with one hand and removing the springs on both sides with the other. Then, place the plastic container cross-side up on a soft surface and begin dismantling the bearing assembly.
Replacing the bearing unit
To access the bearing assembly, you'll need to perform a couple more steps. We recommend removing the oil seal first, using a flat-head screwdriver to pry the spring clamp off the motor, and then unscrewing it. Then continue disassembling:
- We unscrew the pulley with a 12 mm head; inserting a hammer handle between the stiffeners will make the task easier;
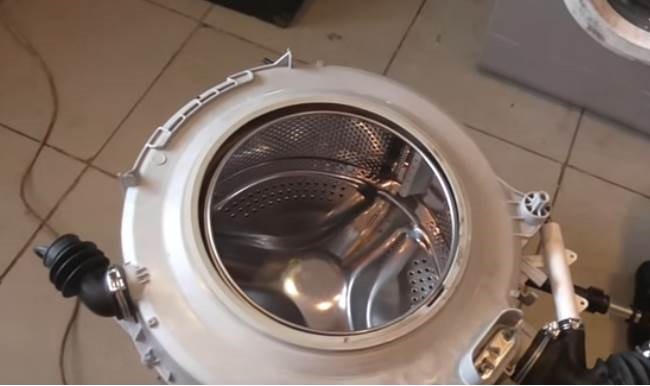
- we divide the tank into two halves, removing all the provided bolts (about 16) on the seam;
- we clean the inner surface of the tank and the heating element from scale;
- If the drum does not come out of the second half on its own, place the container on supports and spray WD-40 into the crosspiece;
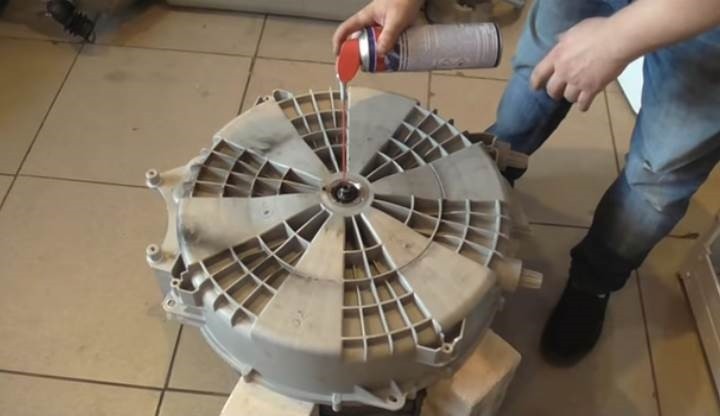
- wait 5-10 minutes until the liquid eats away the accumulated dirt;
- we find a bolt of a suitable diameter and screw it in all the way;
- take a rubber mallet and hammer the bolt through its base until the rod falls through;
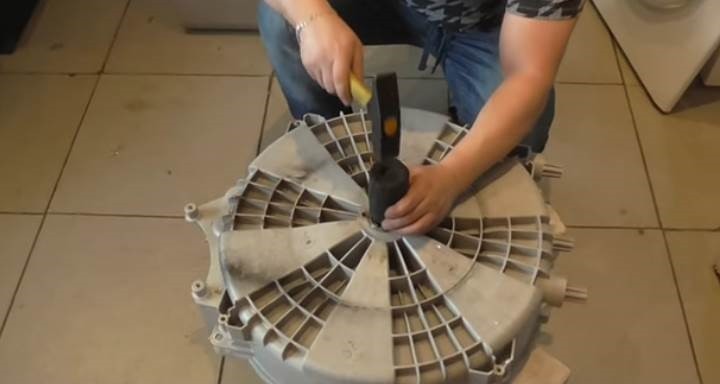
- we unscrew the auxiliary bolt;
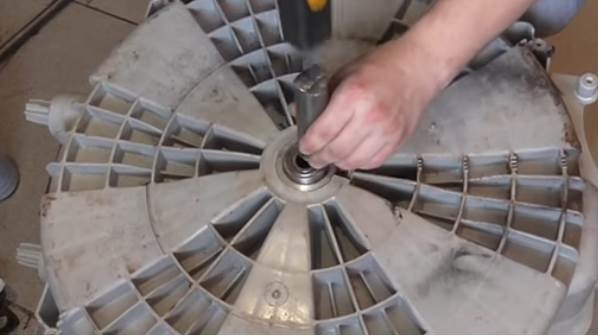
- remove the tank;
- we clean off the scale around the bearings with a screwdriver;
- we pry up the outer ring with a chisel and remove all the elements of the assembly;
- thoroughly wash the tank with WD-40 and wipe dry;
- we insert the smaller bearing using a puller along the outer race;
If you don’t have a special device, you can gently tap the part, moving in a circle.
- We turn the tank over, lower the inner bearing into the groove and tap it in the same way as the first method, cover it with a ring of a suitable diameter and hammer it in again;
- we take out the clip and check the edges;
- we install the seal and fix it with superglue for greater strength;
- lubricate with a waterproof compound.
Now we reassemble the machine, proceeding in reverse order. Place the half tank on the shaft, connect it to the other half, and install the pulley. At this stage, we check the quality of the replacement by rotating the drum and assessing the smoothness of rotation.
Next, you need to attach the cuff, securing it with two clamps, and then replace the wiring, counterweights, front panels, control panel, and other components. It's best to refer to notes in a notebook or a video recording – this will minimize the risk of error. Finally, don't forget the test cycle and run the fastest wash cycle.
Interesting:


Readers' comments
Headings
Washing machine repair


For buyers


For users


Dishwasher


Add a comment