How to replace the pressure switch in a washing machine?
 Sometimes it becomes necessary to replace the pressure switch in a washing machine. Insufficient or excessive liquid flow into the tank indicates that the component is failing. The machine cannot function for long with this problem. An error message will appear on the display, and the machine will stop working until the problem is fully resolved. DIY repairs are straightforward, especially if you understand all the nuances of replacing the part and follow the correct procedure.
Where is the part located and how to find a replacement?
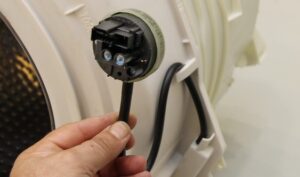
The pressure switch looks like a tablet. It's located under the top panel of the machine. A tube extends from the body of the element and connects it to the tank. The more liquid the machine draws in, the higher the pressure in the hose. This causes one of the contacts to close, signaling the water intake valve to shut off.
You can select the appropriate pressure switch by its serial number and the model of your washing machine. The easiest way is to get a water level sensor and take it with you to the store. You just need to show the part to the salesperson, and they will select the same or an alternative option. Failures in the water intake and drainage system indicate a failure of the pressure sensor: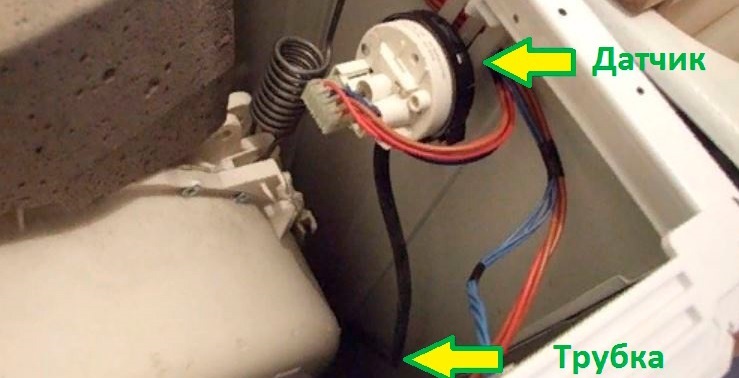
- the liquid is collected until a leak or overflow occurs;
- waste water does not leave the tank;
- the main wash cycle proceeds as normal, but the rinsing process does not start;
- an error appears on the display;
- The wash cycle starts even though the liquid does not reach the required level.
All of the above symptoms indicate a faulty pressure switch. First, the element is removed. Then, it can be diagnosed and replaced manually.
Let's change the relay
Replacement doesn't require many tools—just a short tube and a screwdriver. First, unplug the washing machine. Then, turn off the water supply valve.
You need to remove the screws holding the top cover of the device. The panel slides back and comes off the housing. The pressure sensor will be visible near the side panel. How do you remove it?
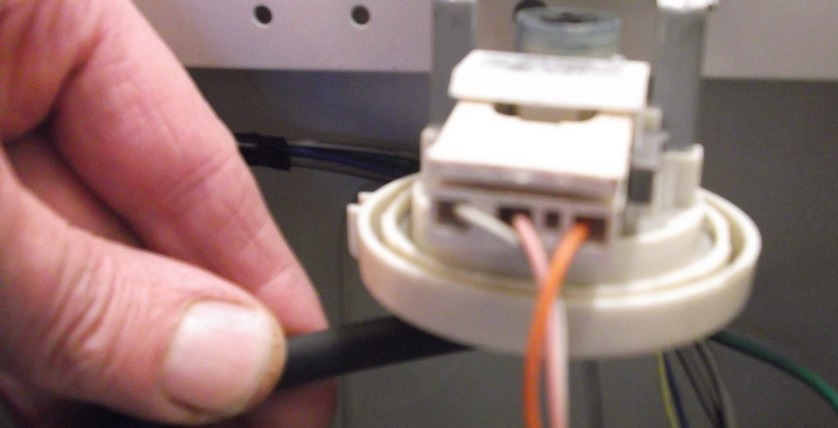
- If the part is secured this way, loosen the mounting bolt. If there are latches, turn the element clockwise and wait until the mechanism releases.
- Unfasten the wires.
- Disconnect the hose. Carefully inspect it to ensure there is no blockage. Often, the tube becomes clogged with debris, which can cause the relay to give incorrect readings.
- Inspect the element body. There should be no damage to the surface.
- Diagnose the pressure sensor. Before replacing it, it's recommended to connect a hose of the same diameter to the pressure tube and blow into it. If the contacts close, you'll hear a characteristic clicking sound. If there's no sound, the component is defective.
- Take a photo of the device in order to remember the location of the wiring and pressure switch connectors.
Important! You can check the pressure sensor's functionality using a multimeter connected to the relay contacts (if the readings on the screen don't change, the pressure switch is broken).
After dismantling, prepare a new, working sensor and install it in place, securing it with bolts. Then connect the wires. Reinstall the hose and secure it with clamps. Don't replace the lid yet. It's recommended to run a short wash cycle. If water fills and drains normally, the water level sensor has been replaced successfully.
When using your washing machine, periodically clean the inlet hose to remove accumulated debris and rust. For preventative measures, it's best to install filters. This will prevent small particles from clogging the appliance.
Interesting:


Readers' comments
Headings
Washing machine repair


For buyers


For users


Dishwasher


Add a comment