How to change the seal in an Indesit washing machine
There's nothing good about a broken household appliance, as it always entails wasted time and money. However, if you suddenly discover you need to replace the seal in your Indesit washing machine, that's actually a good thing. A leaky seal that has lost its seal is the first sign that the bearings in the washing machine are about to fail, and then the entire unit. Therefore, replacing the seal is usually followed by replacing the bearings. Let's take a closer look at the nuances of replacing seals and bearings in your Indesit "home helper."
We dismantle the tank together with the drum
It's unfortunate, but replacing such important components requires almost complete disassembly. But don't rush into disassembling the device yourself—first, disconnect it from the water supply and power, and then move it to a spacious room where you can work comfortably. To disassemble the equipment, you need to prepare a screwdriver, a hammer, and WD-40 aerosol in advance. After all preparations are made, you can begin replacing parts.
We remove the top cover of the washing machine, for which it is necessary to remove the fixing screws, which are located on the back of the lugs.
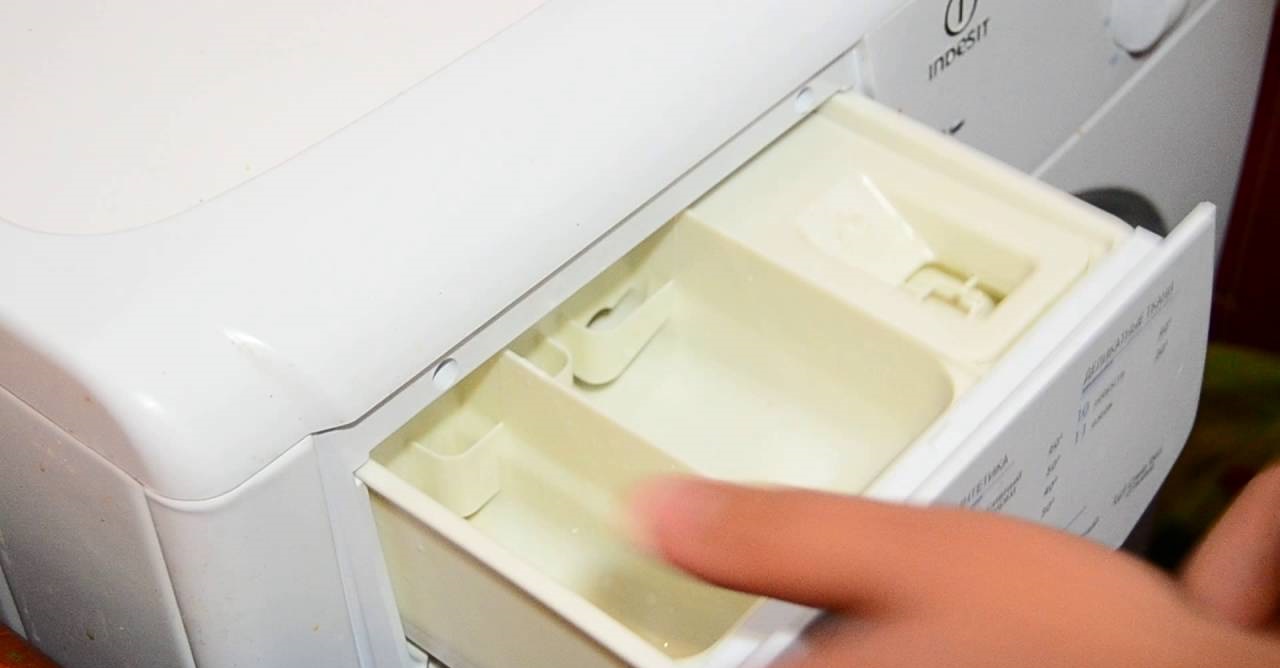
We remove the tray intended for household chemicals by gently pulling it by the handle.
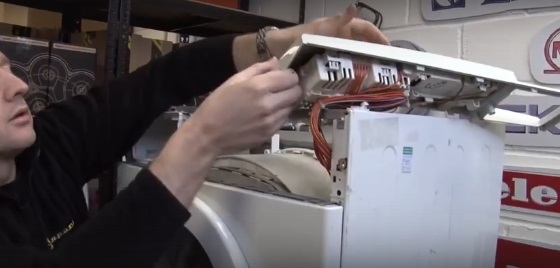
Having first loosened the screws located around the perimeter, we remove the instrument panel of the car.
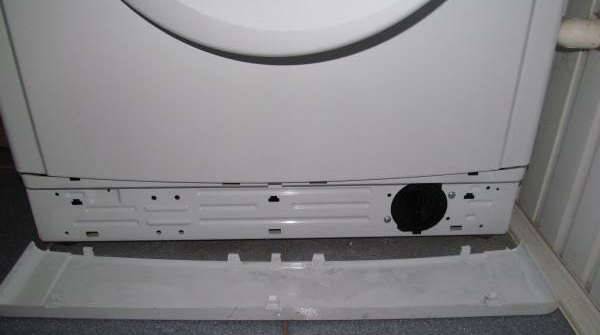
Using a screwdriver, you need to pry up and remove the false panel located at the bottom right of the washing machine.
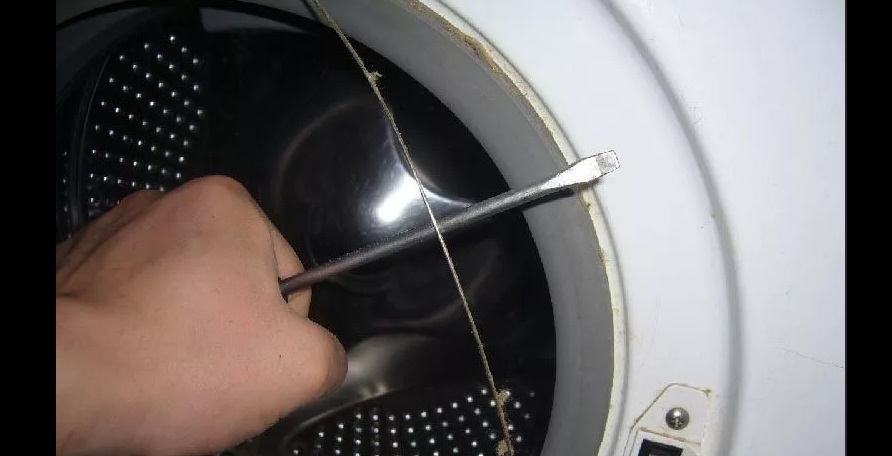
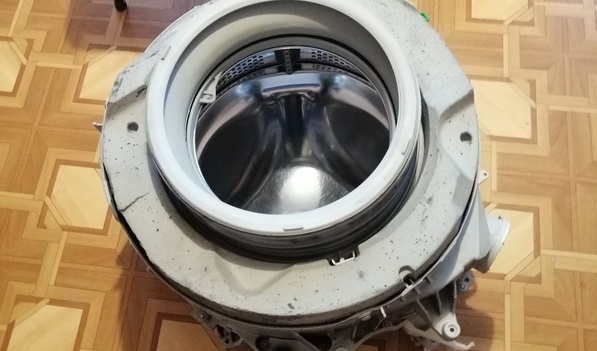
We open the hatch slightly, inside which we should loosen the outer clamp on the cuff, for which we need to carefully pry the clamp with a screwdriver.
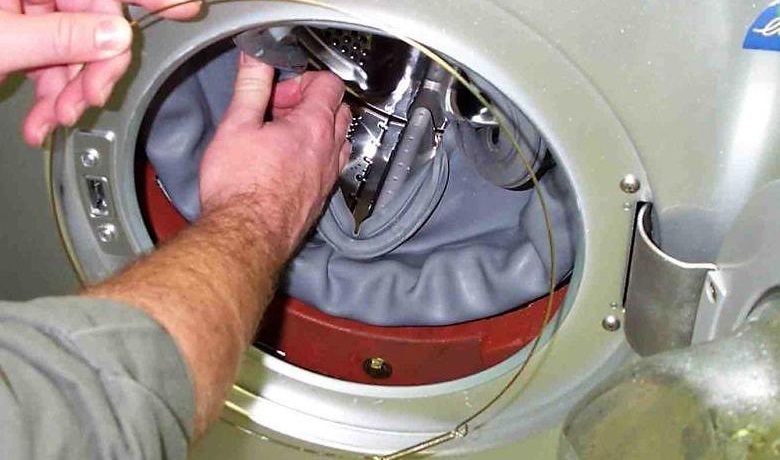
Now you need to tuck the cuff into the drum.
Carefully disconnect the wiring of the hatch locking device.
Be sure to take several photos of the correct wiring connections so that you have an example of how to connect the wiring correctly at hand.
We remove the bolts that hold the front panel of the equipment, and then remove the panel.
So, in these eight steps, we'll ensure free access to the washing machine's tub and drum. However, don't proceed further and remove the containers from the housing until you've unplugged the connected pipes and wires. What next?
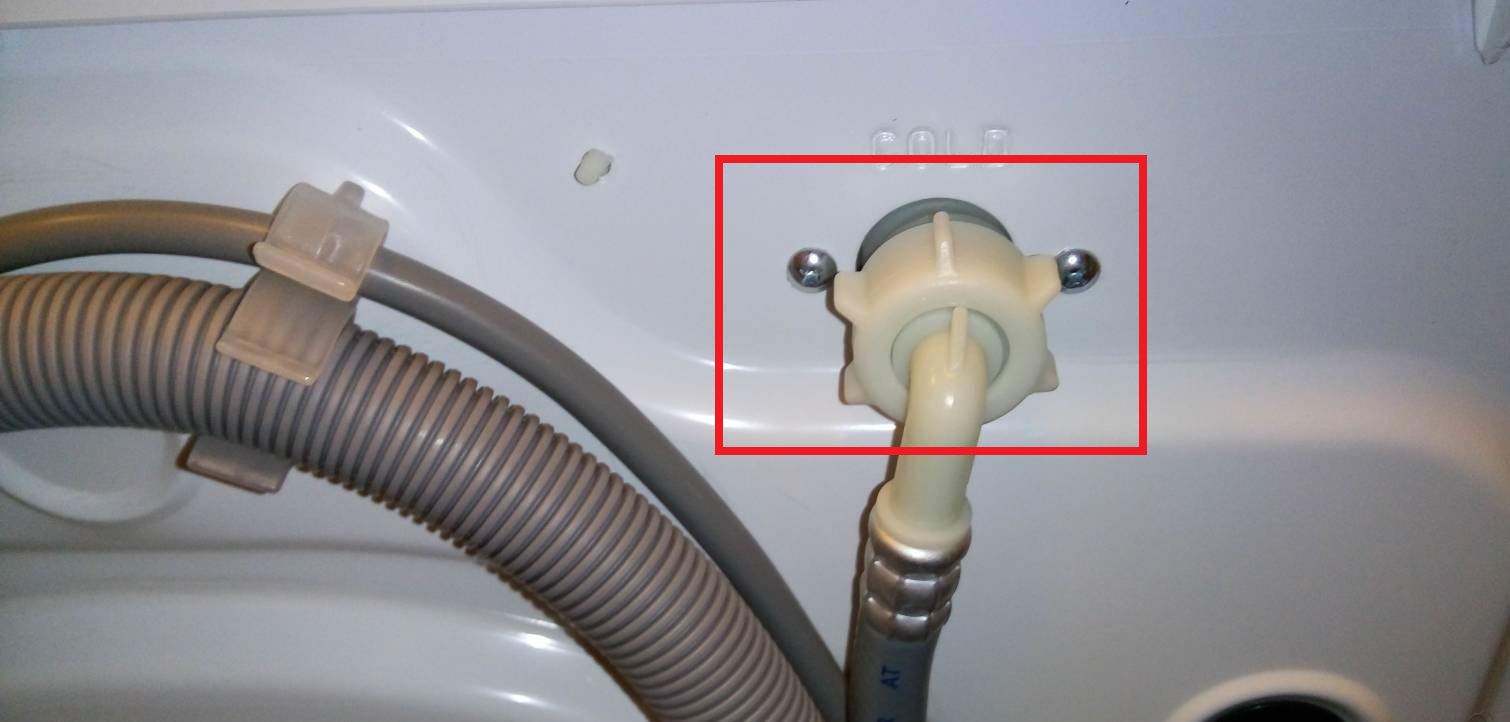
First of all, remove the filler neck.
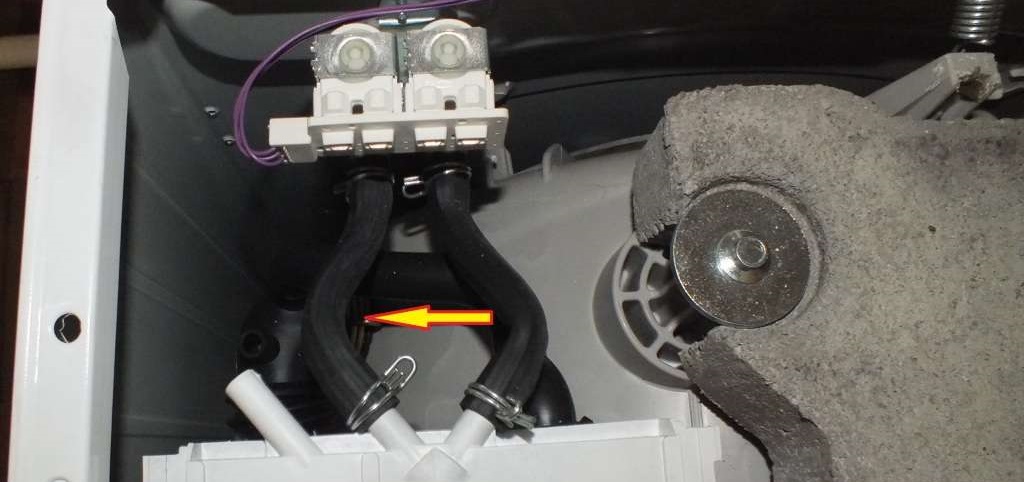
Next, disconnect the pipes that go directly to the household chemicals tray.
Remove the metal false panel located at the back of the washing machine body.
Lower the counterweights by loosening the central bolts.
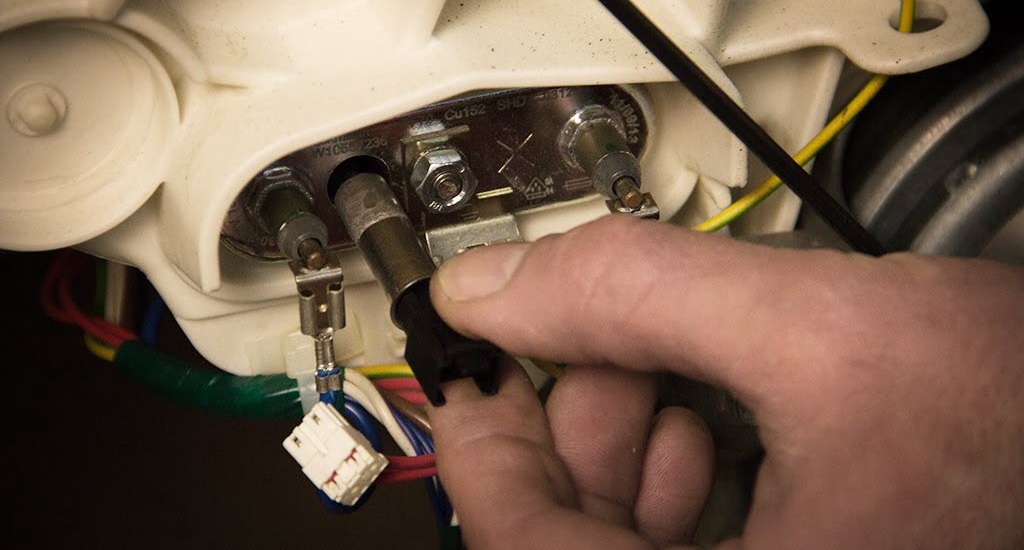
Disconnect the thermistor, having first removed the wires from the connector.
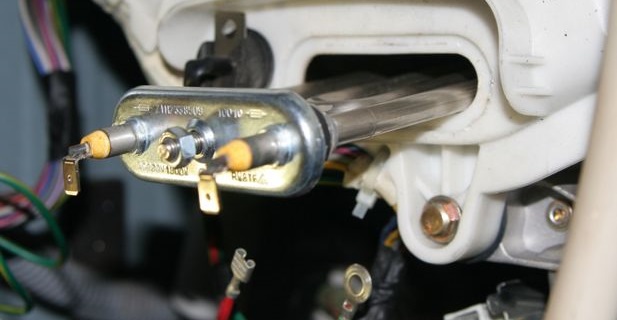
Disconnect the wires from the water heating element, and then remove the heating element itself.
Now that we've sorted out the wiring, all that's left is to prepare the drum itself. Since it's already easily accessible from the front, we now need to prepare the rear of the washing machine, which means loosening the pulley and removing the drive belt. Here's the instruction:
Unscrew all five screws that secure the back panel of the washing machine;
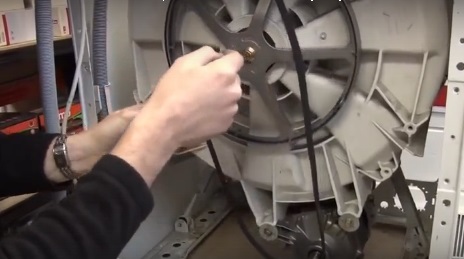
remove the belt from the pulley;
loosen the nut that holds the pulley;
remove the drum of the machine.
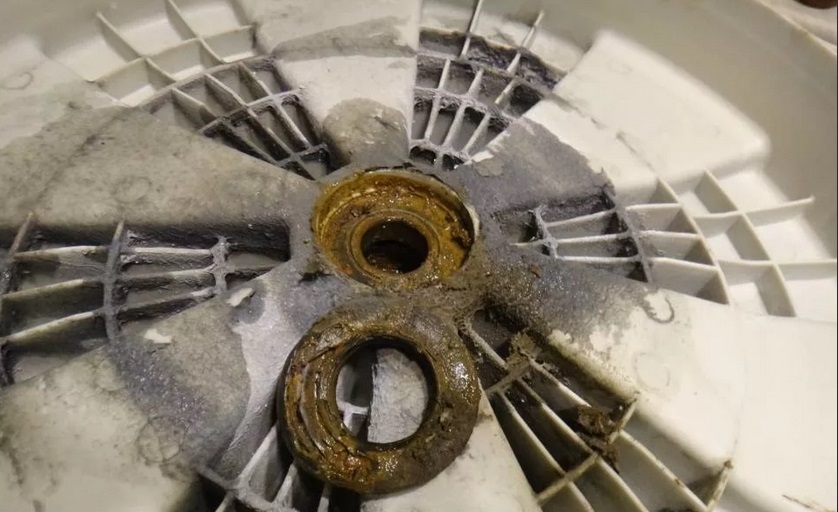
Once you finally have the drum in your hands, you can check the current condition of the spider. Pay attention to the shaft - if there are no marks, abrasions or chips on it, then the element is fine. In this case, you should leave the part alone and begin working on the bearings. If there are problems with the shaft, you'll first have to repair the blades or simply buy a new unit.
You can't do without cutting the tank
It's unfortunate, but the drums of Indesit's "home helpers" can't be disassembled. Company representatives believe that if the bearings are damaged, the owner will either buy a completely new drum and tub, or even a brand new washing machine. Of course, it's much cheaper to simply replace the bearings, so you'll have to carefully saw through the drum yourself, replace the parts, and then reassemble the drum.
This task is easier if you have a jigsaw. Unfortunately, not everyone has one, so most homeowners use a hacksaw for cutting the tank. This is a basic and inexpensive tool that almost everyone has, but the downside of using such a hacksaw is the speed – you’ll have to spend several hours or more just to cut the tank into two parts. This is acceptable for a one-time repair of your own household appliances, but is completely unsuitable for daily repairs at a service center.
The job will go much faster with a Gross wood saw, which features fine, hardened teeth that make it ideal for cutting through a washing machine tub.
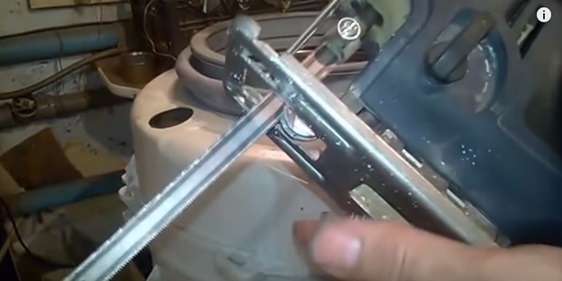
If you decide to speed up the process and buy a regular jigsaw, you'll also need two washers, a bearing for the 4mm screw, and a hacksaw blade. The latter is necessary because a standard jigsaw blade is too wide, so it's much easier to adapt a thin blade from a regular hand jigsaw. It needs to be shaped to resemble a jigsaw blade first, so the tip will attach securely to the jigsaw.
Once the blade is shaped to fit the jigsaw, secure the entire assembly with washers, a bearing, and a bolt. To do this, place the washers on the sides, place the bearing in the middle, and securely fasten everything with a bolt.
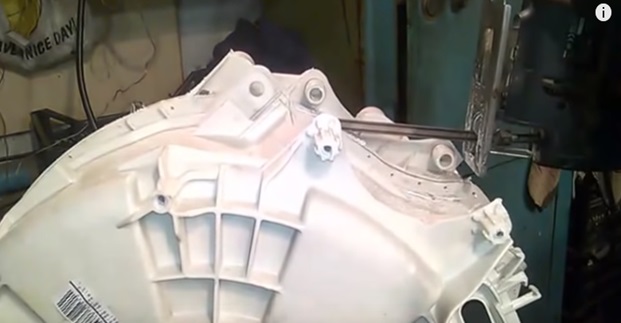
Once the tool is ready, begin cutting the tank. Of course, this can be done with a standard jigsaw blade, but it's much easier and faster to adapt the blade to a jigsaw.
There are few nuances to cutting. The most important thing is to cut strictly along the seam, trying to do it as evenly as possible. The more evenly you can divide the tank into two halves, the easier it will be to glue it back together.
We replace parts with our own hands
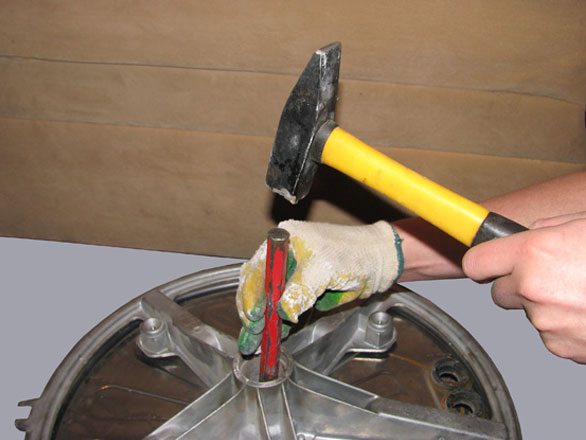
Finally, we move on to the crucial part: removing the bearings. For this crucial repair step, all you need is a regular hammer and a special drift. Let's get to work.
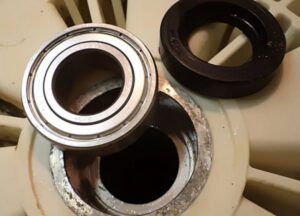
Remove the oil seal.
Place the end of the drift into the very center of the rear bearing and begin tapping the metal rod with a hammer.
Never hit the same spot - change the direction of the rod each time.
After completing work with the first bearing, proceed to removing the second bearing.
If, while dismantling a bearing, the inner race has fallen out, but the outer race remains, then to make it easier to dismantle the bearing, it is permissible to carefully saw and chip the part.
Once you've finished with the bearings, take the time to clean the machine—clean away any rust, scale, dirt, standing water, and other debris. The drum shaft should also be cleaned. Once cleaning is complete, you can begin preparing the bearings, lubricating the bearing seat, and installing the seals.
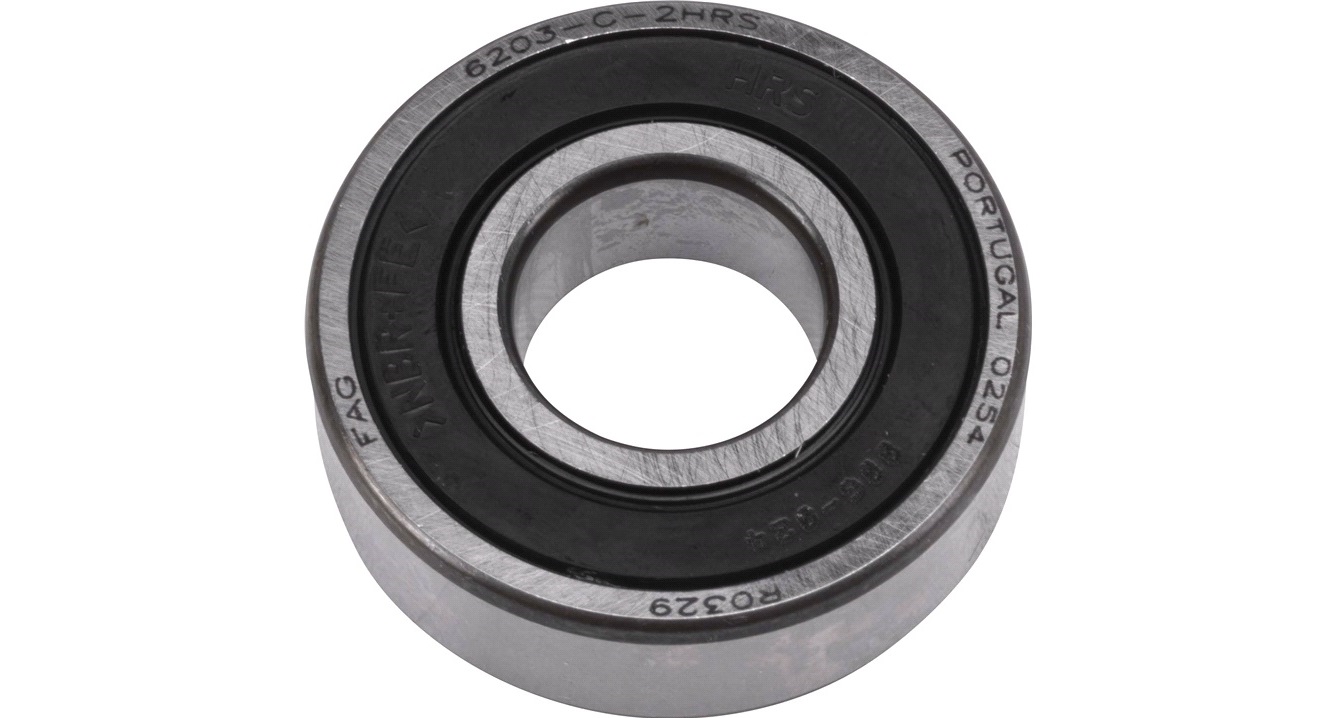
The dimensions of the seal for an Indesit washing machine are 22 x 40 x 10 millimeters. Remember, you need to purchase two of these parts for your washing machine. Regarding the bearings, the first one should typically be a sealed 2RS type 6203, and the second one should be a sealed 2RS type 6202. To ensure you buy the correct part, first remove the damaged seals and bearings, then take them to the store as a reference.
Once you've acquired the new parts, you need to seat the bearing in its designated seat, which has been pre-lubricated. Gently tap the bearing on the outer race using the same hammer and metal rod. Ensure the bearing seats evenly. Install the second bearing using the same procedure. Afterward, be sure to lubricate the seals and install them over the bearings.
We restore the tank's integrity
Now that we've sorted out the bearings and seals, all that's left is to reassemble the tank. This will require some effort and careful following of the instructions. What needs to be done?
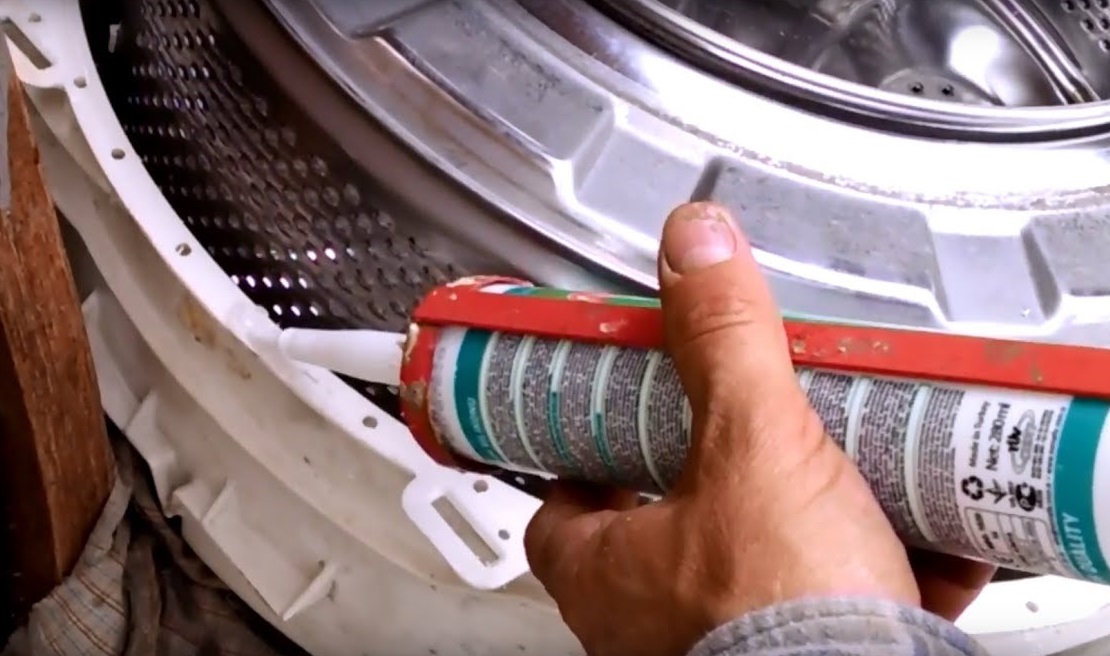
Buy some moisture-resistant silicone sealant, some fasteners to secure the two halves of the tank, and some screws and nuts.
Degrease the seam on the two halves of the tank.
Apply a generous amount of sealant to the connecting seam of the element.
Make sure that every single cut section is thoroughly sealed with a sealant that can withstand not only sudden temperature changes, but also strong pressure, washing machine vibration, and moisture.
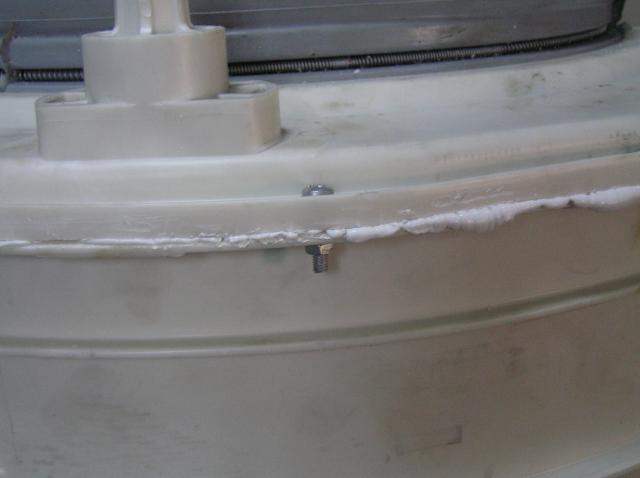
Connect the halves, pressing down on the lid as you place it on the base of the tank.
To prevent both parts of the tank from slipping when fixed, they need to be secured. For this purpose, two awls are suitable, which need to be installed on the sides of the tank in the holes that are on the weld seam.
Finally, place screws around the entire perimeter of the seam and tighten the nuts securely to ensure that the tank halves do not fall apart during the work cycle.
After completing the work, wait at least a few hours for the sealant to dry. Only then can you replace the drum and reassemble the washing machine according to our instructions in reverse order.
 There's nothing good about a broken household appliance, as it always entails wasted time and money. However, if you suddenly discover you need to replace the seal in your Indesit washing machine, that's actually a good thing. A leaky seal that has lost its seal is the first sign that the bearings in the washing machine are about to fail, and then the entire unit. Therefore, replacing the seal is usually followed by replacing the bearings. Let's take a closer look at the nuances of replacing seals and bearings in your Indesit "home helper."
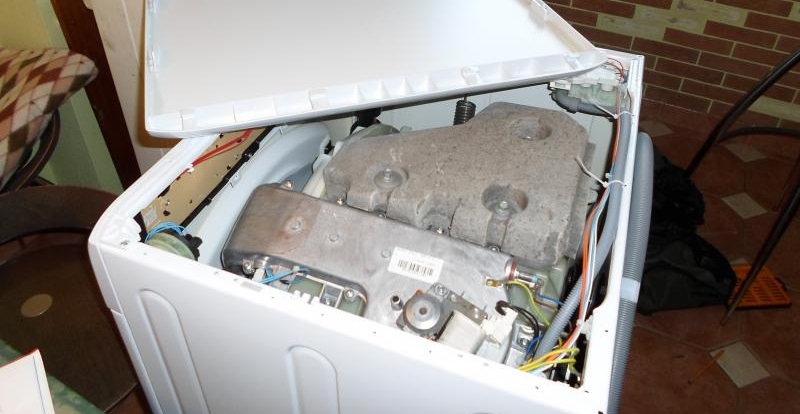


I have an Indesit car with a metal detachable tank, although it’s very old, from the early 2000s.