Since modern LG washing machines are manufactured with inverter brushless motors, brush problems are virtually impossible. However, replacing the brushes in an LG washing machine may be necessary if you're still using an older model with a brushed motor. You shouldn't encounter this problem during the entire life of such a washing machine, as the brushes typically last 12-15 years. If you're unlucky enough to have brushes that fail, our article today on replacing this component will help.
Dismantling the engine
Replacing the motor brushes is so important because, if you don't do this, the motor of your "home assistant" can break down after just a few working cycles due to worn carbon tips. However, replacing the motor is an extremely expensive repair, especially when compared to the cost of installing two brushes. So let's get started with dismantling the damaged components, which will require first removing the motor from the washing machine.
Disconnect household appliances from the power supply and water supply.
Remove the back wall of the washing machine body using a regular screwdriver.
The machine's motor is located at the bottom, directly under the tank.
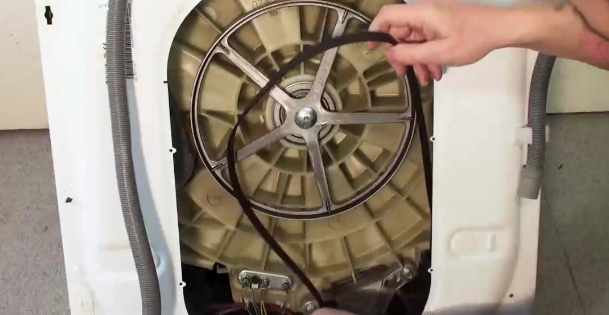
Remove the drive belt by simultaneously turning the pulley and pulling it towards you.
Release the engine from the belt.
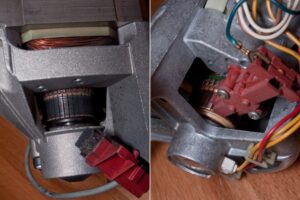
Disconnect all wires going to the electric motor.
Just in case, take a few photos of the wiring - you will need them when assembling the device.
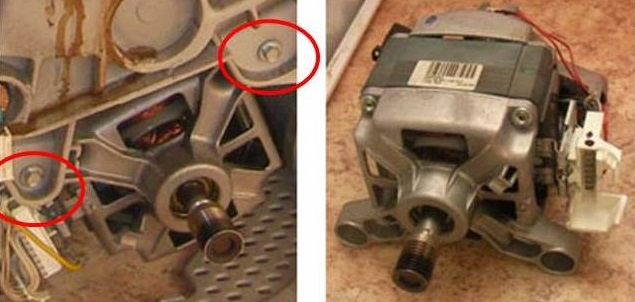
Remove the retaining bolts, of which there may be up to four, and then carefully remove the extremely heavy engine.
Not only is the motor very heavy, so you need to be prepared to remove it, but it is also relatively difficult to remove - to do this, you need to pull it towards you, rocking it from side to side.
This completes the first stage of the work. You need to inspect the part for damage and wipe off any dust or other contaminants. After a quick cleaning, place the motor on a flat, bright surface to make it easier to replace the motor brushes.
Description of the progress of work
At this point, you'll need to go to the hardware store to pick up brushes, if you haven't already. You can dismantle the old parts and use them as a reference to avoid buying the wrong part, or simply tell the sales associate the model of your appliance so they can help you find the right brushes. Once everything is ready, get to work.
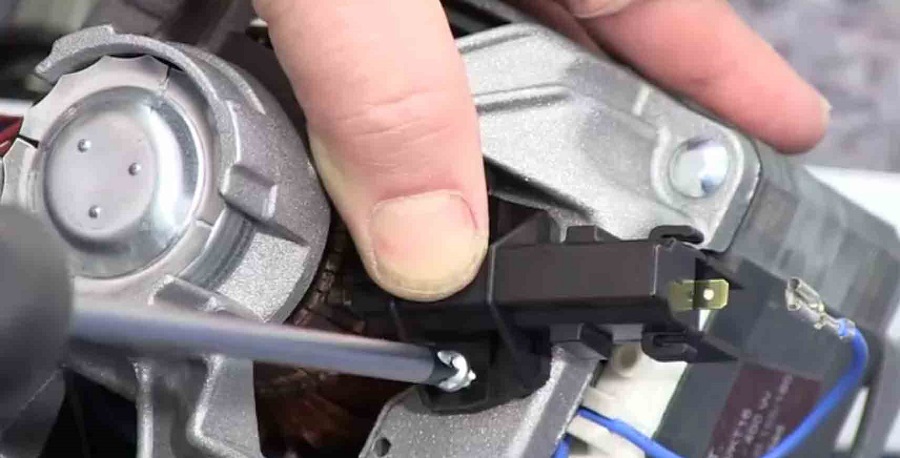
Turn the engine on its side and remove all retaining screws.
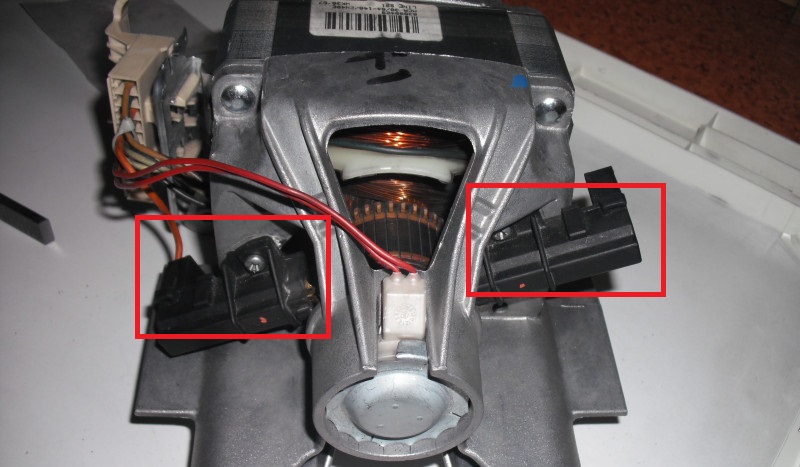
Locate the brushes located on both sides of the element body.
Remove them one by one by using a screwdriver to press on the lever of the part.
At this stage, it's also worth taking a photo for proper reassembly later on. You need to record which way the corner is beveled to prevent the machine from sparking due to improper placement of the part.
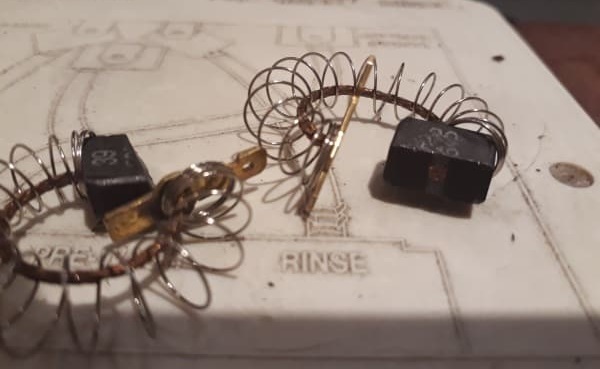
Inspect the brush; the carbon portion should be at least 1.5 centimeters long. If it's shorter, the brushes need replacing. If it's longer, the shaking and noise from the washing machine is caused by something else.
Be sure to sand the motor surface with 0-grit sandpaper and a rag to remove all scuffs, dirt, and scratches.
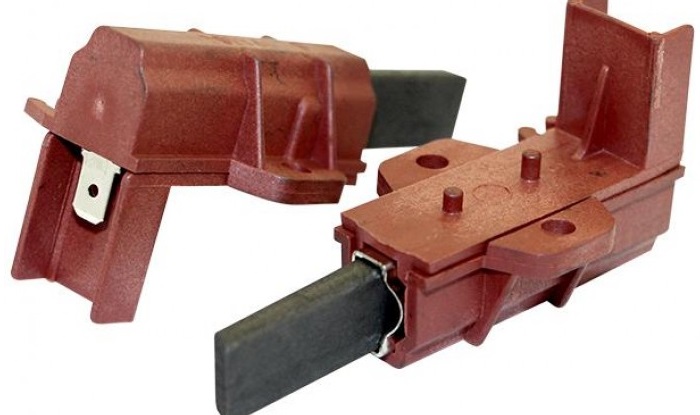
Install the new brushes in place.
If you don't have brand-new brushes in a special housing, you can replace only the carbon portion. In this case, the instructions are as follows:
disassemble the plastic case;
Unsolder the worn plate using a soldering iron, remove it, and straighten the spring;
Measure the length of the new brush and make sure it fits the plastic housing perfectly;
tin, clean the contacts, straighten the wire and insert the coal, using the bronze guide as a guide;
Next you need to solder the wires and snap the structure into place;
If the brush has play in the guide, carefully tighten it with pliers so that it does not whistle during washing;
Reinstall the motor using our instructions from section one in reverse order. Pay close attention to all the mounting screws to ensure that none of the machine's components are loose.
Once the LG washing machine is reassembled, all that remains is to conduct a small test. To do this, turn on a quick wash with spin and listen carefully to the operation - if the electric motor is running loudly, but without a noticeable crackling sound that resembles sand rubbing, then the repair was successful.
What do the experts recommend?
If you want to replace your motor brushes and forget about them for decades, follow a number of recommendations from service center specialists. If you follow these guidelines precisely, even a novice can handle this type of repair at home.
Select your wiper blades carefully. It's best to remove any damaged parts and take them to the store to purchase identical replacements. Various third-party replacements are available on the market today, but it's recommended to purchase only genuine, new parts.
Brushes should always be replaced in pairs to ensure they are perfectly matched. This is true even if only one brush has failed.
Check the electric motor at least once every six months – it should not be dirty, and the carbon tip of the brushes should be longer than 1.5 centimeters.
After replacing the brushes, take care of them and do not load the drum to the maximum - for the first ten or so cycles, try to wash only half of the maximum possible volume.
Keep a close eye on your "home helper," paying attention to sudden stops in washing, poor spin quality, unpleasant crackling, whistling, sparks, and burning smells during operation.
Removing old wiper blades and installing new ones is a simple process if you follow our instructions. Be patient, follow each step carefully, and remember safety precautions, and you're sure to succeed.
 Since modern LG washing machines are manufactured with inverter brushless motors, brush problems are virtually impossible. However, replacing the brushes in an LG washing machine may be necessary if you're still using an older model with a brushed motor. You shouldn't encounter this problem during the entire life of such a washing machine, as the brushes typically last 12-15 years. If you're unlucky enough to have brushes that fail, our article today on replacing this component will help.
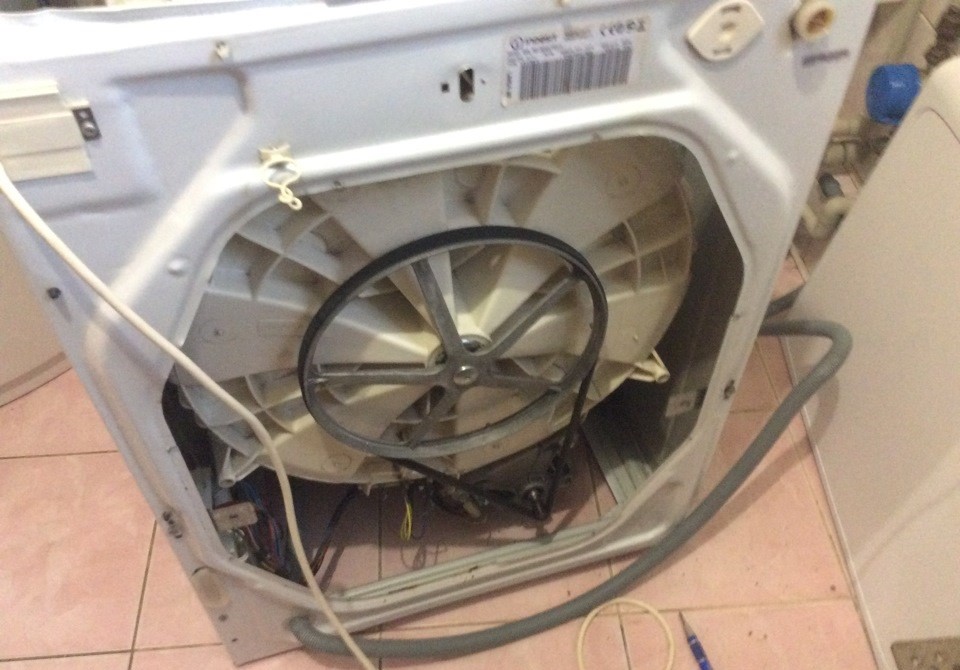


Add a comment