How to change a washing machine support?
 Washing machine repairs that involve replacing bearings are considered complex. This is especially challenging when working with a non-detachable drum. However, some models have bearings housed in bearing supports, making repairs quite simple, even at home. Let's look at how to replace a washing machine bearing support yourself, without the help of a professional.
Let's make sure the problem is in the bearings
Sometimes, owners misdiagnose the cause of a malfunction, mistakenly believing the bearings are the problem. They replace the part, only to discover it wasn't the fault. To determine which part is faulty, remove the side panel of the washing machine to inspect its internals. On front-loading models, this will be the rear panel; on top-loading models, it will be the side panel. The following general signs indicate bearing damage: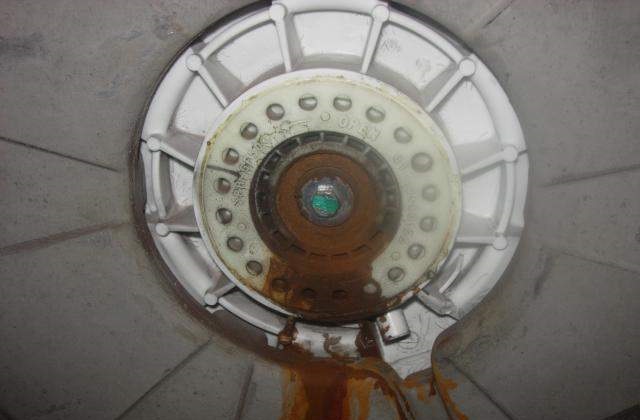
- the presence of brownish stains on washed laundry (this is the result of grease coming out of the part);
- the appearance of strong vibrations (bearing play);
- noise, rumble, grinding, heard during operation of the equipment;
- drive belt breakage (may occur due to bearing seizure);
- the presence of rusty stains on the caliper and the outer surface of the tank in the pulley area.
The part needs to be replaced as soon as possible; if the universal joint fails, the repair will become even more expensive and labor-intensive.
If you're desperately short on time for repairs, take your washing machine to a repair shop. Alternatively, don't use it until you're ready to replace the part yourself.
Equipment repair instructions
We will describe the repair procedure using the example of a Zanussi vertical washing machine, since this model is equipped with a classic support. Replacing a washing machine support is not difficult; the main thing is to have a special key available, which is used by technicians for this type of repair.
The caliper key can be purchased at specialized stores.
The sequence of actions will be as follows:
- turn off the power to the washing machine, disconnect it from the water supply and sewerage systems;
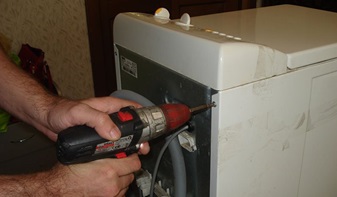
- Move the machine away from the wall to gain free access to the body from all sides;
- Unscrew the screws holding the side walls of the machine, remove the panels and put them aside;
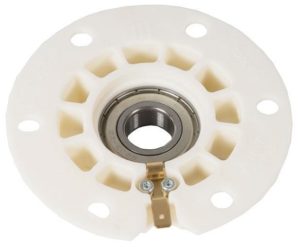
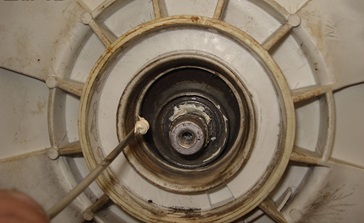
- find the support screwed into the wall of the tank;
- remove the drive belt from the pulley wheel;
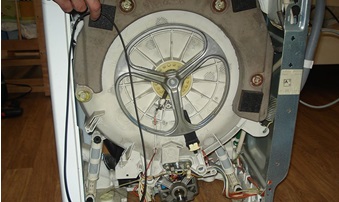
- unscrew the bolt holding the pulley, remove the wheel from the axle;
- Loosen the caliper mounting screw on the axle. The bolt is located on the opposite side of the housing;
- loosen the screws holding the counterweight, remove the weight from the tank;
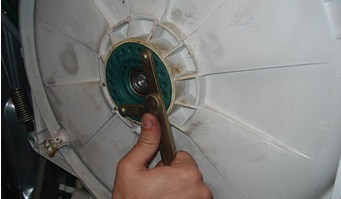
- Using a special key, remove the caliper;

- clean the mounting location of the part from any dirt accumulated on the shaft;
- Treat the shaft with a rust preventative;
- Apply grease to the seat. It is included with the spare part;
- place the sealing rubber and support on the shaft;
- tighten the new part with a wrench;
- put back the previously removed bolt that secures the caliper to the axle;
- Connect the ground with a self-tapping screw.
Next, the washing machine is reassembled in reverse order. The counterweight is installed, the drive belt is attached, and the cabinet walls are secured. The washing machine will once again operate normally.
Interesting:


Readers' comments
Headings
Washing machine repair


For buyers


For users


Dishwasher


Add a comment