How to replace the heating element in a Zanussi washing machine
The purpose of the heating element is to bring the water temperature in the tank to the preset temperature. When the device fails, the user inevitably wonders how to replace it themselves. Replacing the heating element in a Zanussi washing machine is indeed possible, and we'll show you how.
We get to the heating element and check it.
The heater is located inside the washing machine's drum, at the bottom. In Zanussi machines, it's located on the rear wall. To access it, we need to:
Disconnect the machine from the water supply and power supply, otherwise it will be unsafe to operate the device;
Move the unit away from the wall to access the back panel of the washing machine;
Remove the back panel of the washing machine by unscrewing the screws that hold it in place with a screwdriver.
A heating element is easy to recognize; its base resembles a small metal ellipse with several protrusions. Two of the protrusions are contacts, one is a stud, and the other is a thermistor.
First, you can check the temperature sensor, which could also be the cause of the problem. How do you do this? Look at the base of the heating element. See the cube-shaped protrusion? That's the sensor. Take a multimeter and test the device without removing it from the heating element. If the tester shows a figure around 4, it means the sensor is fine, but the machine is not heating the water because of the heater.
Caution! Before removing the heating element, place a container underneath it just in case. If there's any water left in the tank, it may spill out when you unscrew the element and flood the wires.
We take out the old part and install a new one.
First, remove the wire terminals. Be sure to remember which terminal was connected to which part of the heating element, and where the heating element is located. Next, take a screwdriver and unscrew the ground bolt (located in the middle of the base), but not all the way, just enough to remove the heater. Then, grasp it with pliers, being careful not to break it, and pull it toward you.
Take the new part. By the way, the temperature sensor is removable, so if it worked fine on the old heating element, you can remove it and insert it into the new heater. The sensor looks like a large screw with a large, square head. To remove it, grasp the head and pull it toward you, as if you were unscrewing a bolt. Then, using a twisting motion, insert the thermistor into the new heating element.
Now you need to insert the new part into the connector. Take your time, as washing machines are equipped with special recesses and fasteners that prevent the heater from moving up and down (to prevent melting the plastic parts). For everything to work properly, the heating element must fit into the niche..
You can check for proper connection by rotating the drum. If there are no grinding or scraping sounds, you've succeeded. After that, screw the grounding nut back in, but not all the way. How can you tell if the nut is securely fastened? Fill the drum with a glass and let some water flow. If the heating element doesn't leak, everything is properly screwed in. If the heating element leaks, tighten the bolt a little more. Next, reinstall the terminals as they were on the old heater.
Reassembly and testing
To begin with, we will not reinstall the back panel so that we do not have to remove it again if something goes wrong.
Now let's check the heating element connection. To run the test mode, connect the washing machine to all utilities, as the heating element requires both electricity and water. Then, run a wash cycle that requires heating the water.
Important! Some models have special test modes (for example, for the heater). If yours has one, you can use it.
If the machine runs smoothly, doesn't make any unusual noises, and doesn't display an error code, you've done everything correctly. You can replace the rear panel, screw it in place, and return the machine to its original location.
 The purpose of the heating element is to bring the water temperature in the tank to the preset temperature. When the device fails, the user inevitably wonders how to replace it themselves. Replacing the heating element in a Zanussi washing machine is indeed possible, and we'll show you how.
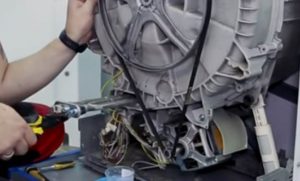 Take the new part. By the way, the temperature sensor is removable, so if it worked fine on the old heating element, you can remove it and insert it into the new heater. The sensor looks like a large screw with a large, square head. To remove it, grasp the head and pull it toward you, as if you were unscrewing a bolt. Then, using a twisting motion, insert the thermistor into the new heating element.
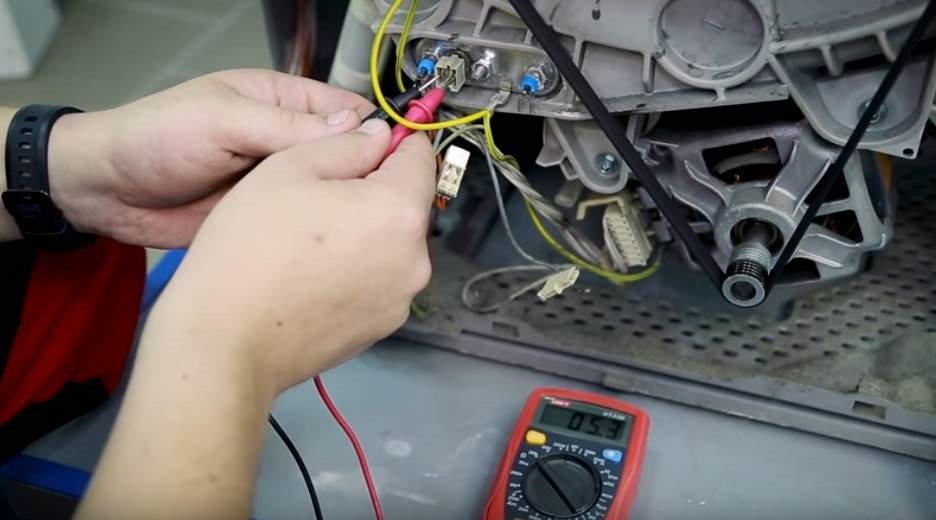


Add a comment