How to start a washing machine motor?
 Vyatka washing machines were produced at the Vesta plant in Kirov since the early 1990s. Household appliances of that era were built to last—some models still work flawlessly today. They used the most powerful and reliable motors, which still perform flawlessly even after 40 years.
Even if you've long since upgraded your Vyatka and put the old washing machine away in the garage, its motor will always come in handy around the house. This "perpetual motion" engine can be used for DIY projects. Craftsmen use it to build lawn mowers, various machine tools, feed grinders, and concrete mixers. How do you jump-start a washing machine motor? How do you check if it's working properly?
Options for connecting and starting the engine
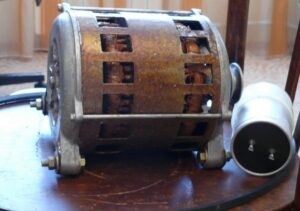
The electric motors of older Vyatka semiautomatic machines operate on a single-phase power supply. The motors consist of several coils and a capacitor. You can find the motor's markings on the housing and read about its main characteristics online.
The motors of Vyatka-automatic washing machines, produced at different times, differ slightly from each other, but their basic characteristics are almost identical. The maximum speed of all electric motors is 2200 rpm during spinning and 450 rpm during washing.
The electric motors of Vyatka cars are provided with six (rarely five) contacts for connection; there are isolated cases of motors with eight terminals.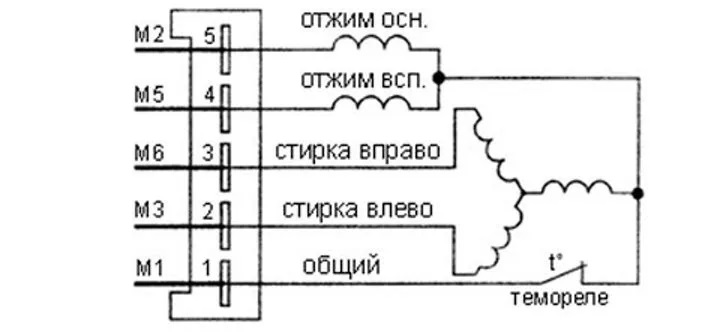
Motors with five and six contacts are connected in almost the same way. The only difference is that in electric motors with six contacts, you will need to power terminals 1 and 4. This creates a common wire for connecting the device to the power grid.
To connect the washing machine motor to the power supply, you need to prepare:
- power plug;
- 2 wires, a regular one with a plug and one bifurcated.
This is the most basic connection option, requiring neither a capacitor nor a toggle switch. The procedure is as follows: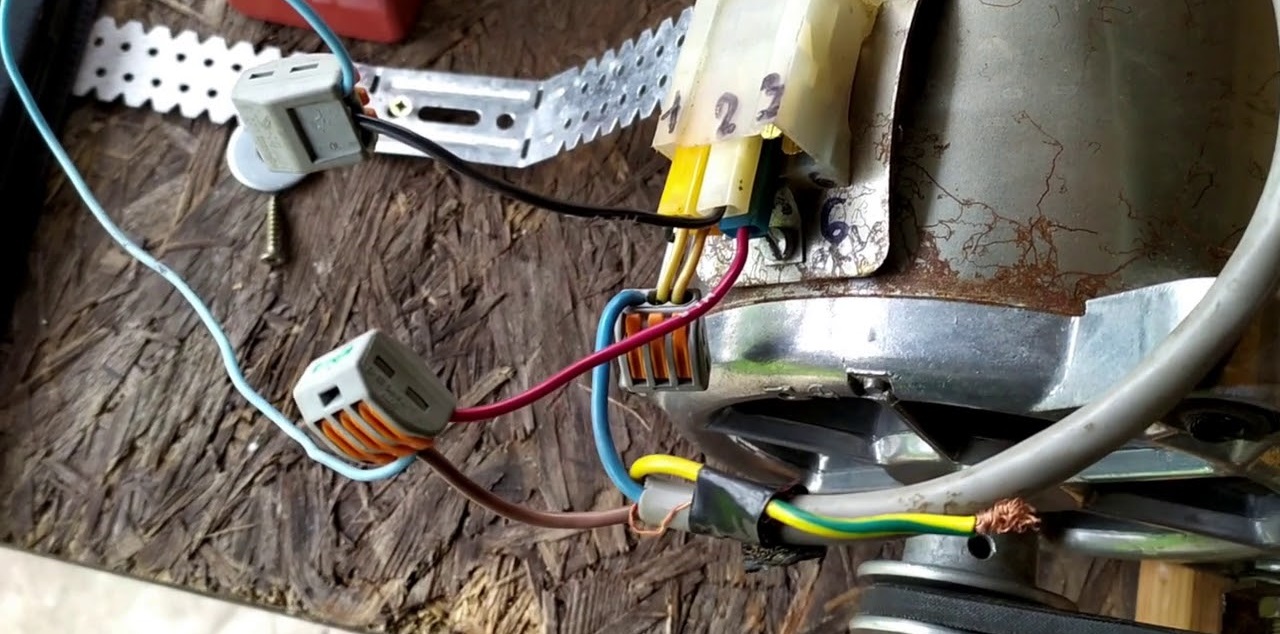
- connect the wire with the plug to one socket of the network plug, and the “double” cable to the second;
- Find terminals 1 and 4 on the six-terminal motor (you can look at the contact markings on the protective housing);
- connect the contacts of the “split” wire to terminals 1 and 4, thereby combining the terminals;
- Connect the solid wire connected to the power plug to terminal No. 2.
Now you can plug the power plug into the socket. The electric motor rotor will start spinning. Note that it will only rotate in one direction.
To change the direction of rotation, you need to manually move the ends of the winding. To ensure automatic motor reversal, it is recommended to include a toggle switch in the circuit. In this case, the motor's direction of rotation will be reversed with a single press. The capacitor is necessary to protect the motor from heavy loads.
Therefore, experts recommend including a capacitor in the circuit. For Vyatka washing machine motors, a protective device with the following characteristics is suitable:
- capacity – 16 μF;
- voltage – 500 V.
We will schematically show how the connection of the washing machine motor should be organized if a toggle switch is used to start the electric motor and change its direction of movement, as well as a capacitor:
The diagram shows that terminals 1 and 4 are connected by a bifurcated wire. This cable is connected to the first connector of the plug. The second and fifth terminals are connected to the toggle switch (located in the middle in the image), which is used to change the RPM and turn the engine on/off. Terminals 3 and 6 of the electric motor are connected to its remaining outputs.
Next, the toggle switch that reverses the motor is connected. It is connected via wires to the lower toggle switch; their terminals are "powered" diagonally. The main cable runs to the capacitor. The protective device is connected to the free contact of the power plug.
If the connection is set up correctly, the motor will start with a push of a button. Reversing its direction will be possible with a single click. A capacitor will protect the unit from heavy loads. This configuration is considered the most convenient and reliable.
It is important to securely fasten the washing machine's electric motor; it will vibrate during operation and is therefore quite capable of damaging its own winding.
Checking the engine with a multimeter
Having found an electric motor from an old automatic car in a garage or at a dacha, you should check whether it is in good working order. To diagnose the engine you will need a multimeter. A digital meter will also be useful. It will allow you to determine the motor's power, voltage, and current output.
The first diagnostic step is performed using a multimeter to measure the motor's resistance. Set the device to the appropriate mode and attach the probes, in pairs, to the electric motor terminals. Normally, the tester display should show the following values: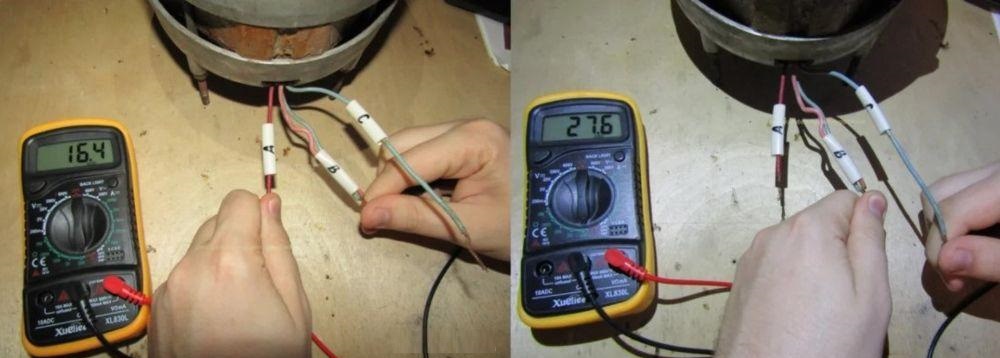
- resistance between pins 1 and 5 is within 23.2-26.8 Ohm;
- between terminals 1 and 2 – from 8 to 9.2 Ohm;
- fourth and third contacts – from 51.1 to 58.9 Ohm;
- 4 and 6 – in the range from 51.1 to 58.9 Ohm;
- 3 and 6 – from 71.6 to 82.4 Ohm.
When the resistance is normal, you can consider reusing the electric motor. If possible, it's still advisable to check it for a few more parameters. This will allow you to predict how the motor will perform, how it will handle loads, and whether it will overheat. A digital meter is useful for this. It will help you determine the power, voltage, and calculate the motor current.
Normally, these readings at minimum and maximum engine speeds should be identical. When running at 370 rpm, a properly functioning engine will produce:
- voltage within 220-230 V;
- power – from 290 to 310 W (may vary depending on your engine model);
- current strength – approximately 1.4-1.5 A.
Even with increased rotation speed, the values shouldn't deviate significantly from the standard. If the engine passes this test, it can definitely be reused. The electric motor can be used to build a concrete mixer, an emery machine, a grain crusher, a lawn mower, and other DIY projects.
Interesting:


1 reader comment
Add a comment
Headings
Washing machine repair


For buyers


For users


Dishwasher


Dear author, it would be great to learn how to connect a Vesta with 8-pin wiring, where the tachometer is routed separately, not to the terminal block. And the control unit is based on the TDA 1085 C. If anyone has a diagram, please help.