Grounding a washing machine in a private home
 Proper grounding in your home is crucial. This isn't a whim, but a mandatory requirement, regulated by the Electrical Installation Code (EIC). Everyone should understand that this is the foundation of electrical safety. You don't need to call a professional to set up grounding. It's not as difficult as it seems. Let's look at how to ground a washing machine in a private home, what you'll need during the process, and which circuit diagram to choose.
We choose the method
If you've decided to do the grounding yourself, you need to decide on the design. Let's look at the options available and the pros and cons of each. Learn more about grounding circuits.
- The pin method. This method is considered the simplest. Its advantages include quick assembly, minimal prep work, and wide installation location flexibility. Pins are driven in at a specific distance from each other and connected with a metal strip and wire.
- Square. This method is rarely used. It's more labor-intensive and expensive. Grounding requires a lot of metal angles and welding.

- Triangle. This is considered the second easiest to install after the pin circuit. This design is the most reliable, which is why people tend to ground their washing machines this way. A definite advantage is that this connection method requires minimal materials.
- A circle. The most difficult contour to create. Very rare in private homes.
The most economical and simple way to make grounding is in the form of a triangle.
Triangular grounding is just as reliable as a pin-type grounding system. Therefore, it's best to safely connect a washing machine in a private home using this method.
We are manufacturing the structure
Without grounding in the home, family members using household appliances are completely unprotected from electric shock. Therefore, the importance of this measure cannot be underestimated. To ground a washing machine, you will need:
- welding machine;
- Bulgarian;
- bayonet shovel;
- sledgehammer;
- 14 mm wrench.
The materials you will need are:
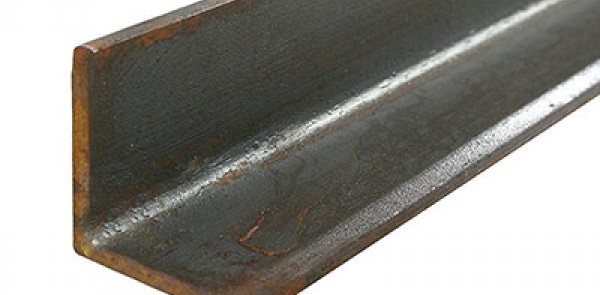
- Three metal corners, 50 x 50 mm. The length of each should be one and a half to two meters;
- 4 pieces of metal strip, at least 11 cm wide;
- about five meters of copper wire, with one core of 6 mm2 cross-section;
- 14 bolt;
- a pair of washers of the appropriate size for the bolt and a nut.
The first step is to dig a small triangular trench. You'll also need to create a separate strip from which the copper wire will run to the electrical panel. The depth of the trench for the grounding circuit must be at least 70 cm. Once you've finished digging the trench, you need to hammer a metal angle into each corner of the triangle. You'll need a sledgehammer for this. The resulting pin should be 15-20 cm above the ground.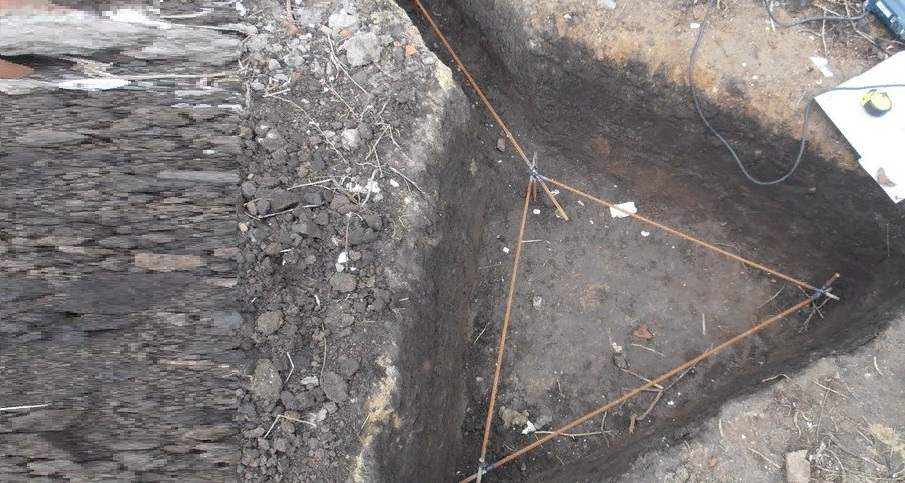
After this, it's time to begin welding. The corners, driven into the ground, are connected to each other with metal strips. The weld seam should be at least 10 cm. A fourth strip should be welded from one vertex of the triangle to the point where the connection to the distribution board will be made. The final step is connecting the wire to the ground busbar. To do this, drill a hole in the metal strip, crimp the cable using a sleeved ferrule, and tighten it with a bolt, washers, and a nut.
Testing the circuit resistance
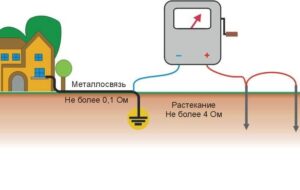
Before connecting the wire to the busbar, it's essential to check the circuit's resistance. Take a standard light fixture, connect one wire to the live wire, and the other to the delta wire. The bulb should glow brightly.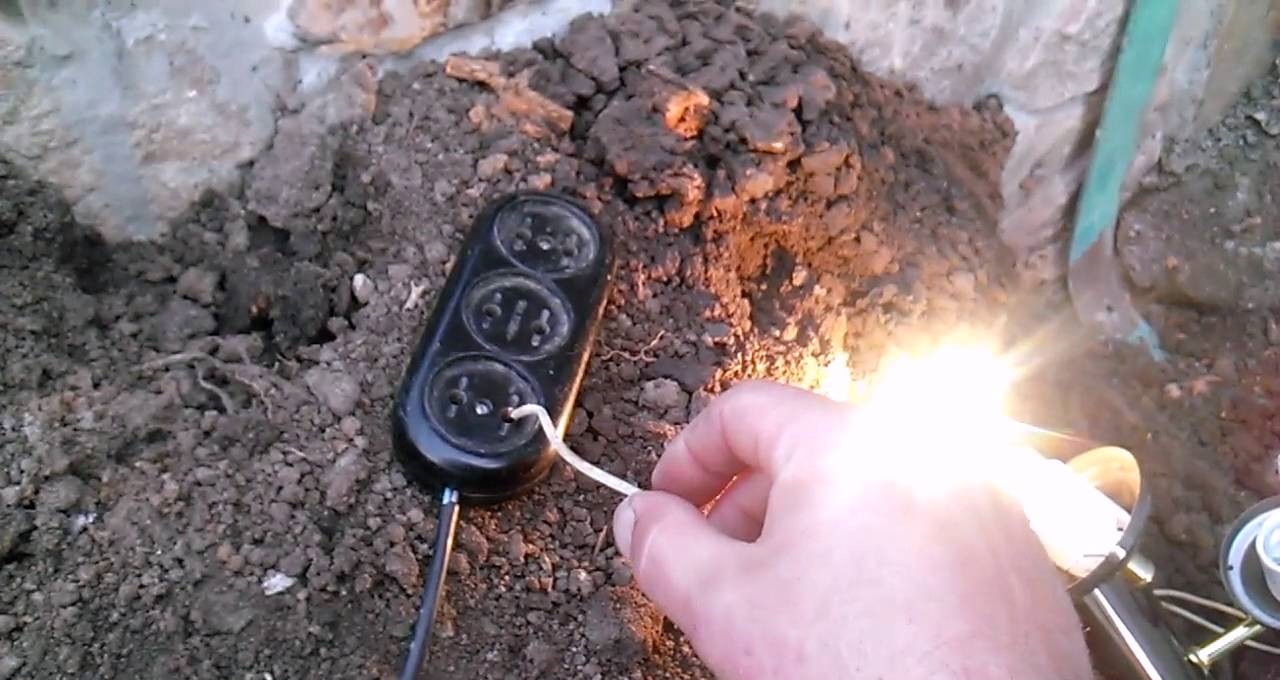
Once the inspection is complete, you can connect the ground wire to the busbar. In fact, making a ground loop yourself is not difficult. It just requires time and welding skills.
Interesting:


Readers' comments
Headings
Washing machine repair


For buyers


For users


Dishwasher


Add a comment